Cambium cnMaestro Conversion Guide
Prerequisites
- This guide assumes the network is using the cnMaestro Cloud Controller.
- The Cambium system has AP(s) linked to the cnMaestro Controller.
- The Cambium system already has basic traffic routing working with existing SSIDs.
- An Intel-based host is required in the network to run the RadSecProxy container.
High Level Steps
- Deploy RadSecProxy container and record IP address of host
- Create AP Group
- Build WLAN Helium Passpoint SSID
- Configure AAA Servers
- Add the NAS-ID to the WLAN AAA Policy
- Configure Passpoint and 3GPP Carrier Info
- Assign APs to the new Group
Deploy RadSecProxy Container
RADIUS messages used to authenticate users and for session accounting are transmitted unsecured and over UDP by default. By directing these messages internally within your secure network to a RadSecProxy, UDP traffic is converted to a TLS-protected TCP connection to the Helium Network core AAA servers.
Prerequisites
- Intel-based machine with Docker installed.
- The host has a private IP address reachable from your cnMaestro controller.
- ACLs or firewalls allow cnMaestro and the Docker container to communicate via UDP on ports 1812 (auth) and 1813 (accounting).
Container Deployment
Unzip and untar the Helium RadSec Docker package:
tar -xvzf Helium_RadSec_Docker.tar.gz
This will unpack:
Dockerfile— Docker build instructionsradsecproxy.conf— preconfigured to connect to Helium AAA serversdocker-compose.yml— to start/stop the container as a daemon
Copy the three Helium-provided certificates into the same directory:
ca.pem— root CA certificatecert.pem— user certificatekey.pem— private key paired with the certificate
Start the container:
sudo docker compose up -d
To stop the container:
sudo docker compose down
Create AP Group
- From the home view of your cnMaestro controller, go to Configuration → Wi-Fi Profiles
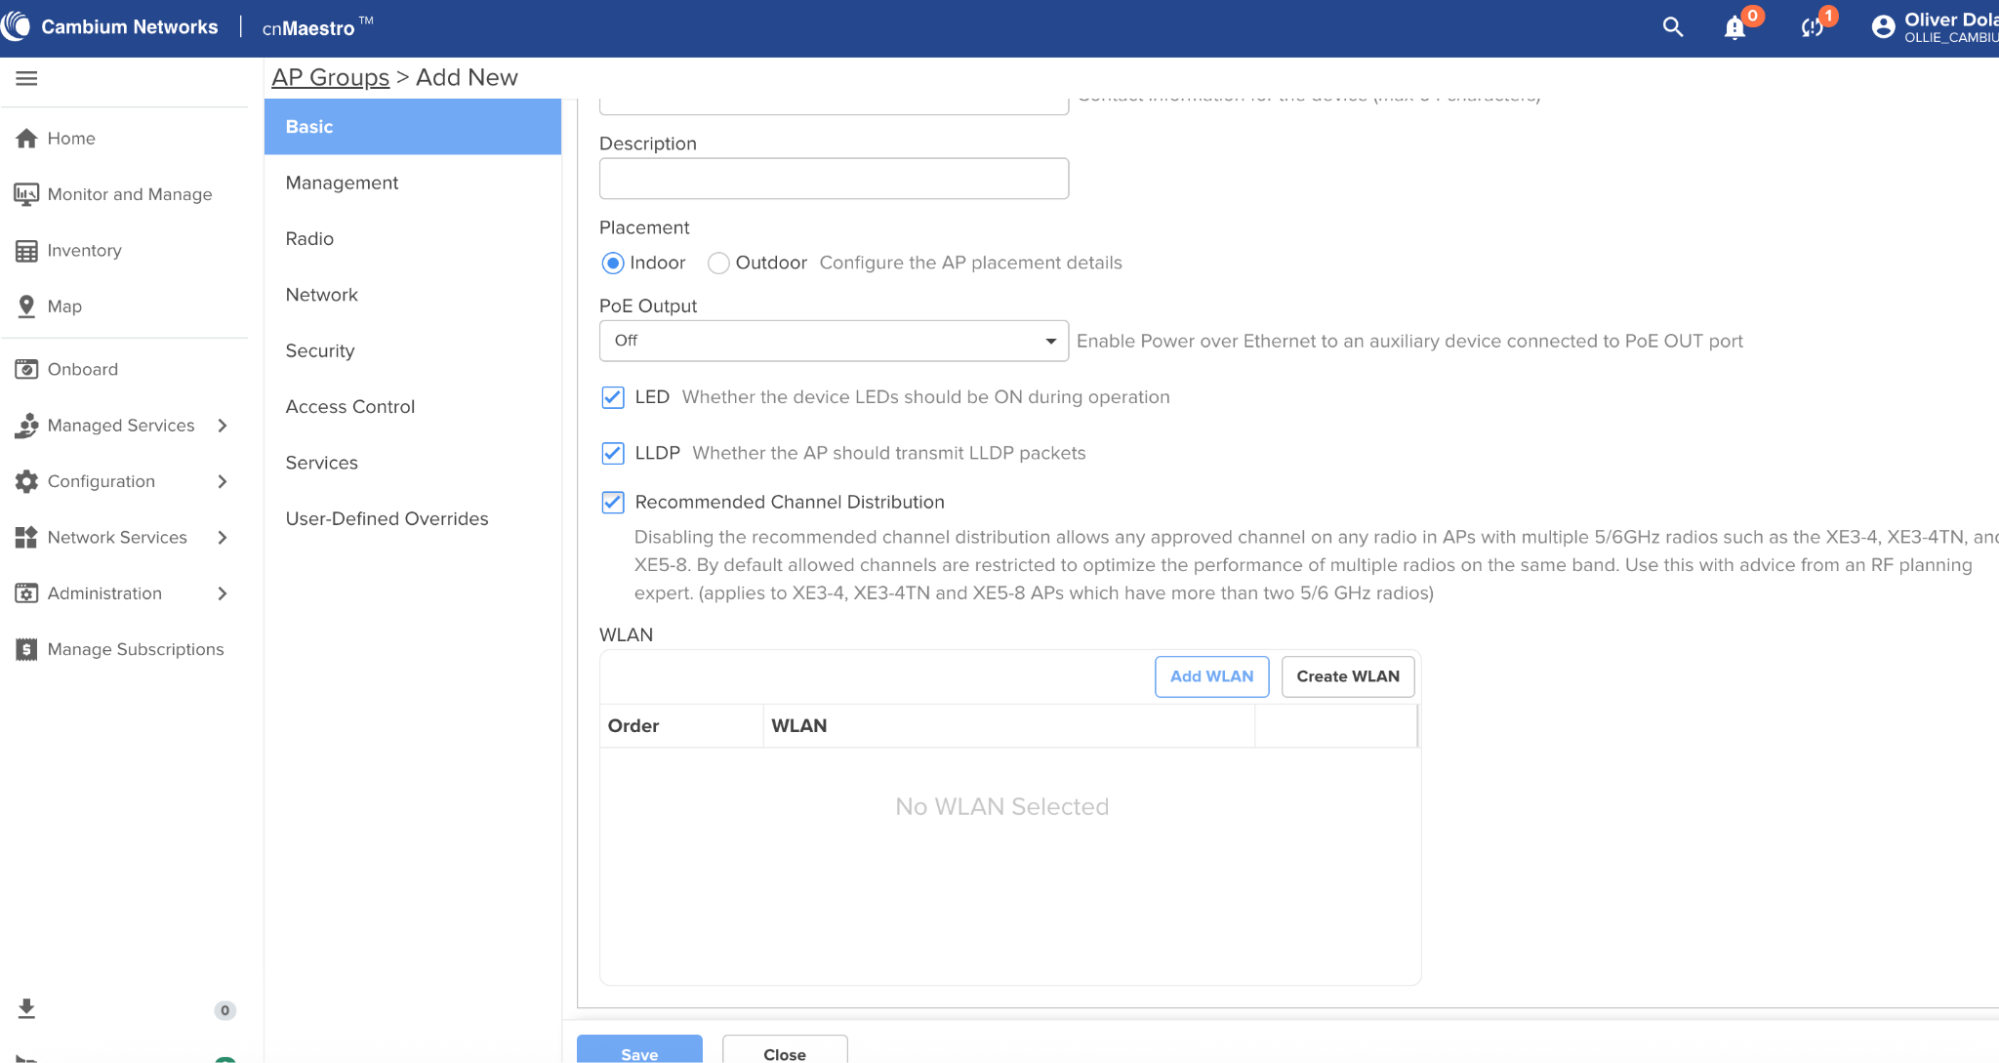
- In Wi-Fi Profiles, select AP Groups → Add New.
- Under Basic Settings, scroll down and click Create WLAN.
Build WLAN
-
In WLAN settings, under Basic Information, set:
- Name:
Helium Enterprise(or your preferred name) - SSID:
Helium - Security:
WPA3 Enterprise - Client Isolation:
Network Wide
- Name:
-
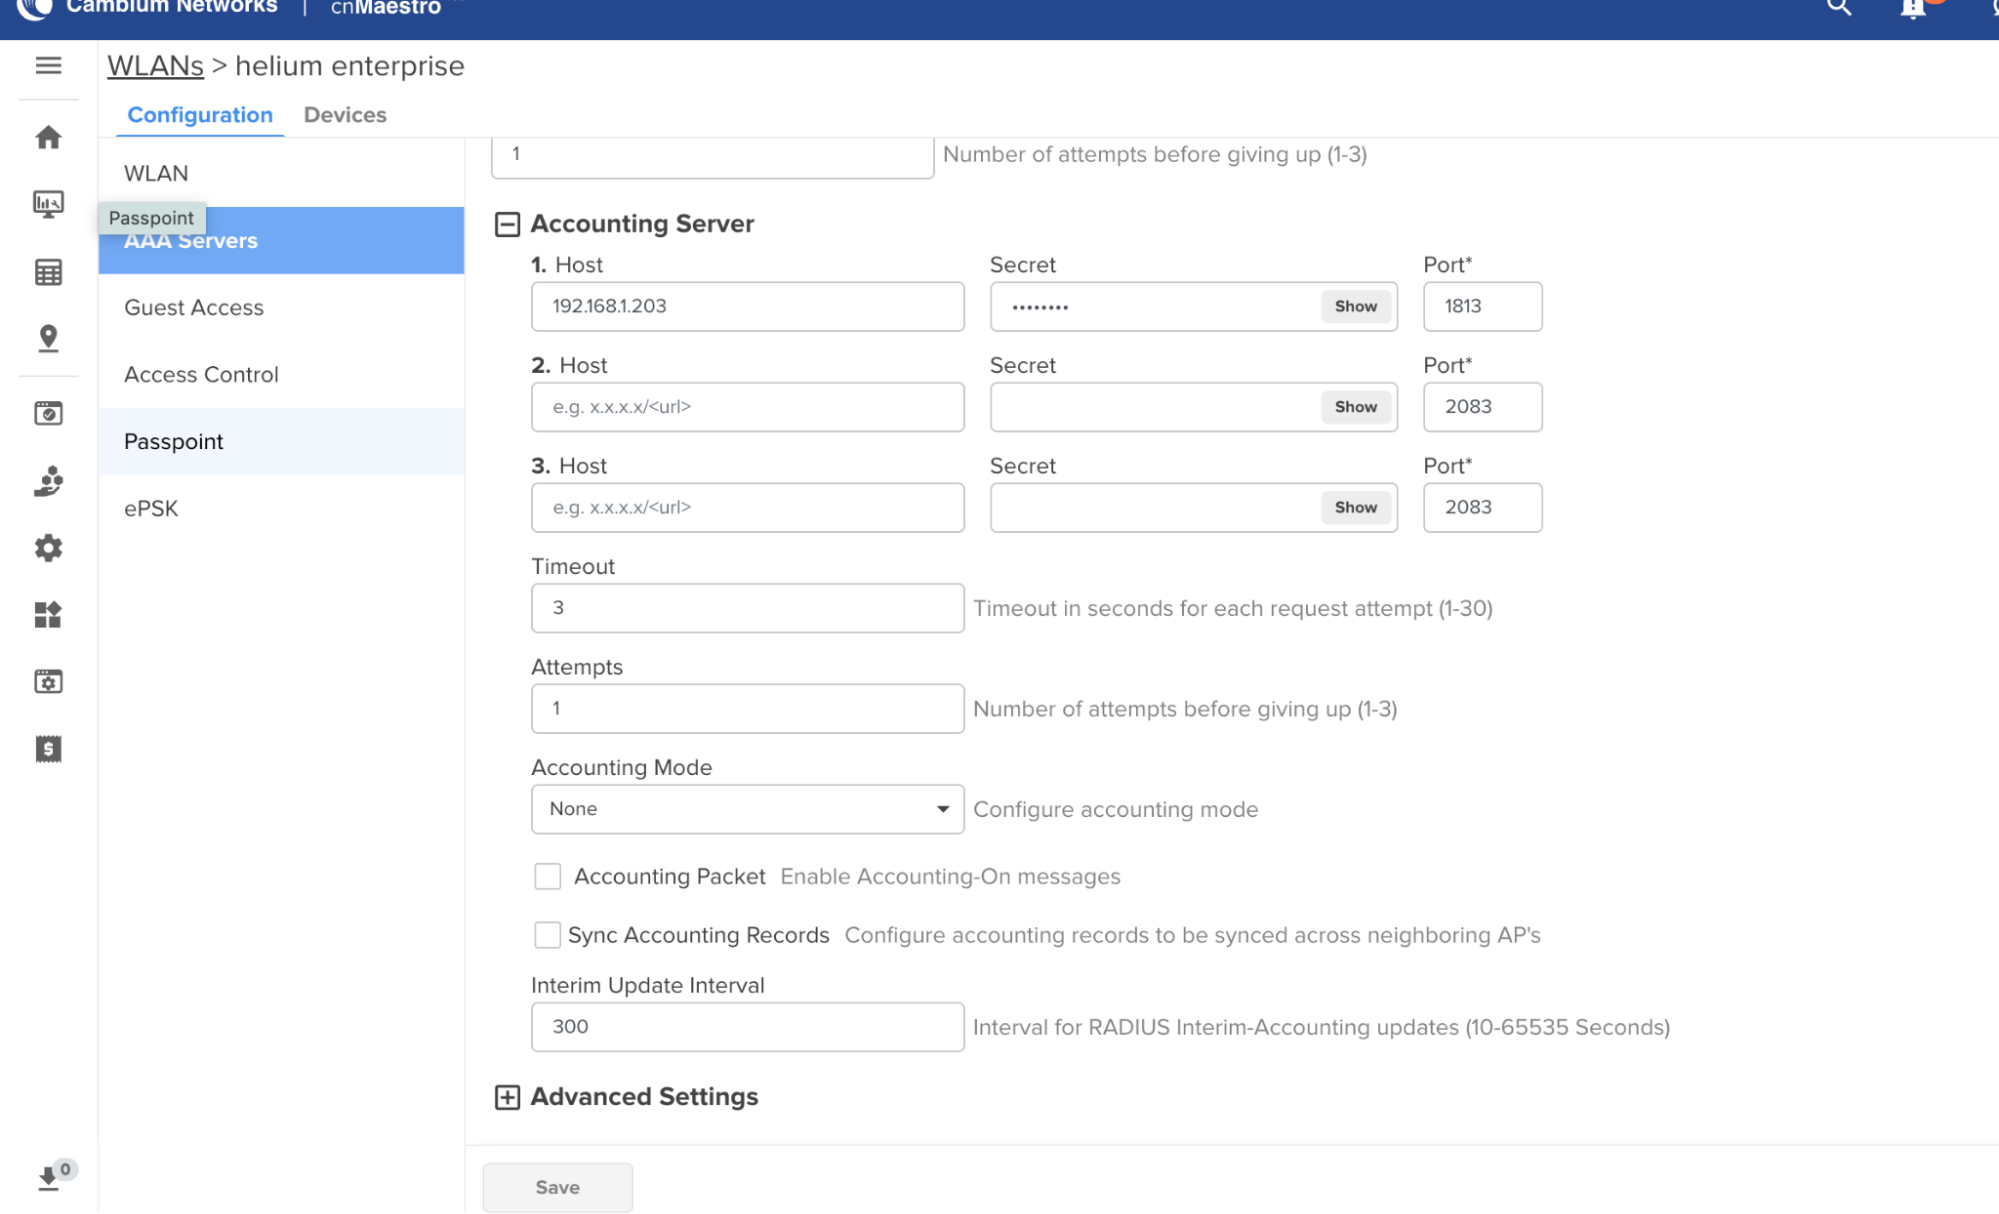
On the left panel, go to AAA Servers.
-
Under Authentication Server:
- Host: IP of your RadSecProxy host (e.g.,
192.168.1.203) - Secret:
mysecret(must matchradsecproxy.conf) - Port:
1812
- Host: IP of your RadSecProxy host (e.g.,
-
Under Accounting Server, repeat the steps above but set Port = 1813.
-
At the bottom, set Interim Update Interval = 300.
-
Under Advanced Settings → NAS-Identifier, select Custom and enter the NAS ID provided by the Helium team for carrier offload approval.
-
Click Save.
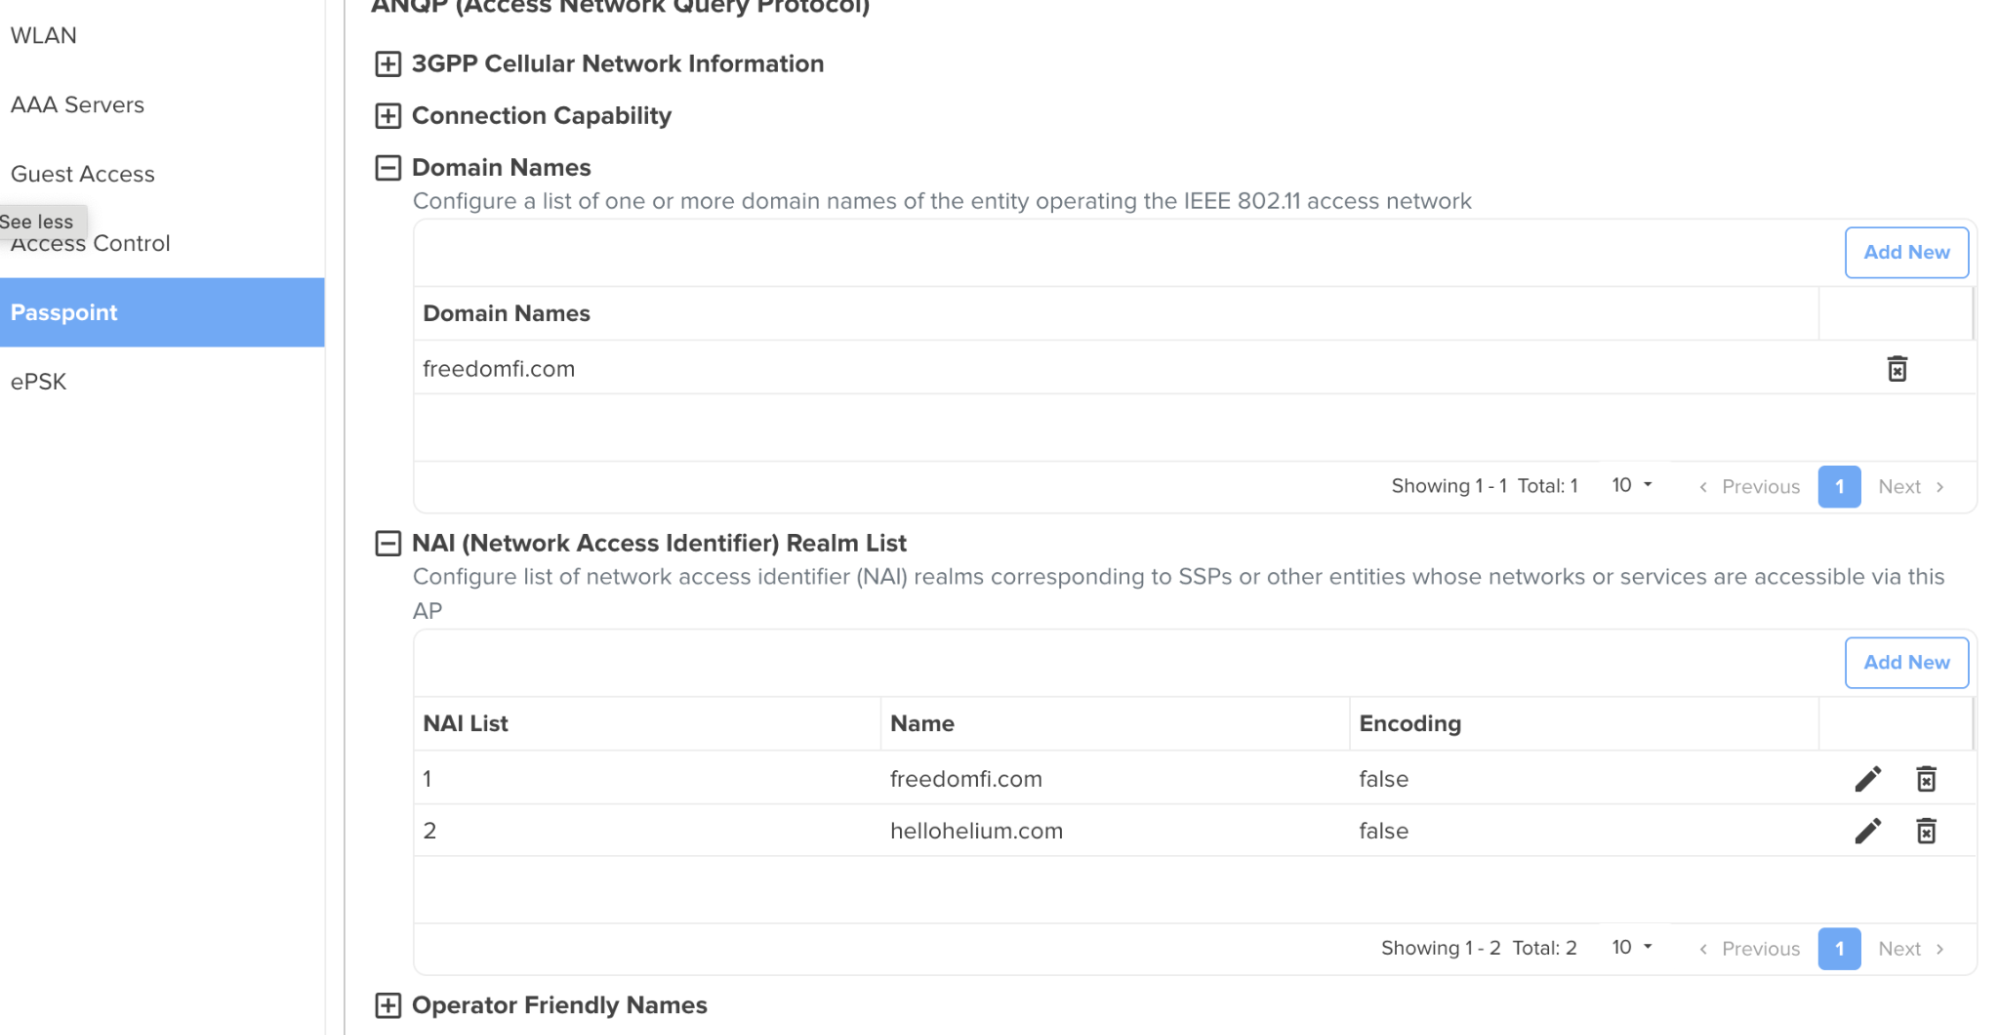
Configure Passpoint
-
Go to the Passpoint tab and enable it under Basic Settings.
-
Set Access Network Type:
Chargeable Public -
Fill in Venue Group and Venue Type with your venue details.
-
Under Domain Names, click Add New and enter:
freedomfi.com
-
Under NAI Realm List, click Add New:
- Name:
freedomfi.com - Method:
EAP-TLS - Authentication:
Credential Type → Certificate - Click Save
- Name:
-
Repeat the process for:
- Domain:
hellohelium.com - EAP:
2 - Method:
EAP-TLS - Authentication 1:
Credential Type → Certificate
- Domain:
-
Save the configuration again.

- Scroll down to IP Address Type Information:
- IPv4 Type:
Double NAT - IPv6 Type:
Not Available
- IPv4 Type:
Assign APs to the New Group
- Go to Monitor and Manage → AP Groups
- Select your new AP group (
Helium) - Click on an AP under this group.
- Go to the Configuration tab.
- Scroll to Device Configuration and assign it to the AP group
Helium.