Ruckus Conversion Guide
Prerequisites
- Ruckus SmartZone must be running version 6.1 or later
- Guide assumes SmartZone Ruckus Mobility Controller
- Ruckus system has AP(s) linked to your SmartZone Controller
- Ruckus system has basic traffic routing working with existing SSID(s)
High Level Steps
- Build Ruckus Helium Passpoint SSID
- Install Certs
- Setup RadSec Proxy
- Configuration HS2.0 Profile
- Build New SSID
Build Ruckus Helium Passpoint SSID
The following steps will configure your Ruckus system to broadcast an SSID with the needed Passpoint and RADIUS configurations to support Helium Mobile user offload.
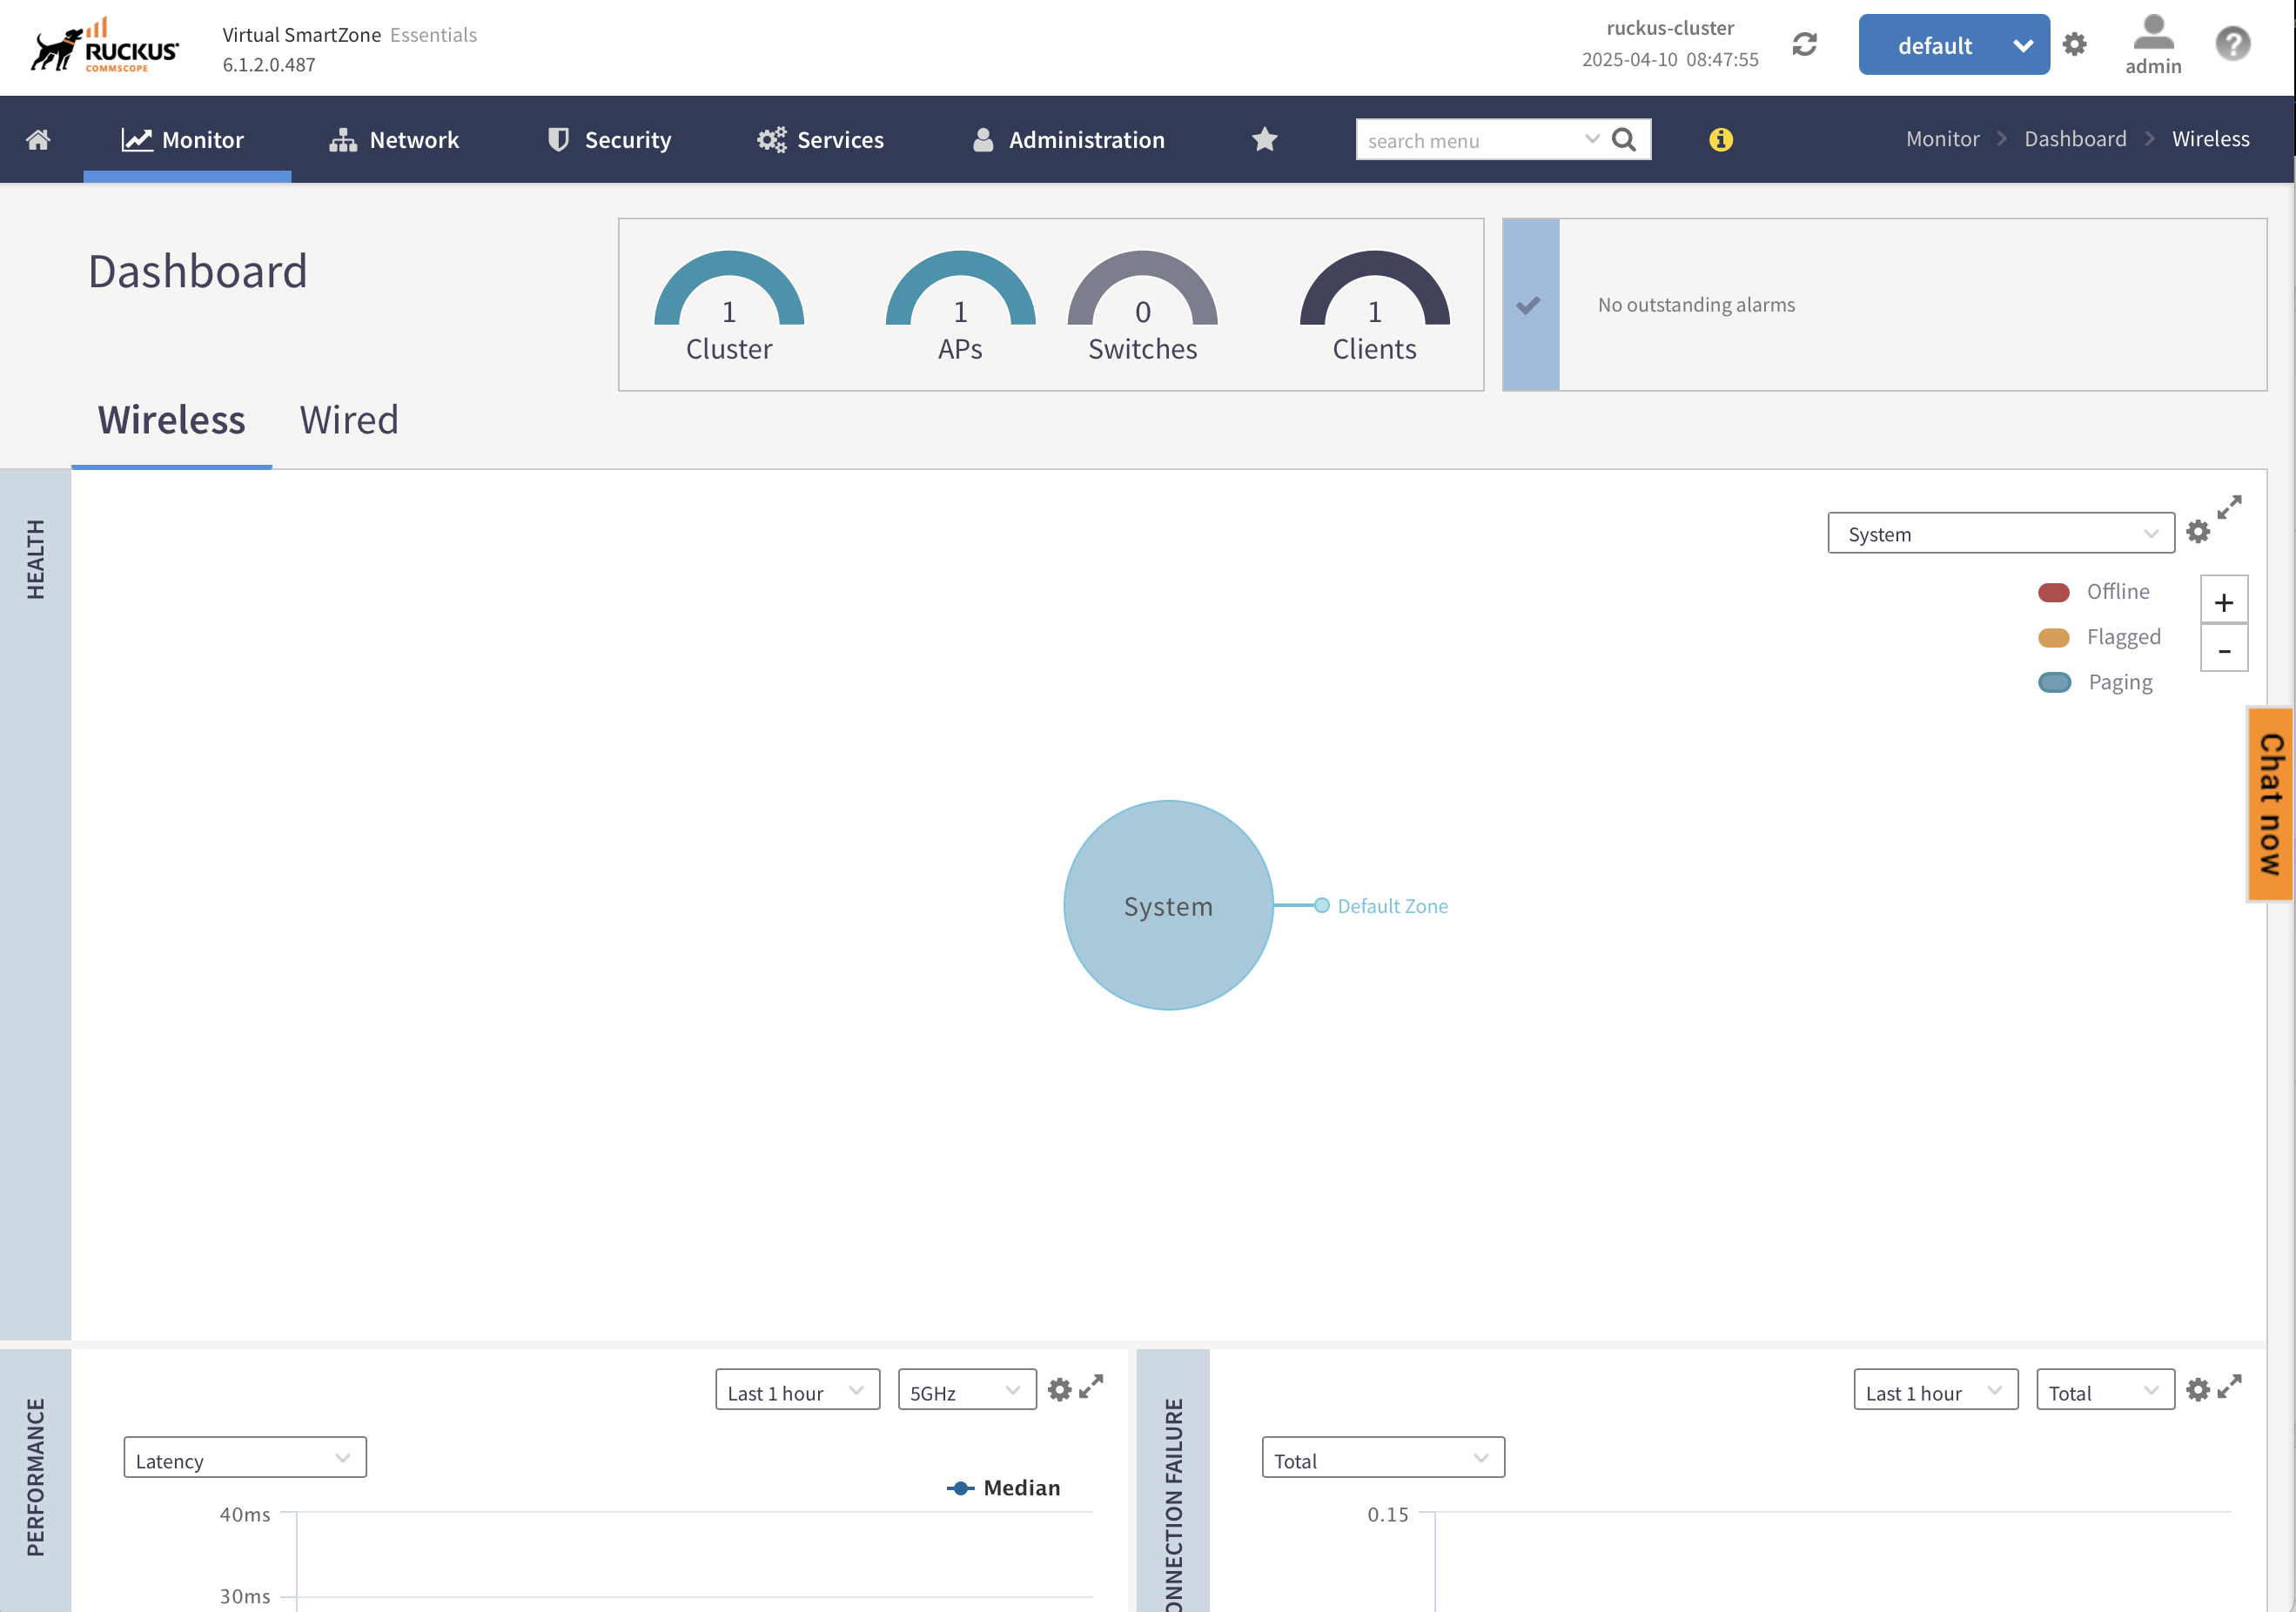
To start login to your Ruckus Dashboard in your browser, this will be our starting point for all major steps below
note
In the following steps we will only mention mandatory fields to set. Most windows will have many other parameters with default values set. Leave any unmentioned parameter at it's default value.
Install RadSec Certs:
- Click on Administration>System>Certificates>SZ Trusted CA Certificates/Chain(External)
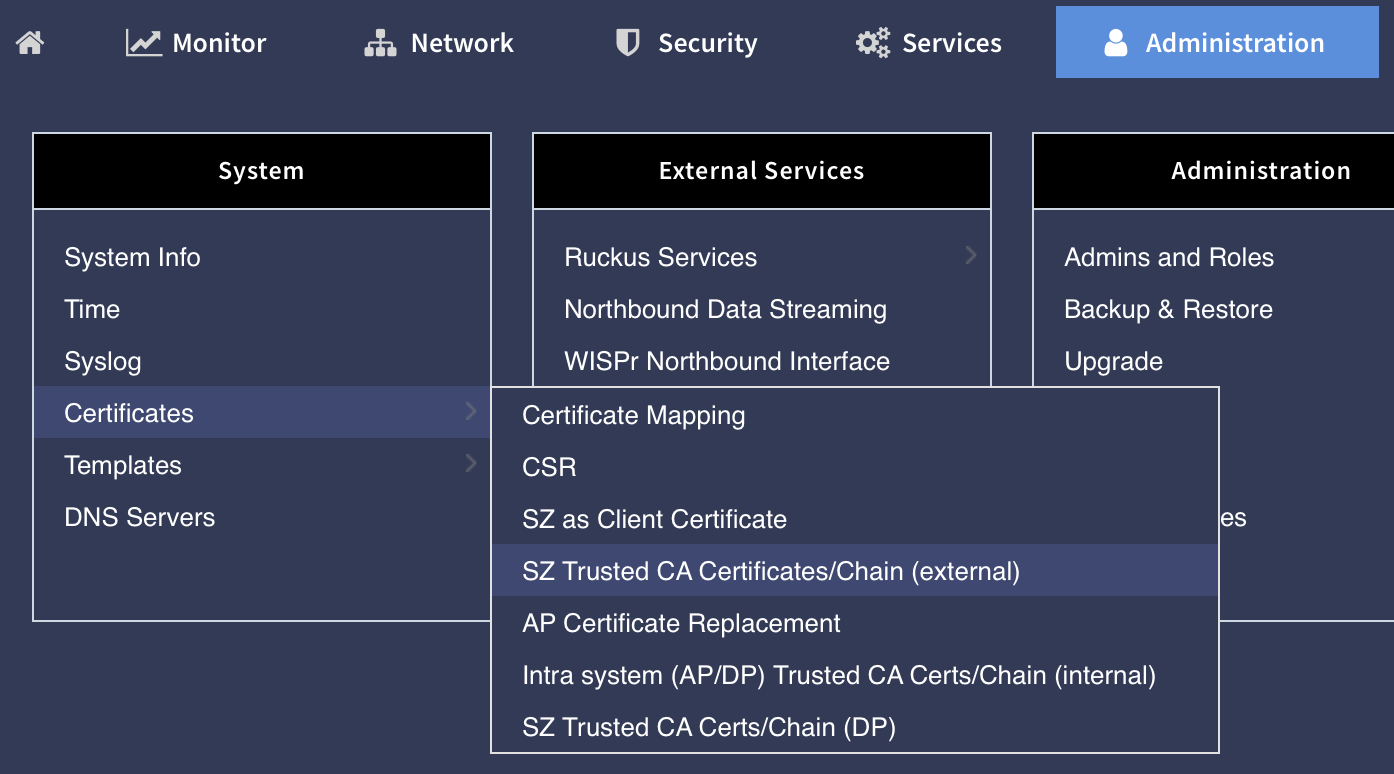
- Click Import
- Load the interim.pem, ca.pem, and root.pem certificates from your local directory.
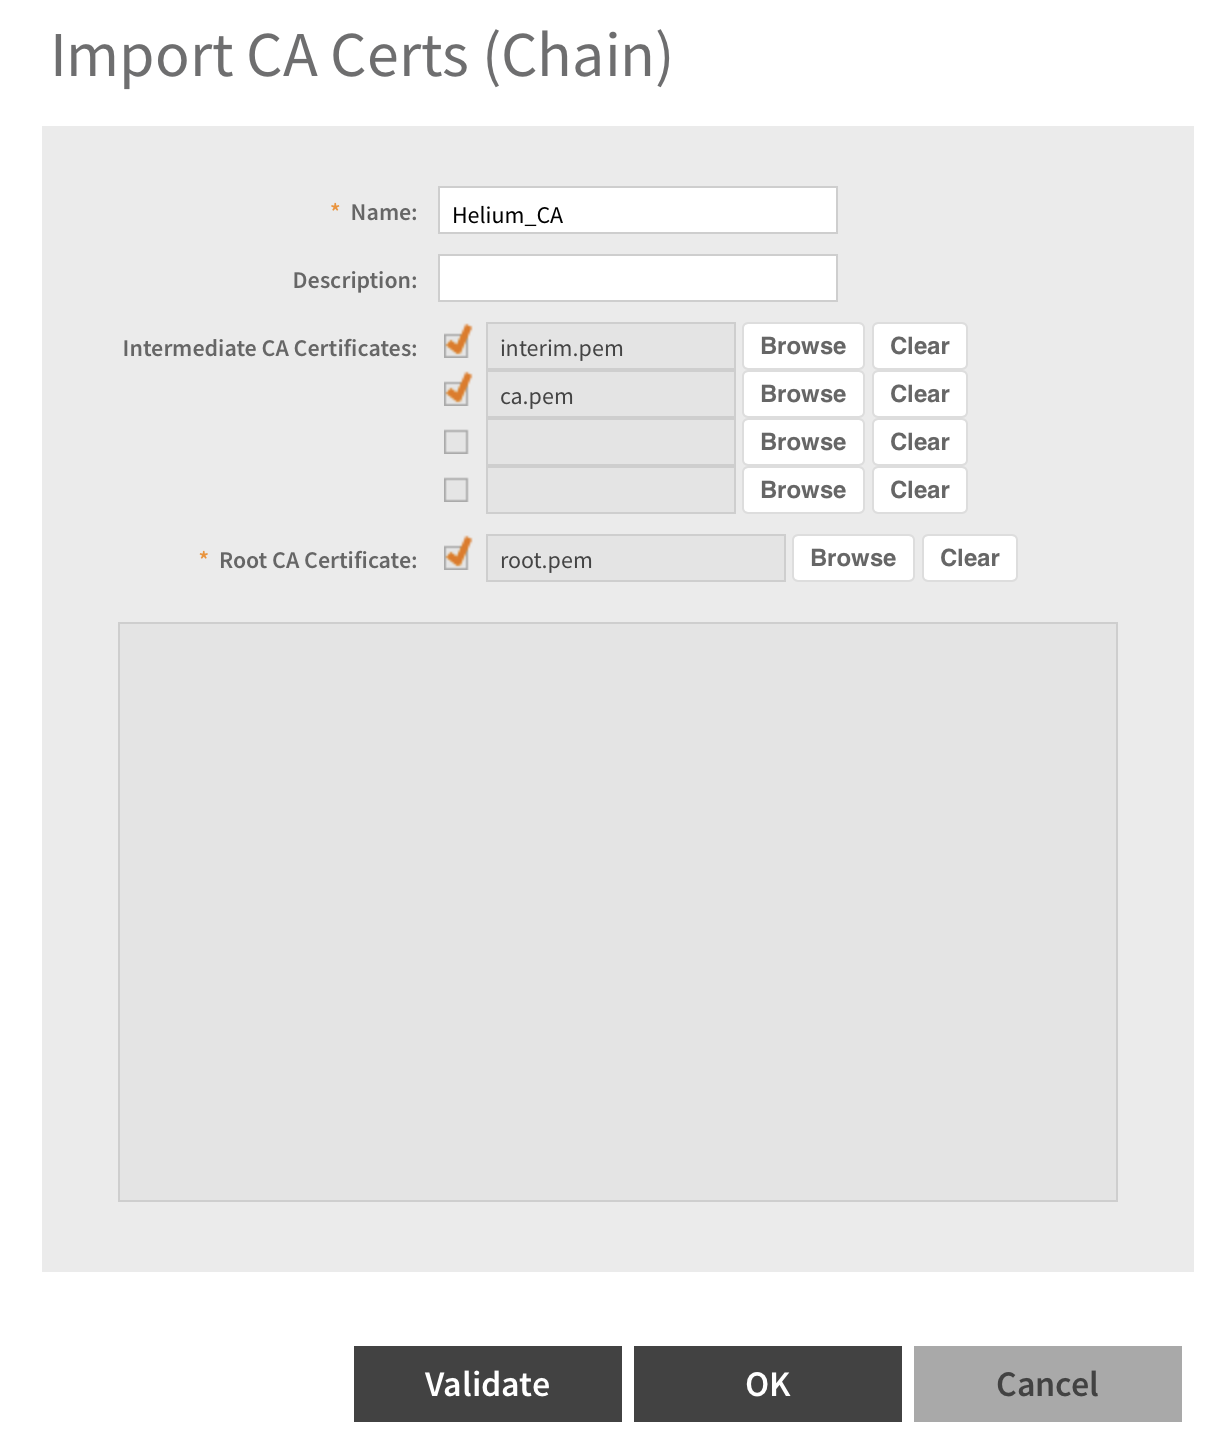
- Click Validate then OK
- Next on sub-menu bar select SZ as Client Certificate tab
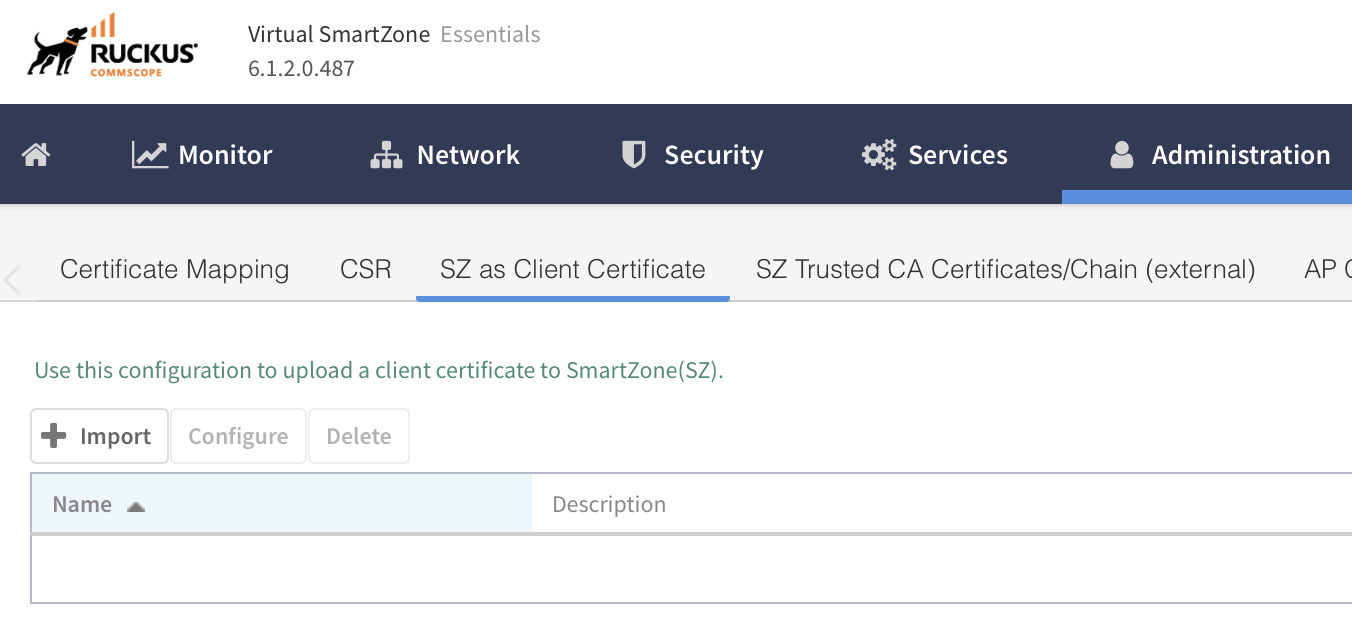
- Click import
- Enter Name as Helium_radsec_client
- Add cert.pem and key.pem
- Click Validate then OK

Configure RadSec Authentication Proxy:
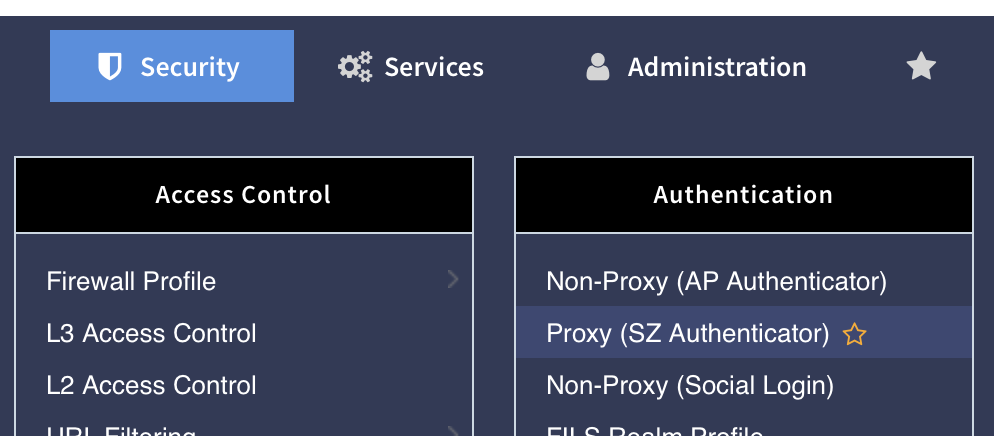
- Click on Security>Authentication>Proxy(SZ Authenticator)
- Click on Create
- Fill in Helium_Radsec as Name
- Click the toggle Encryption to TLS On
- Enter CN/SAN Identity as radius.stage.wifi.freedomfi.com
- Select Client Certificate from drop down to be Helium_radsec_client
- Enter IP Address/FQDN to be 52.37.147.195
- Ensure Port is 2083
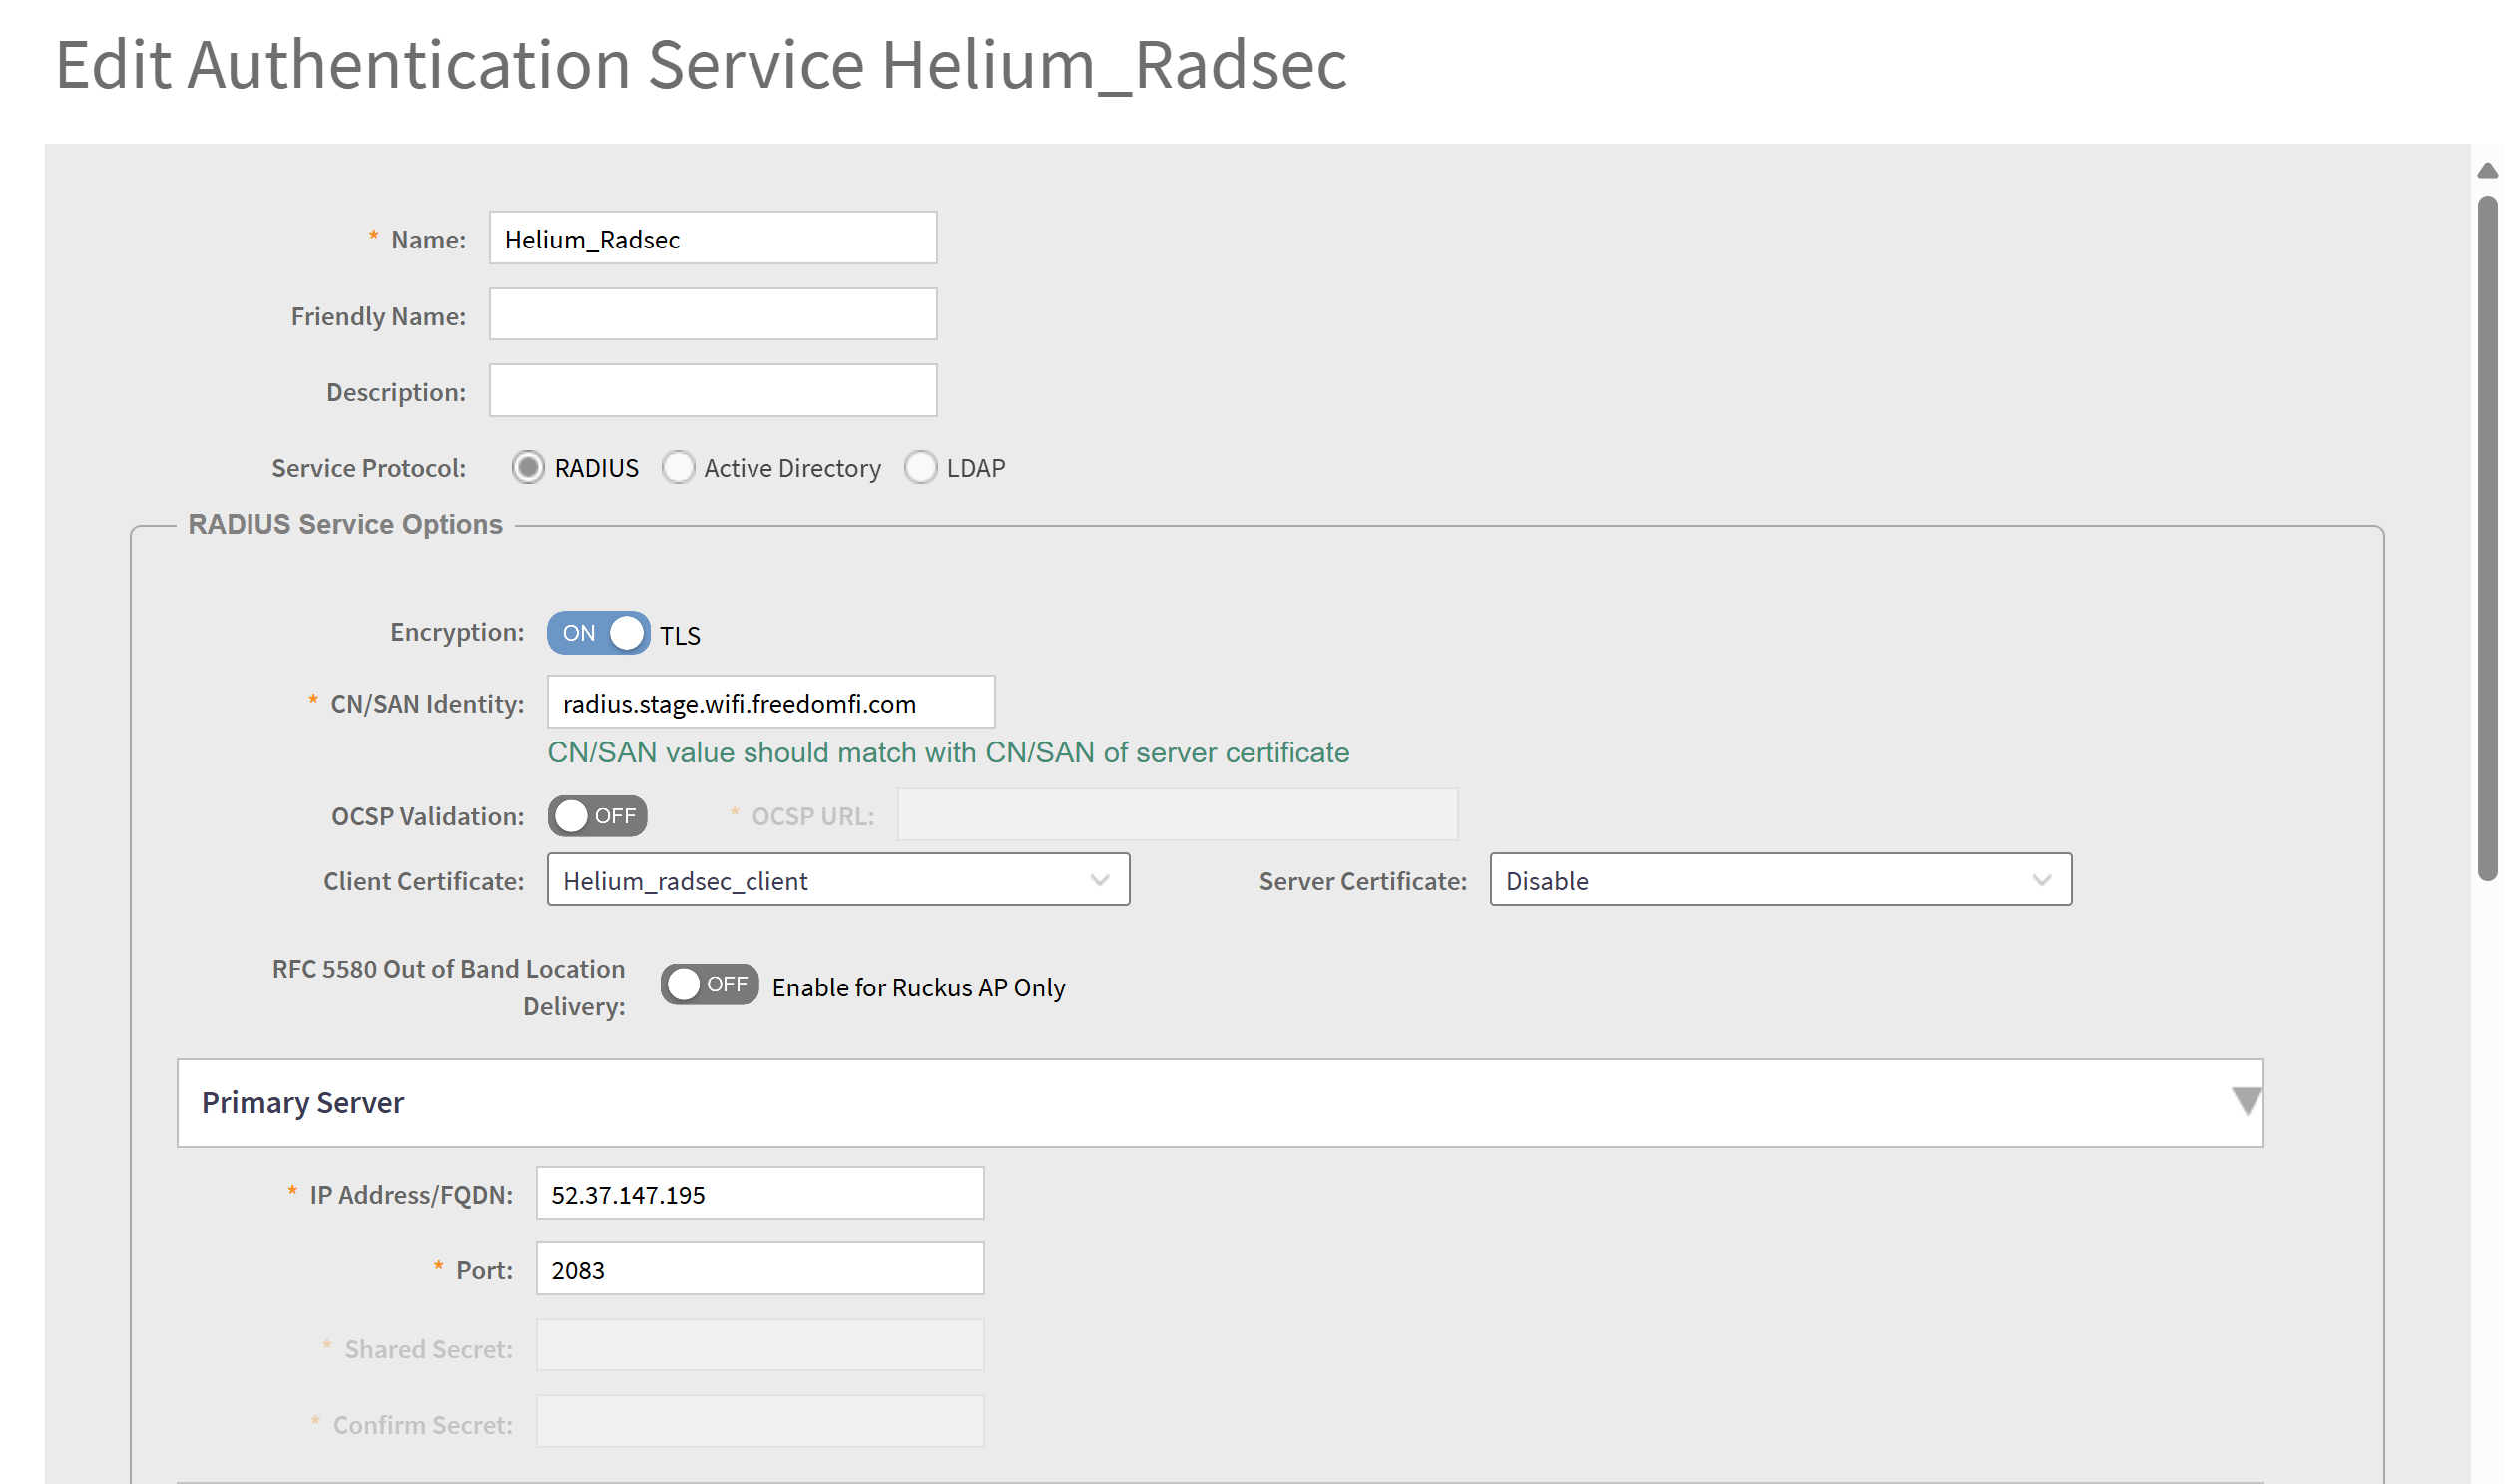
- Click OK
Configure RadSec Accounting Proxy:
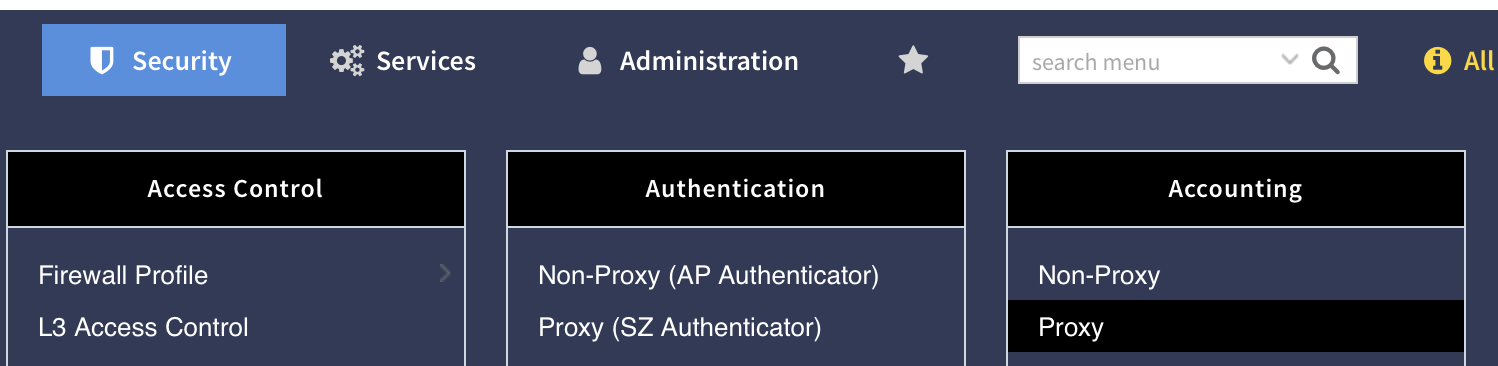
- Click on Security>Accounting>Proxy
- Click Create
- Enter Name as Helium_radsec_acct
- Enable the toggle for Encryption to ON TLS
- Enter CN/SAN Identity as radius.stage.wifi.freedomfi.com
- Select Client Certificate from drop down to be Helium_radsec_client
- Enter IP Address/FQDN to be 52.37.147.195
- Ensure Port is 2083
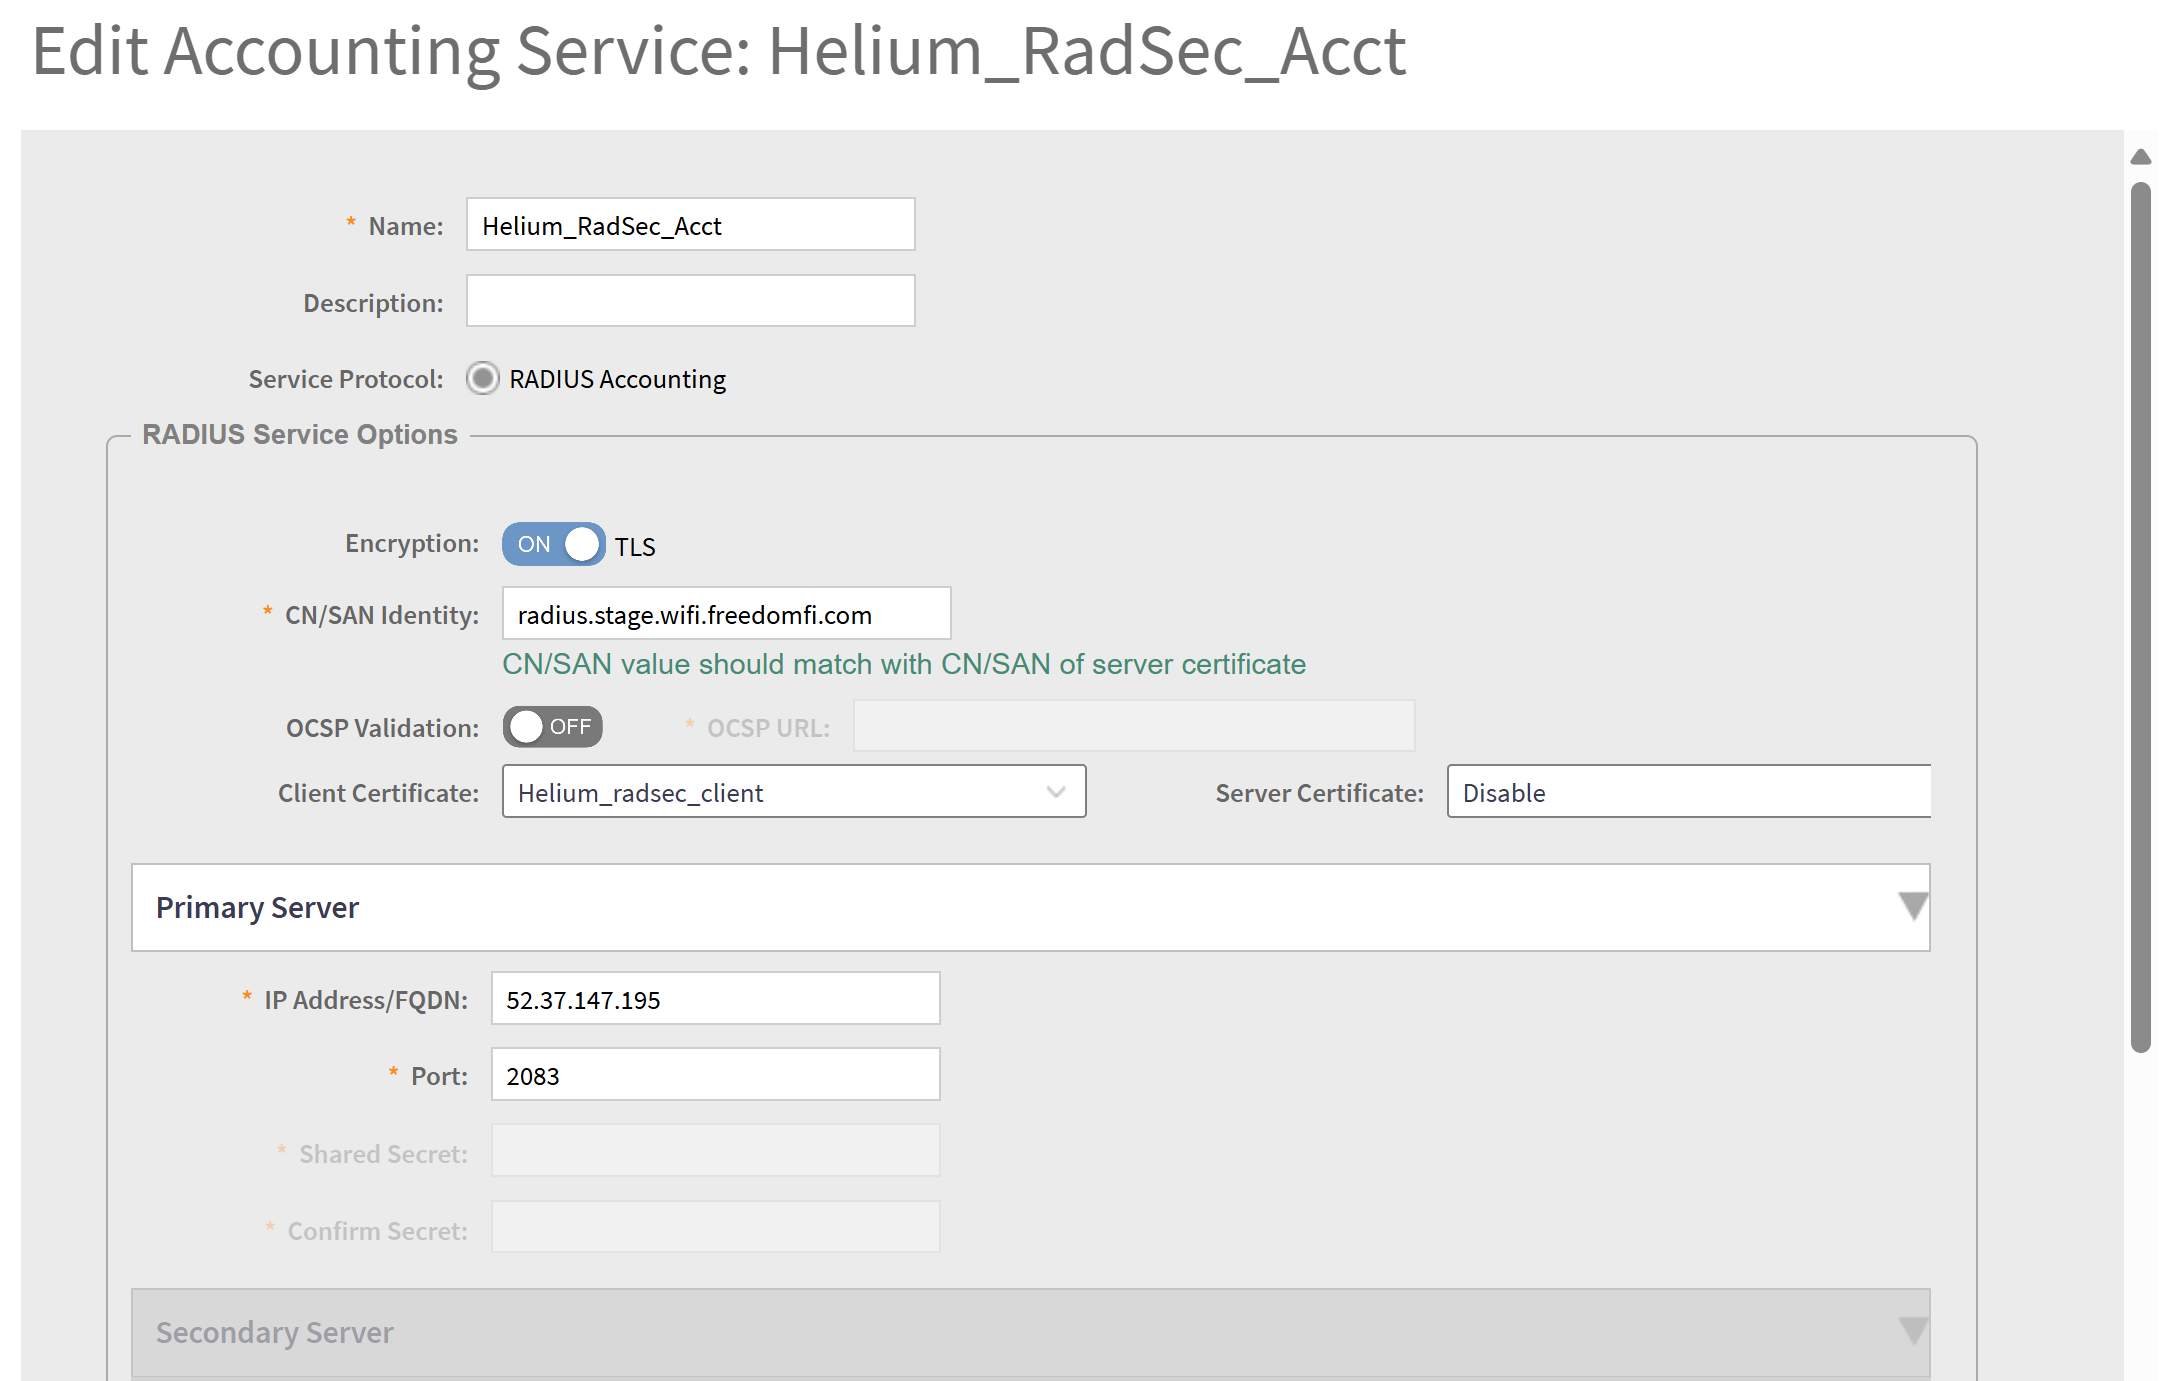
- Click OK
Build Hotspot2.0 Profile:
- Click Services>Hotspots&Portals>Hotspot 2.0
- Under Wi-Fi Operator click Create
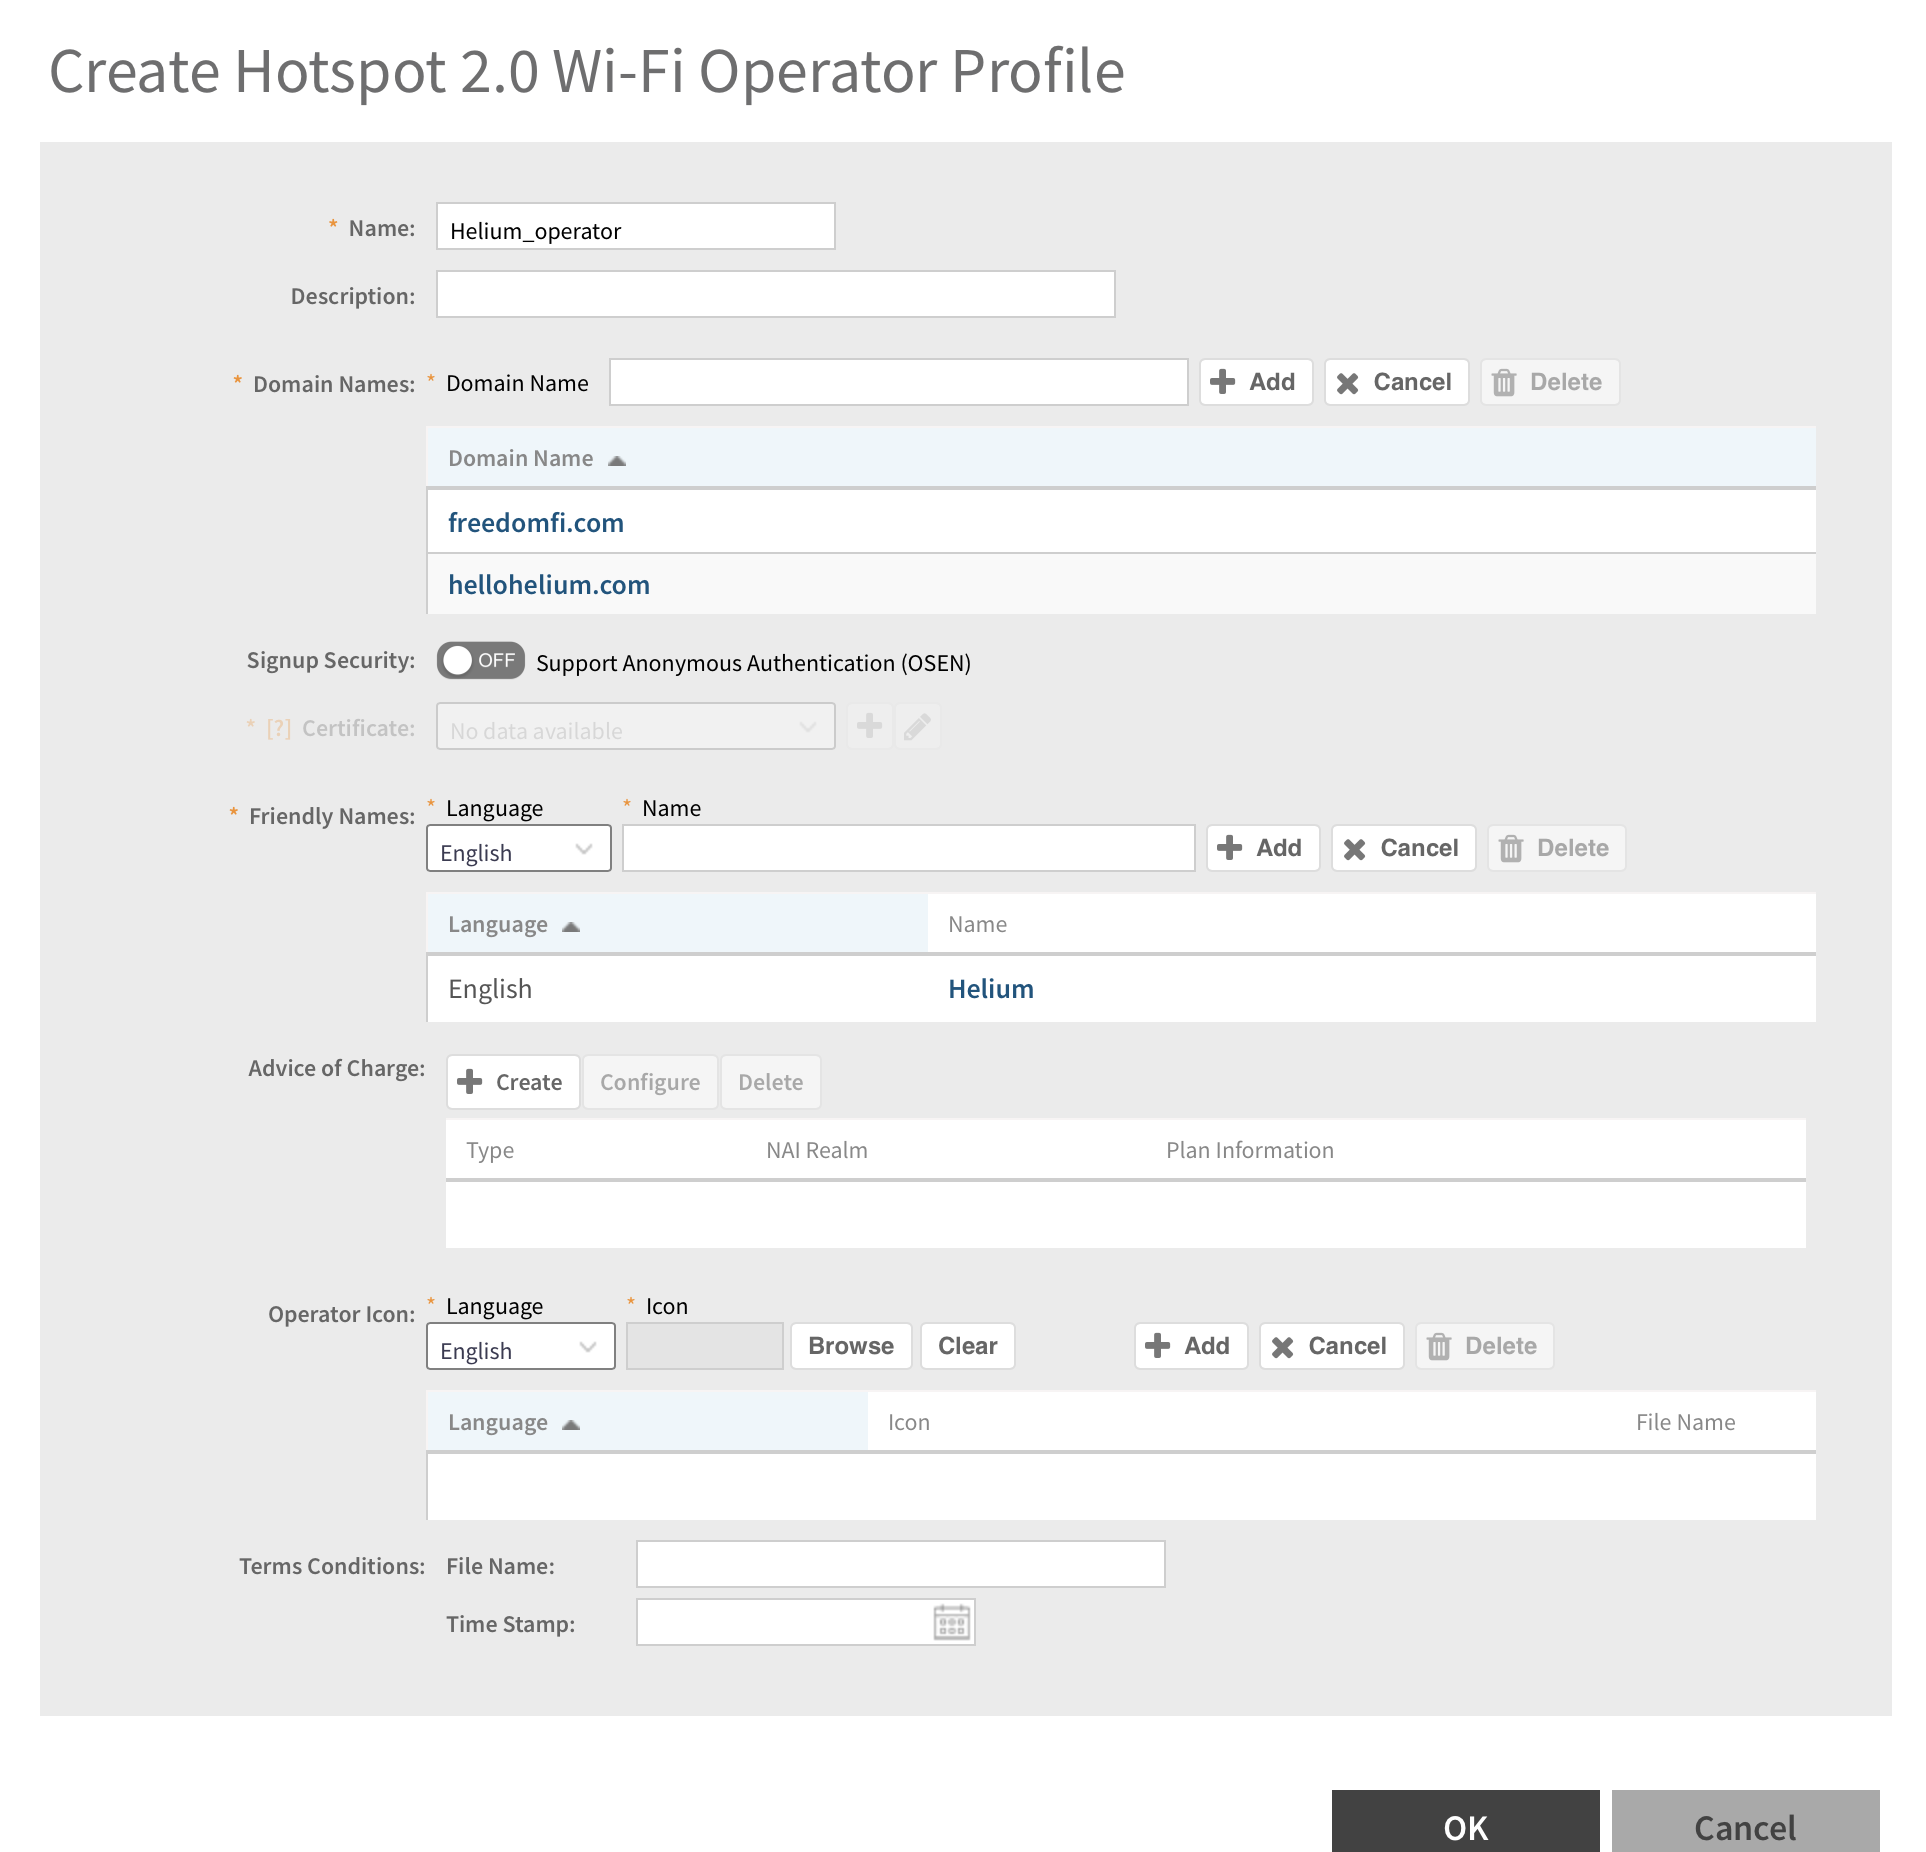
- Configure:
- Name as Helium_Operator
- Enter Domain Name as FreedomFi.com and click +ADD
- Repeat for Domain Name as Hellohelium.com
- Enter Friendly Name as Helium and click +ADD
- Click OK
- Under Identity Provider click Create
- Fill in Name as Helium_IDP
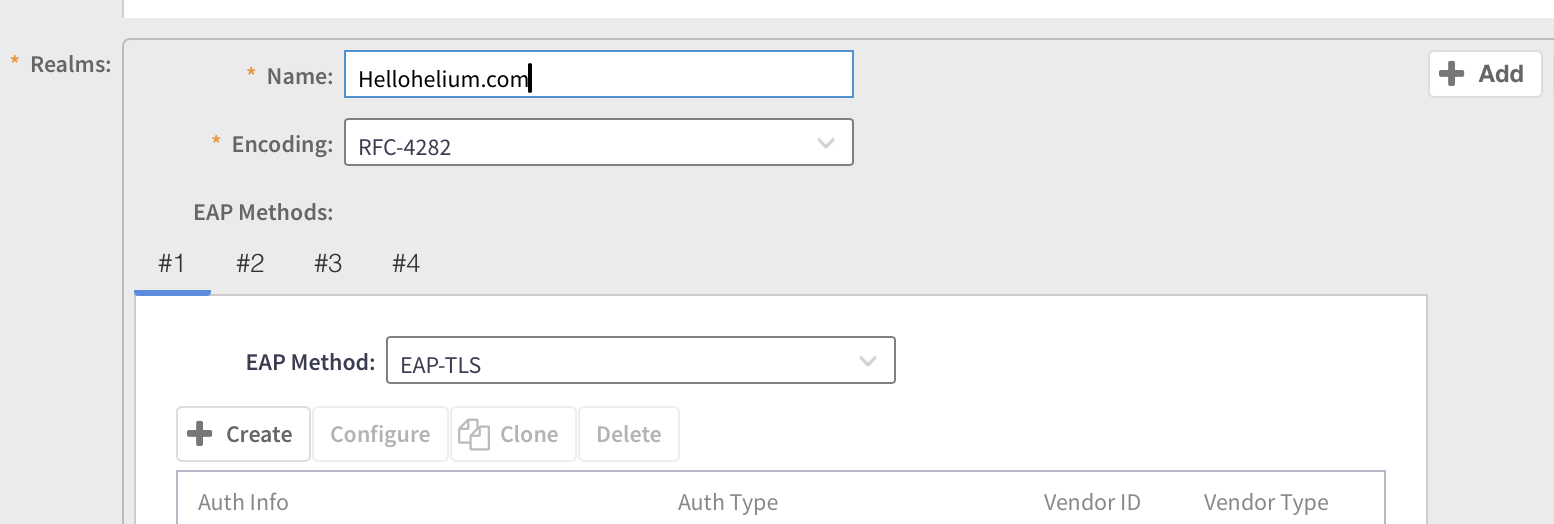
- In the Realms section, enter Name as Hellohelium.com and click +Add
- In the drop down for EAP Method select EAP-TLS and click Create,
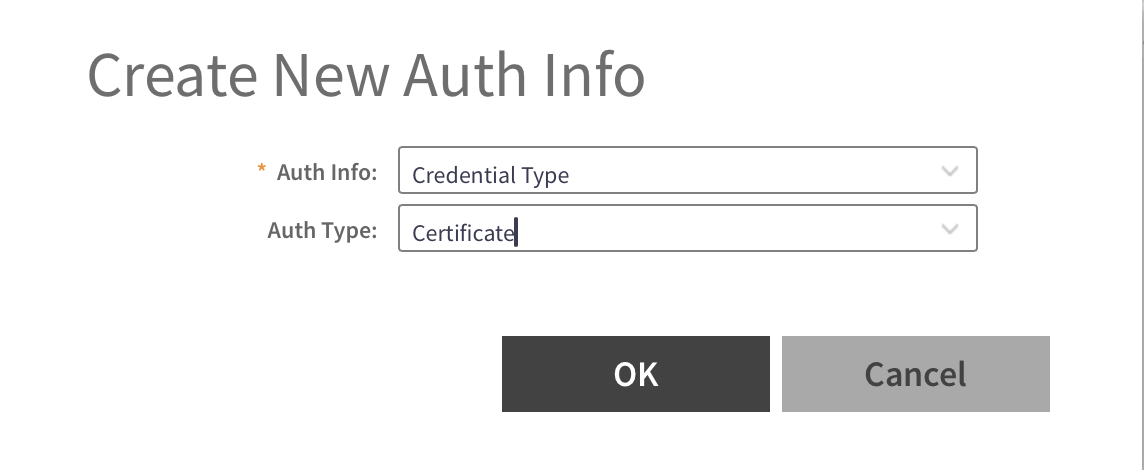
- Choose Auth Info to be Credential Type and Auth Type to be Certificate and click OK.
- Click +Add
- Repeat steps 5.b-5.e for Realm FreedomFi.com with all matching settings.
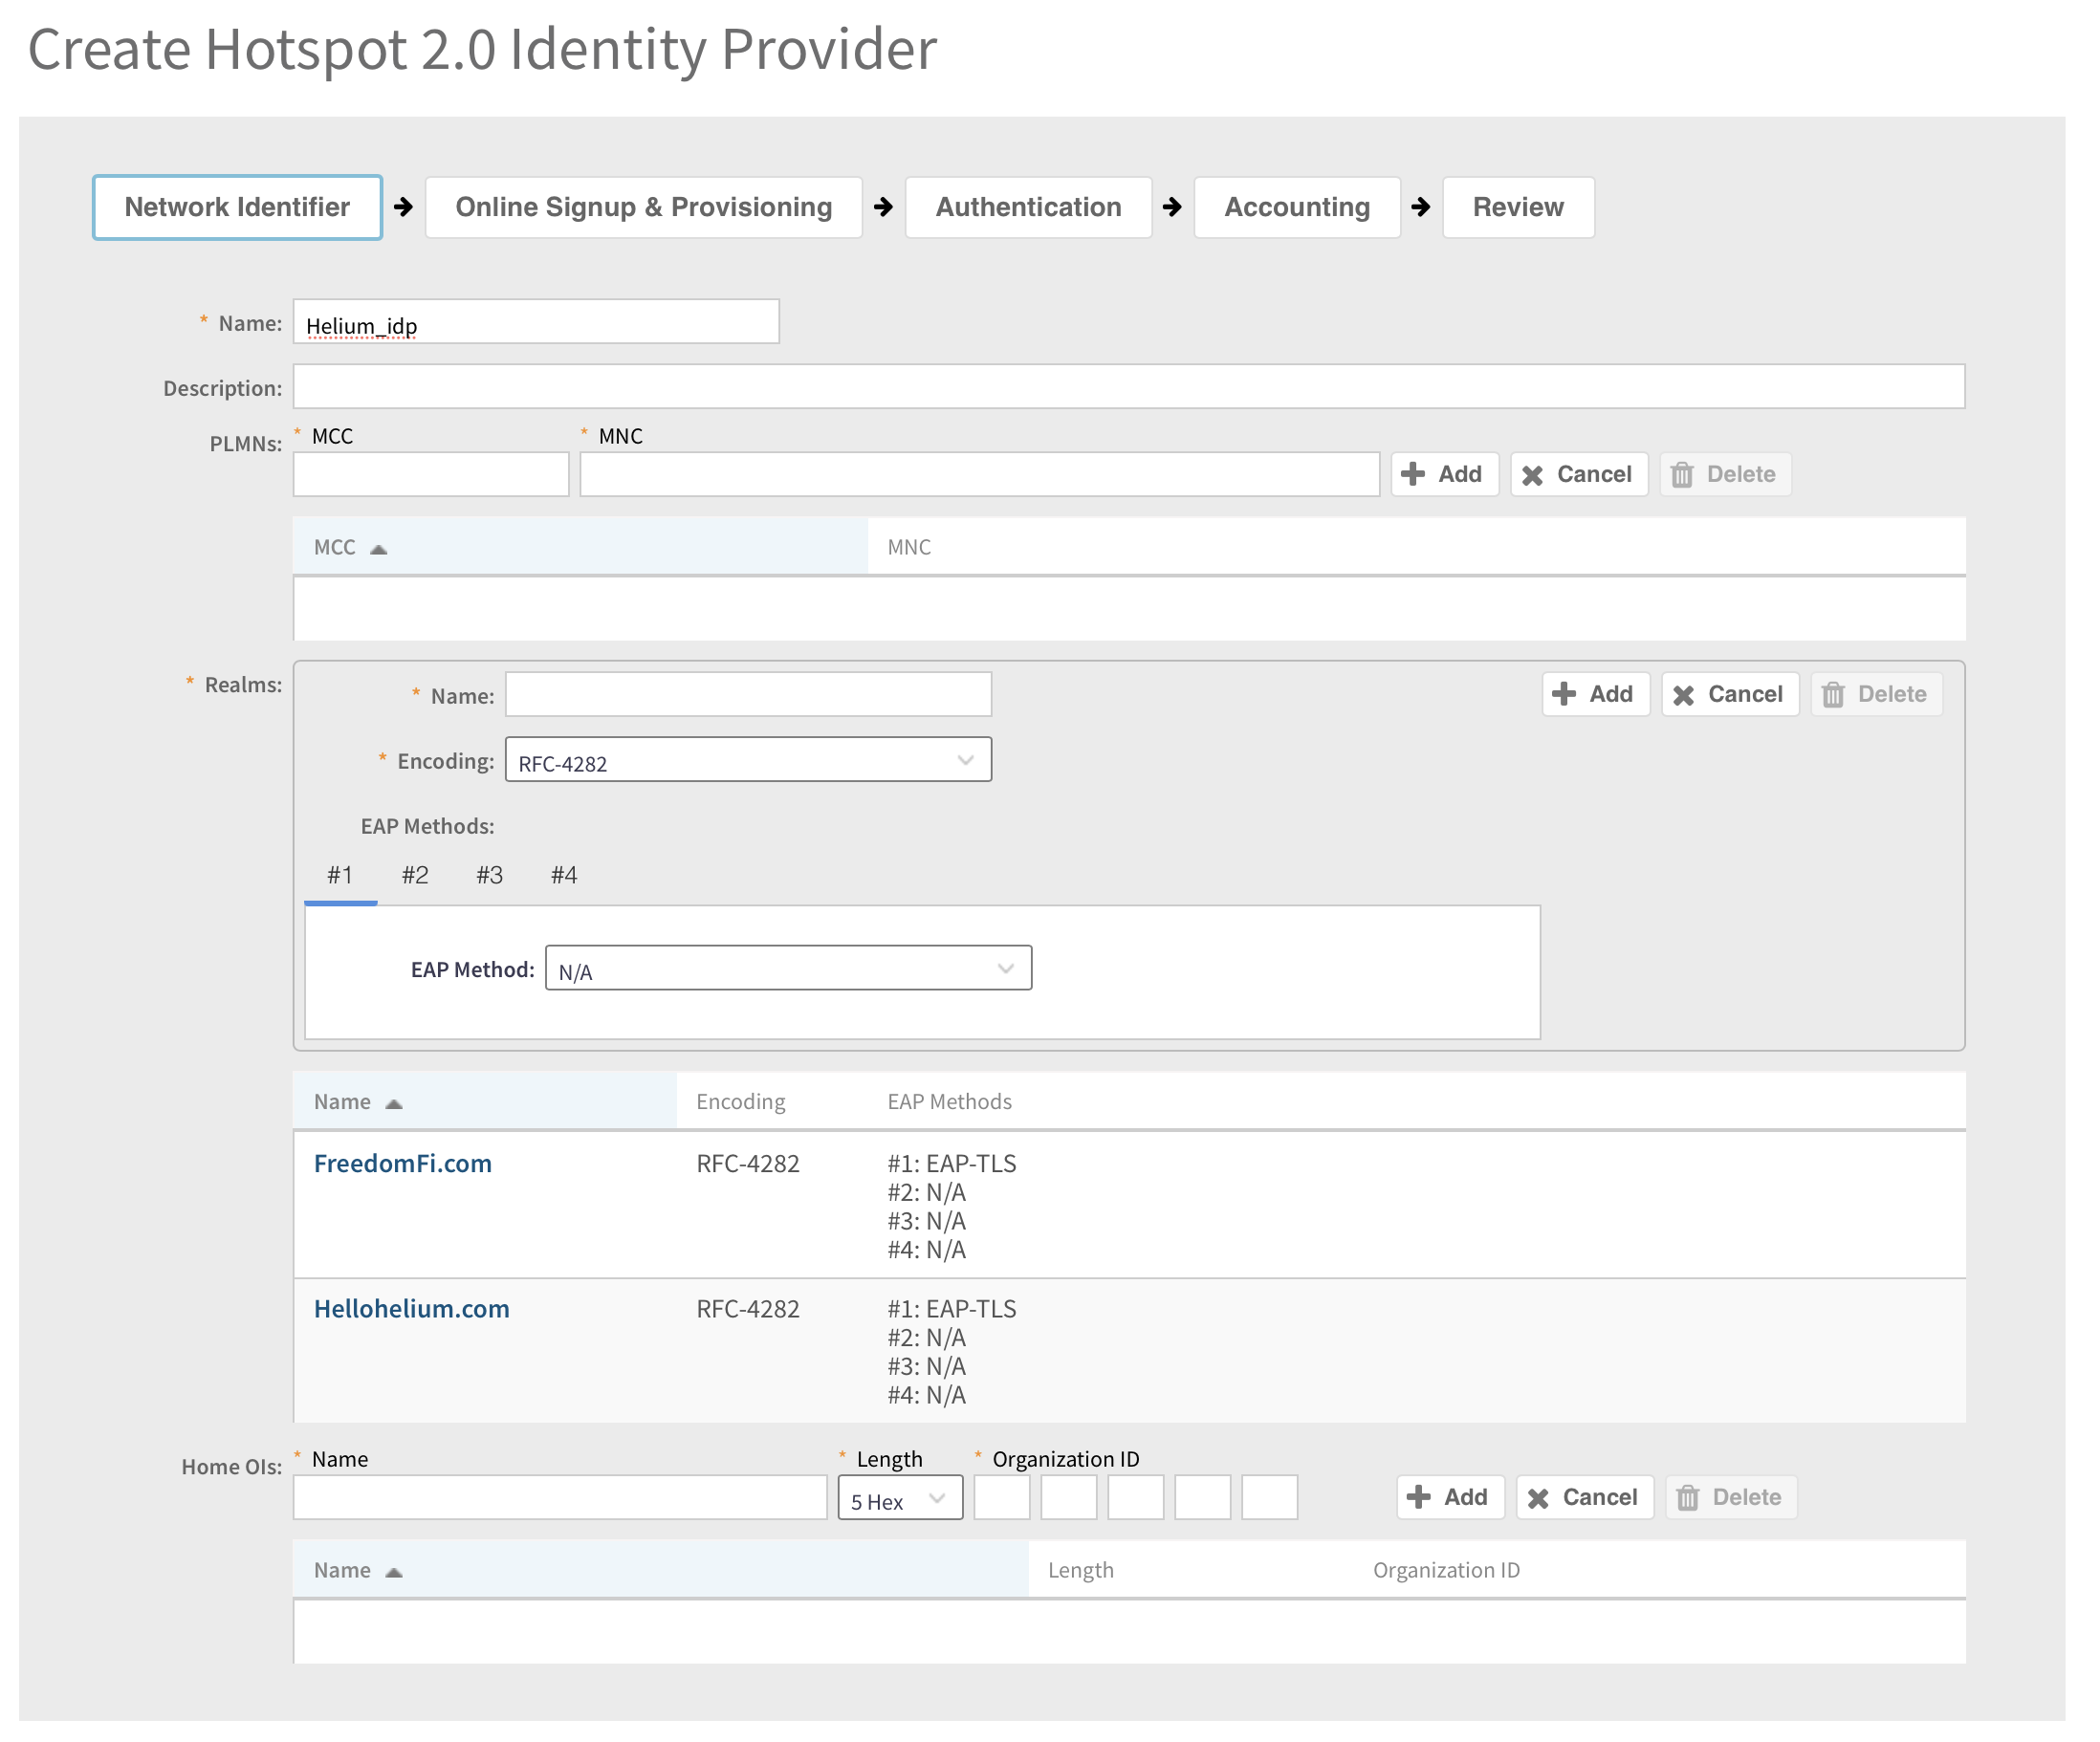
- Click Next
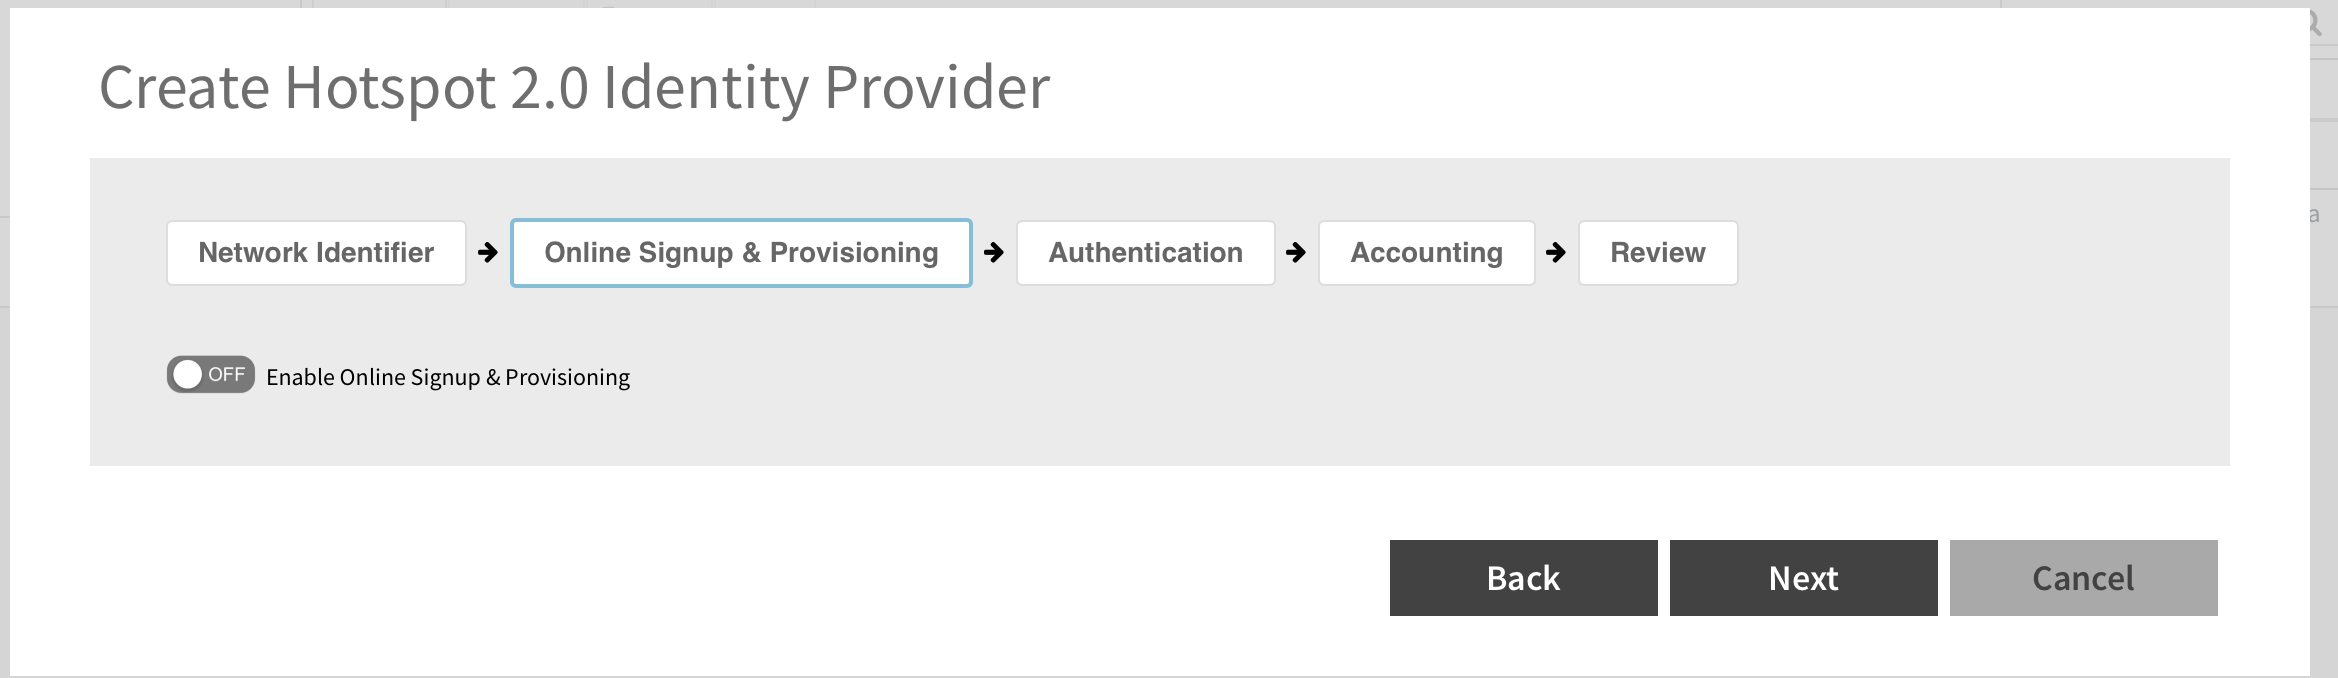
- Leave online signup disabled, click Next
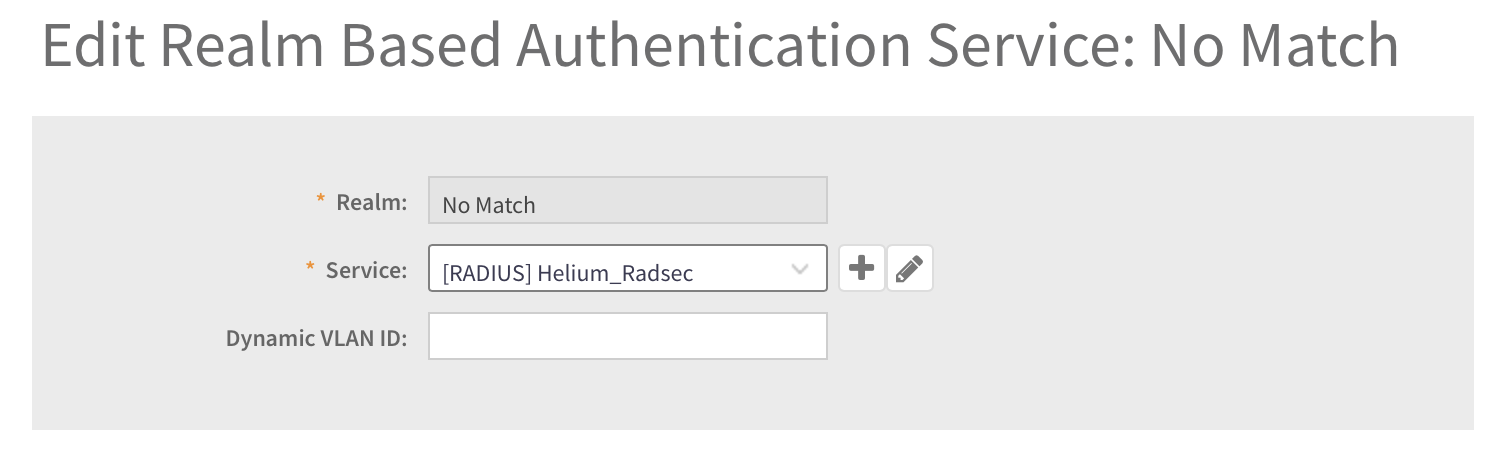
- In Authentication for both no-match and unspecified:
- Click on the Realm name to Select
- Click configure
- Choose Helium_Radsec from drop down
- When done you should see this:
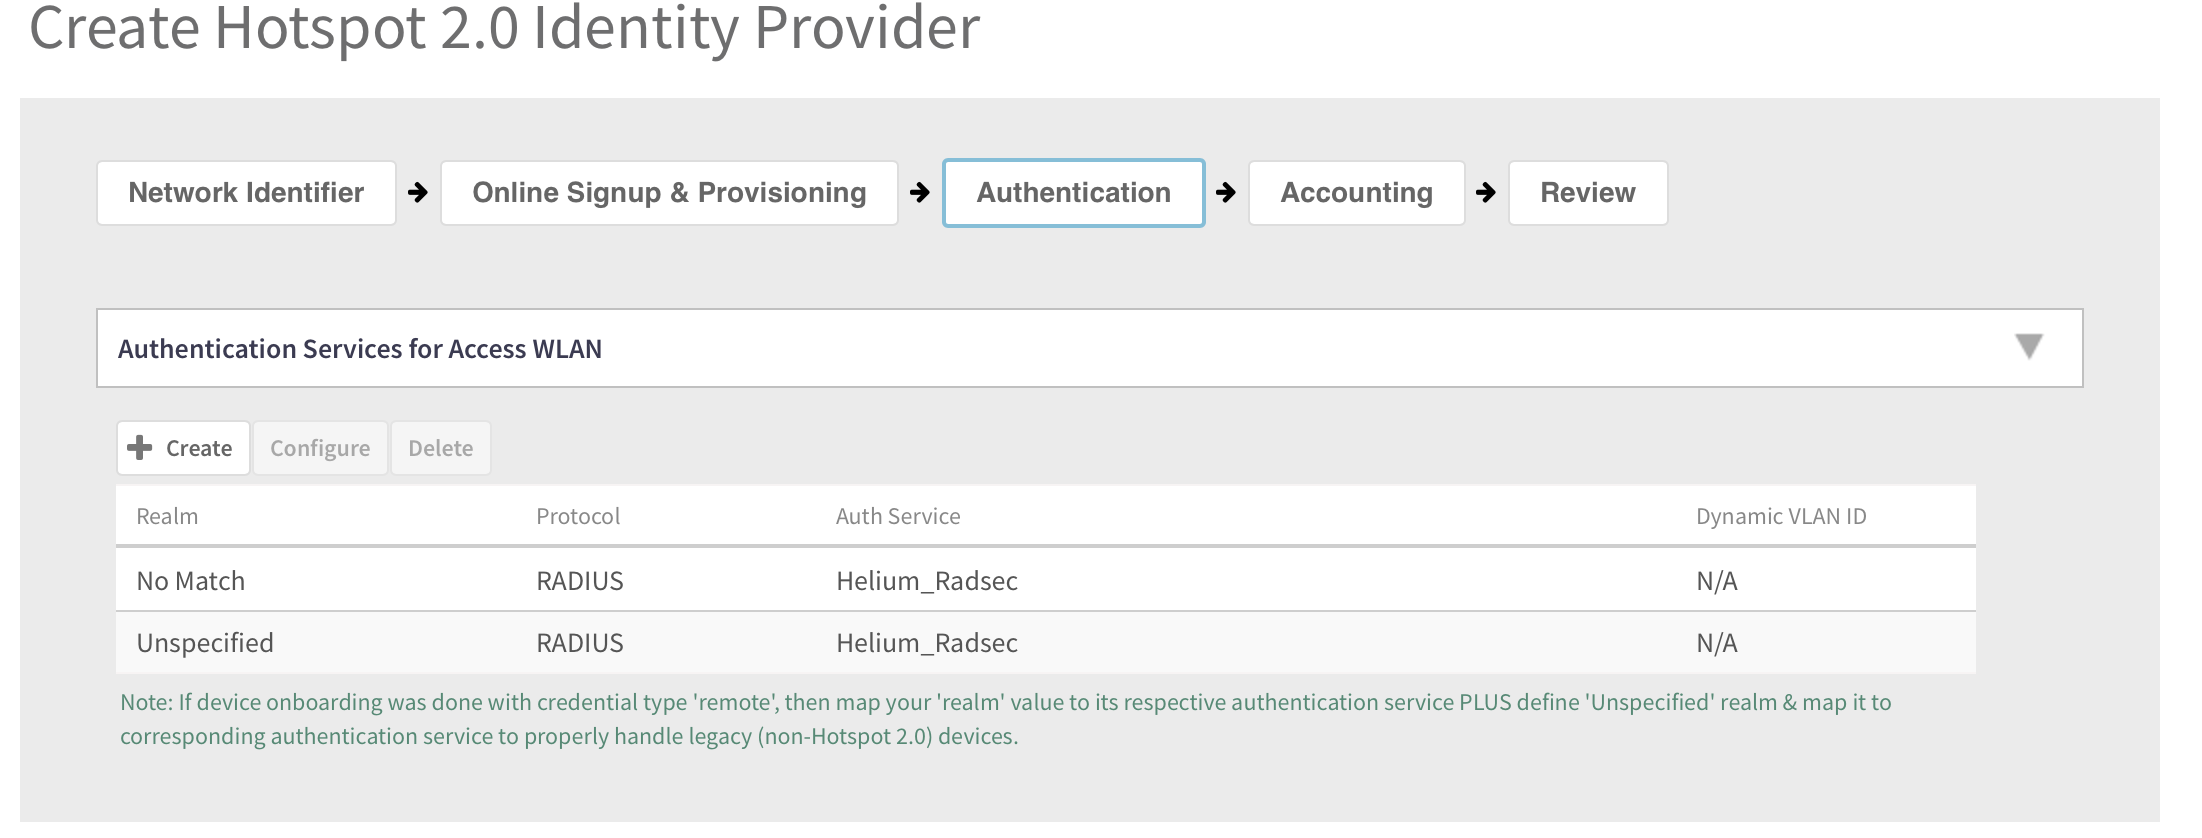
- Repeat these steps for Accounting for both no-match and unspecified:
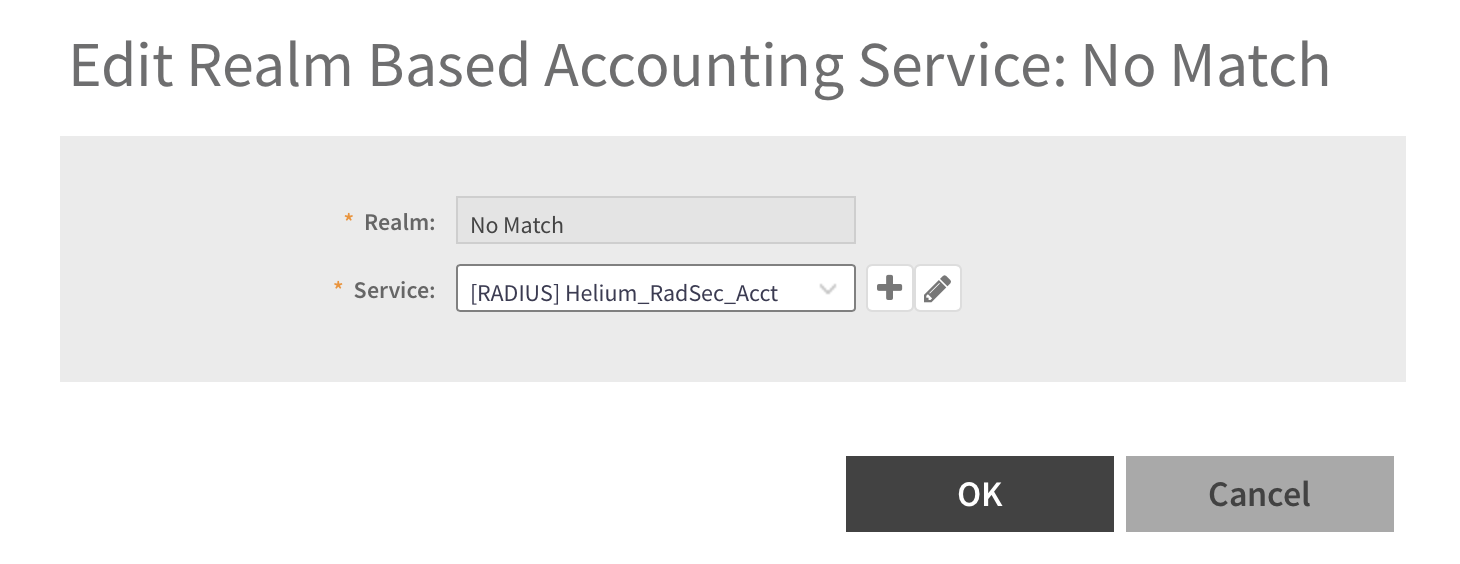
- Config should match this screen
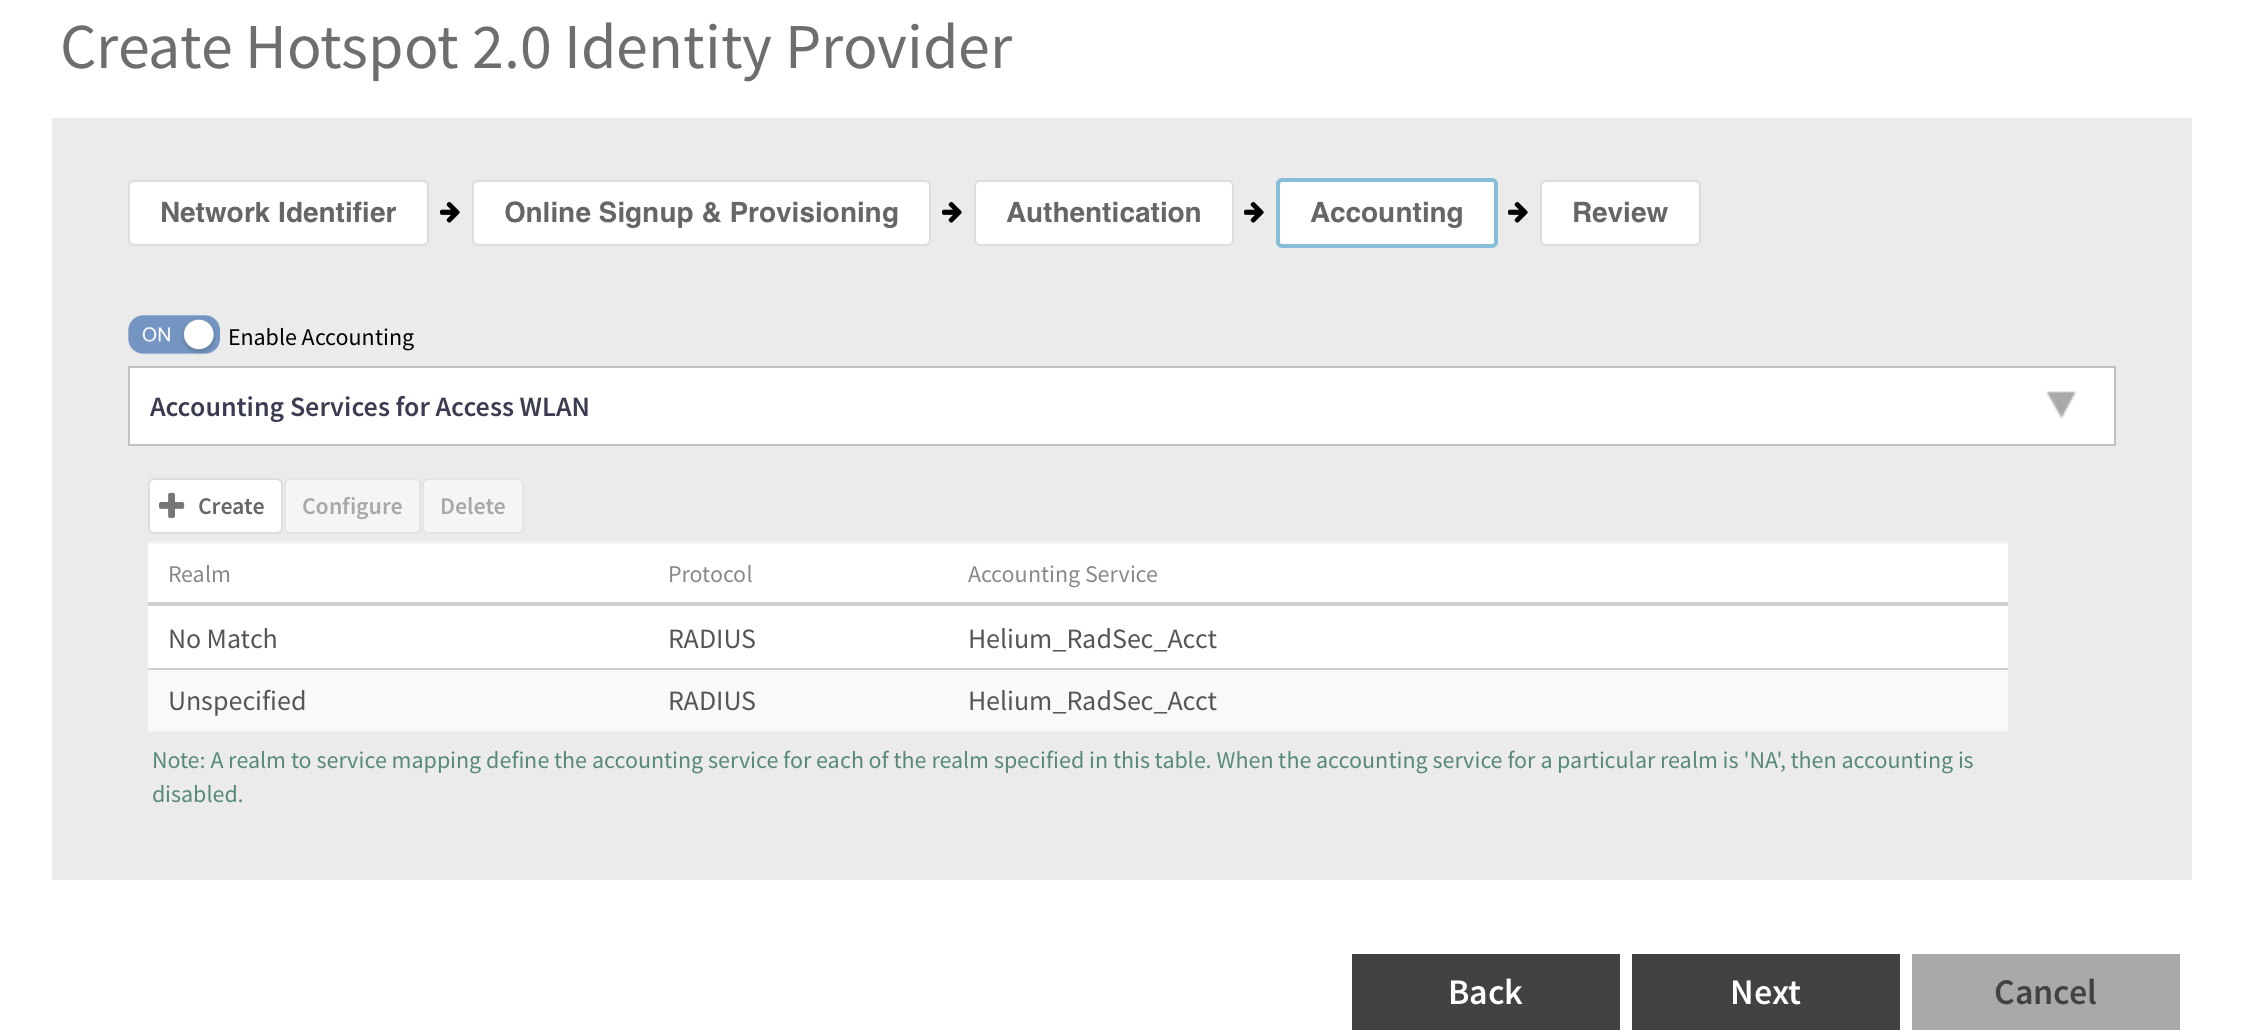
- Review and make sure it matches below
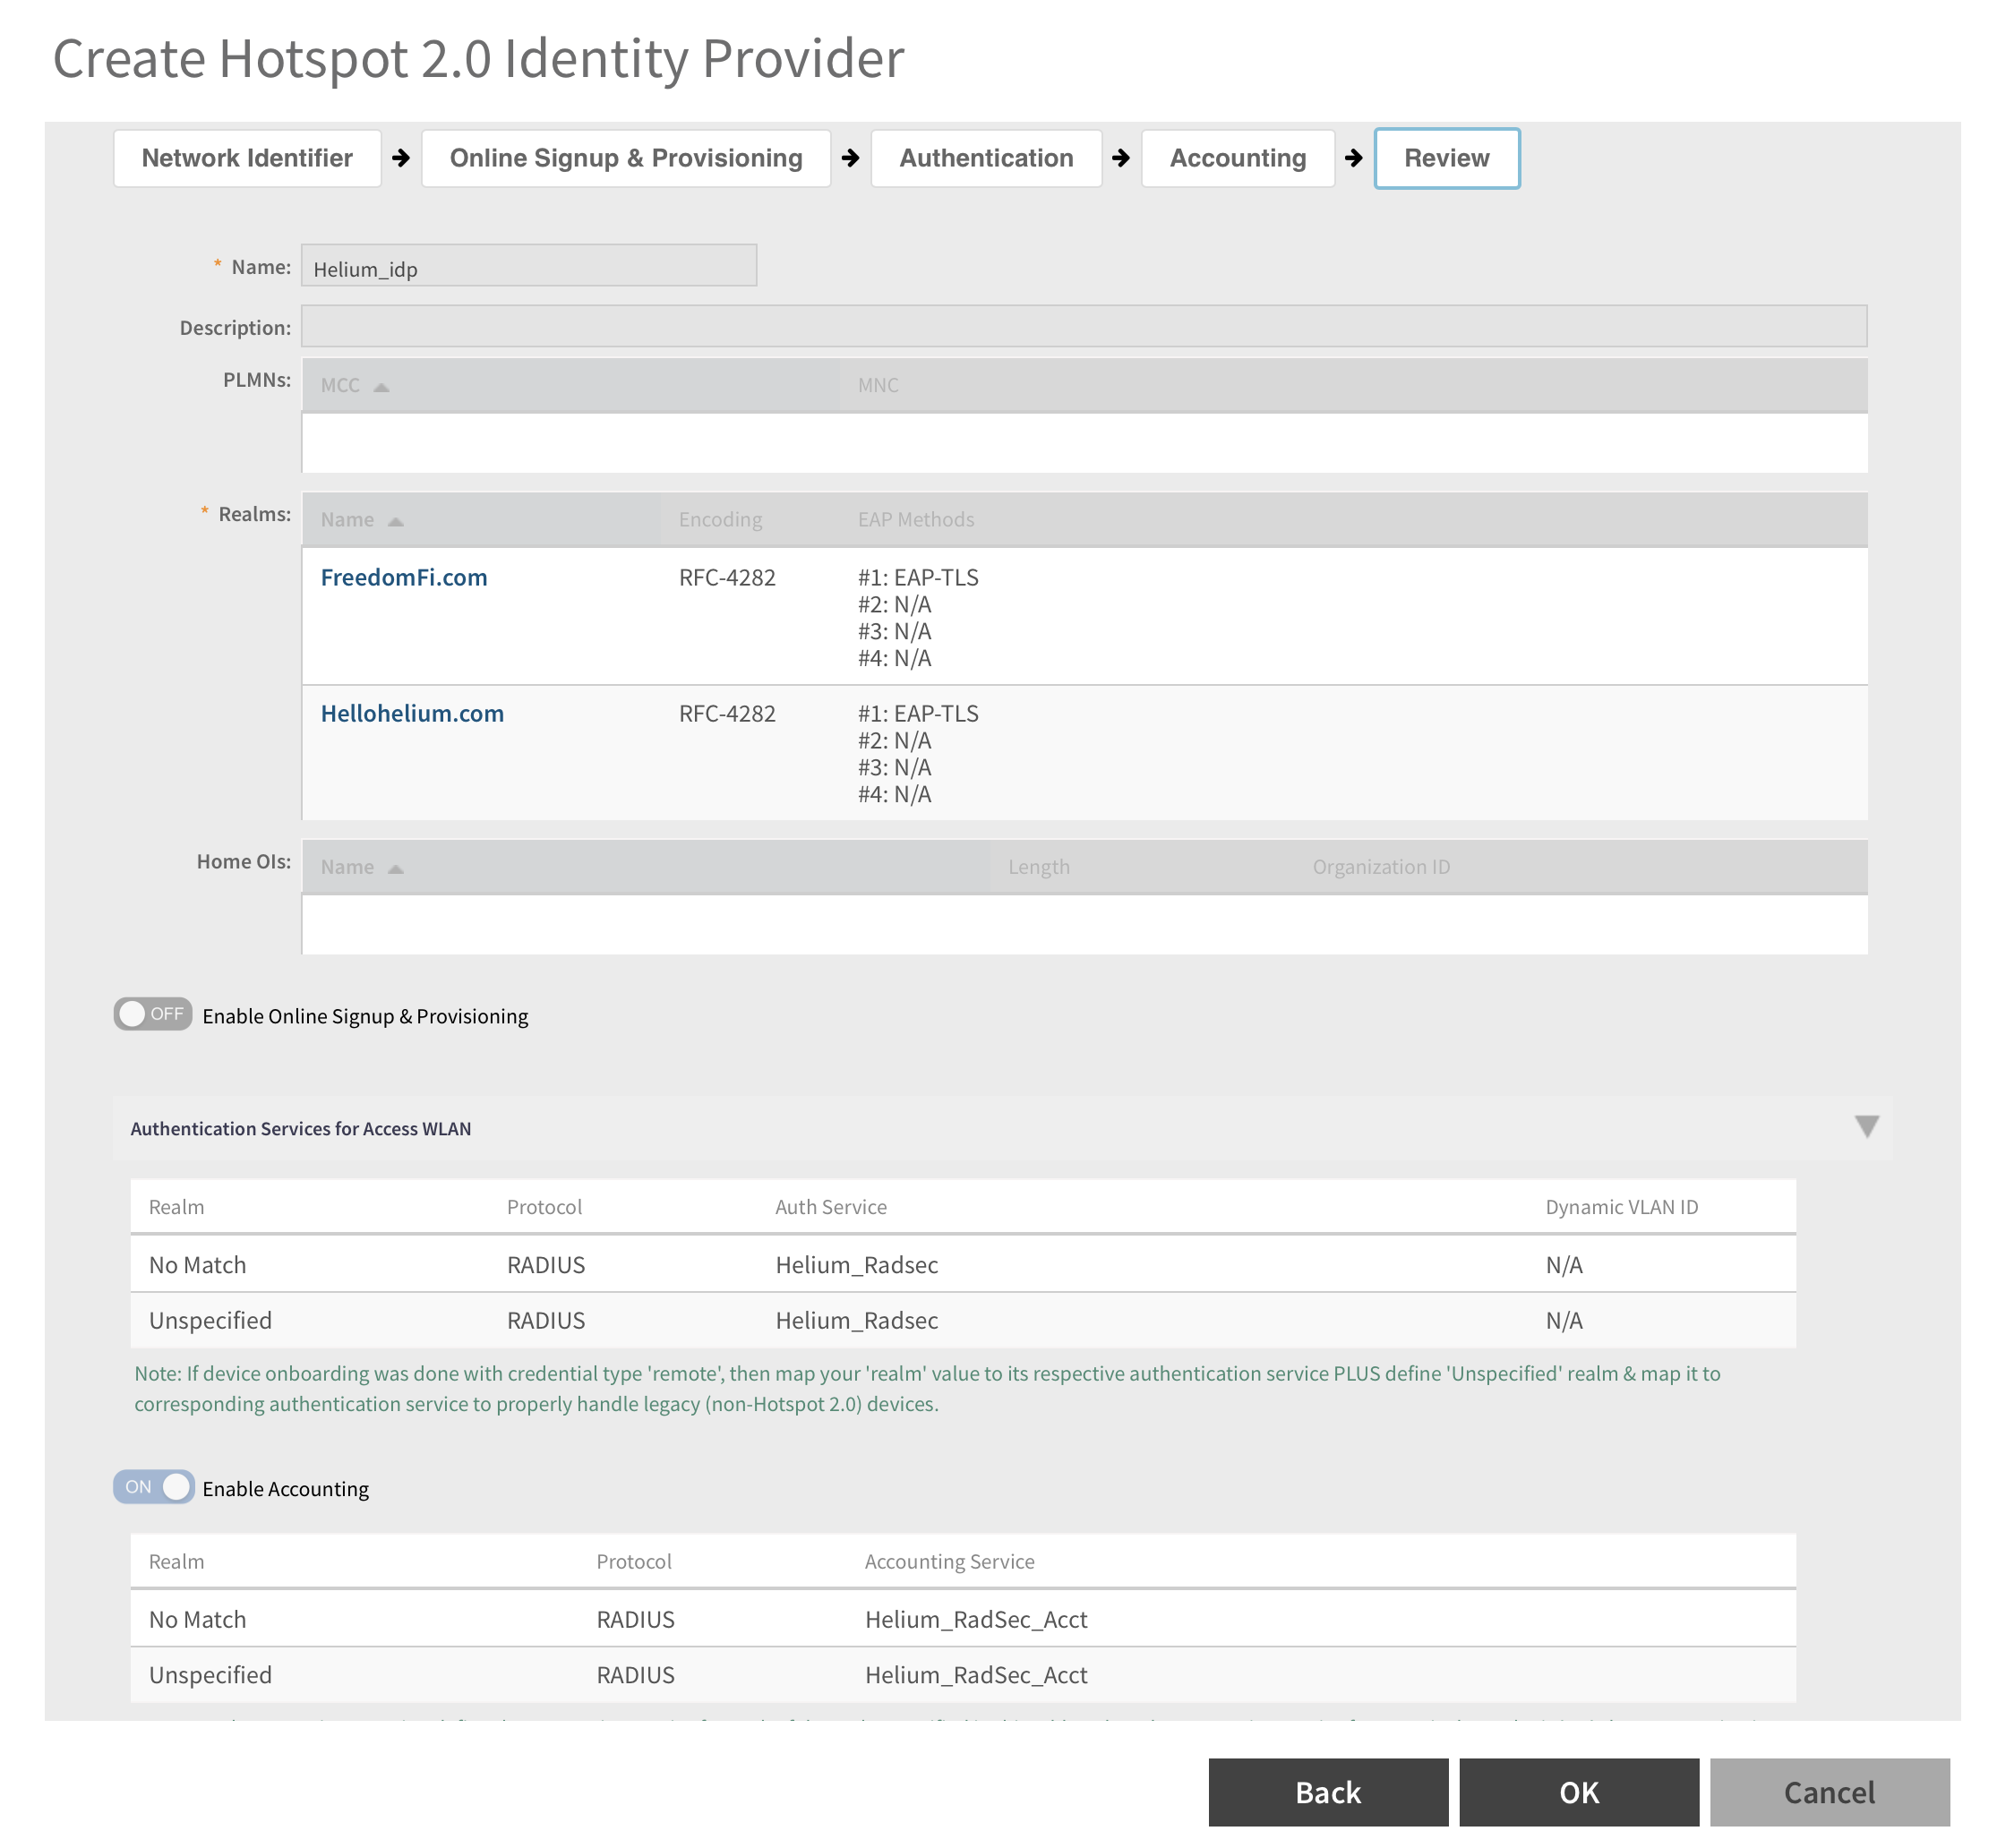
- Click OK.
Build a new SSID
- Click on Network>Wireless LANS
- Select your Zone
- Lick on Create
- Name Helium
- Select Authentication Type to be Hotspot2.0 Access
- Under Encryption for Method Choose WPA3
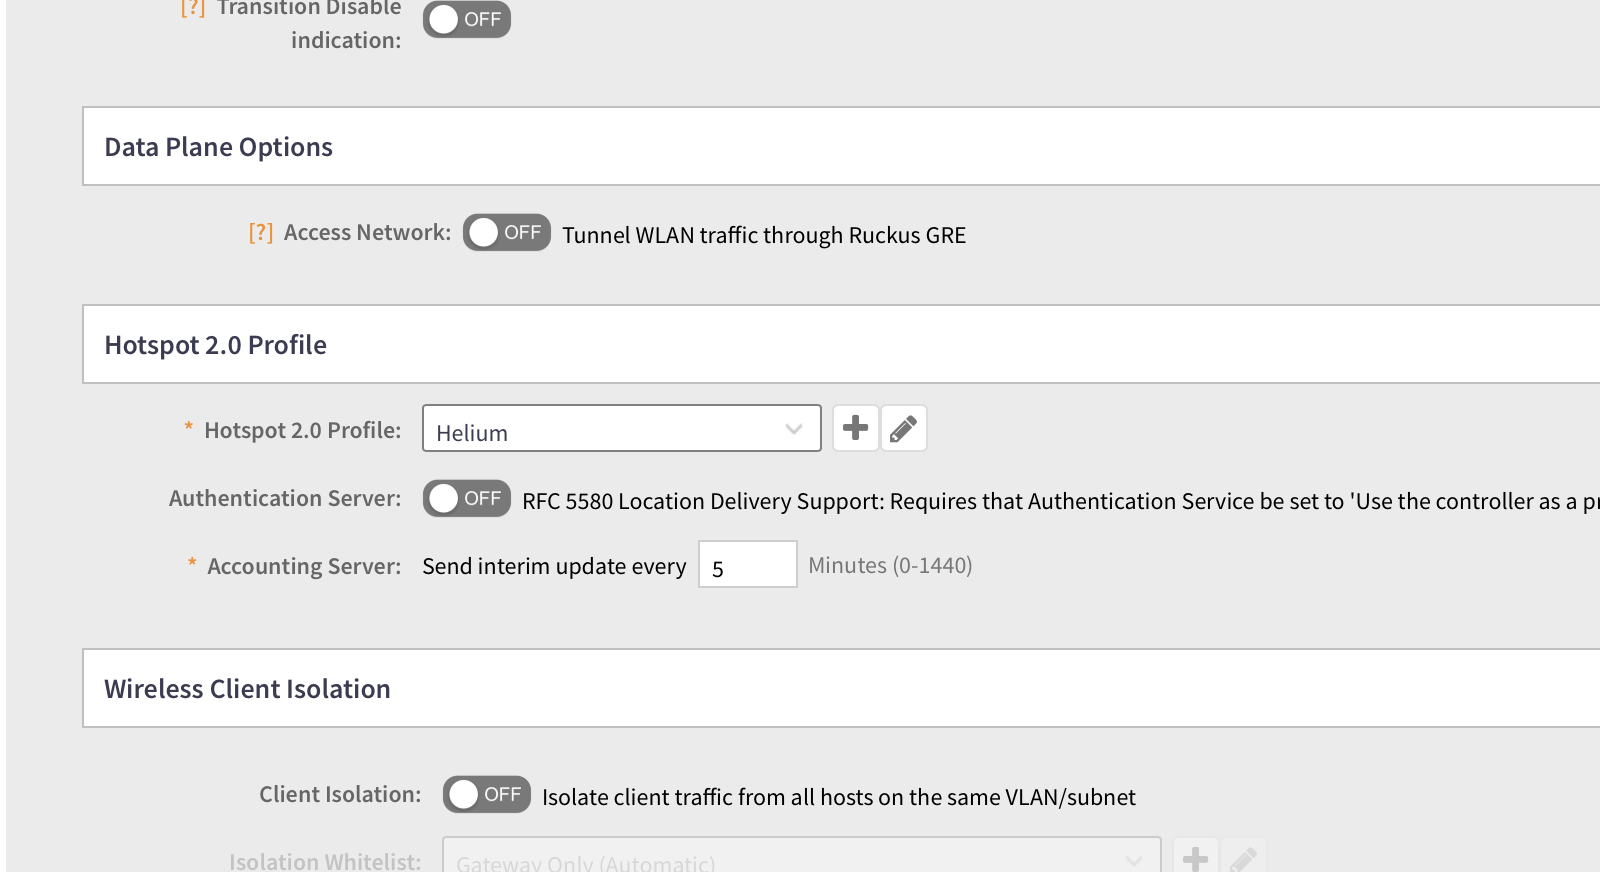
- Under Hotspots 2.0 Profile in Hotspot 2.0 profile click +
- For Name enter Helium
- For Operator select Helium_operator
- For IDP select Helium_IDP click +Add
- Advanced
- Set Access Network Type to Chargeable Public Network
- Select IPv4 Double NATed private address (or applicable to your network)

- Click OK and you should see configuration like the image below.
- Under RADIUS Options
- NAS-ID -> User-Defined > enter your NAS-ID per Helium onboarding spreadsheet.
- For Called Station ID set to AP MAC
- Enable the toggle for Single Session ID accounting
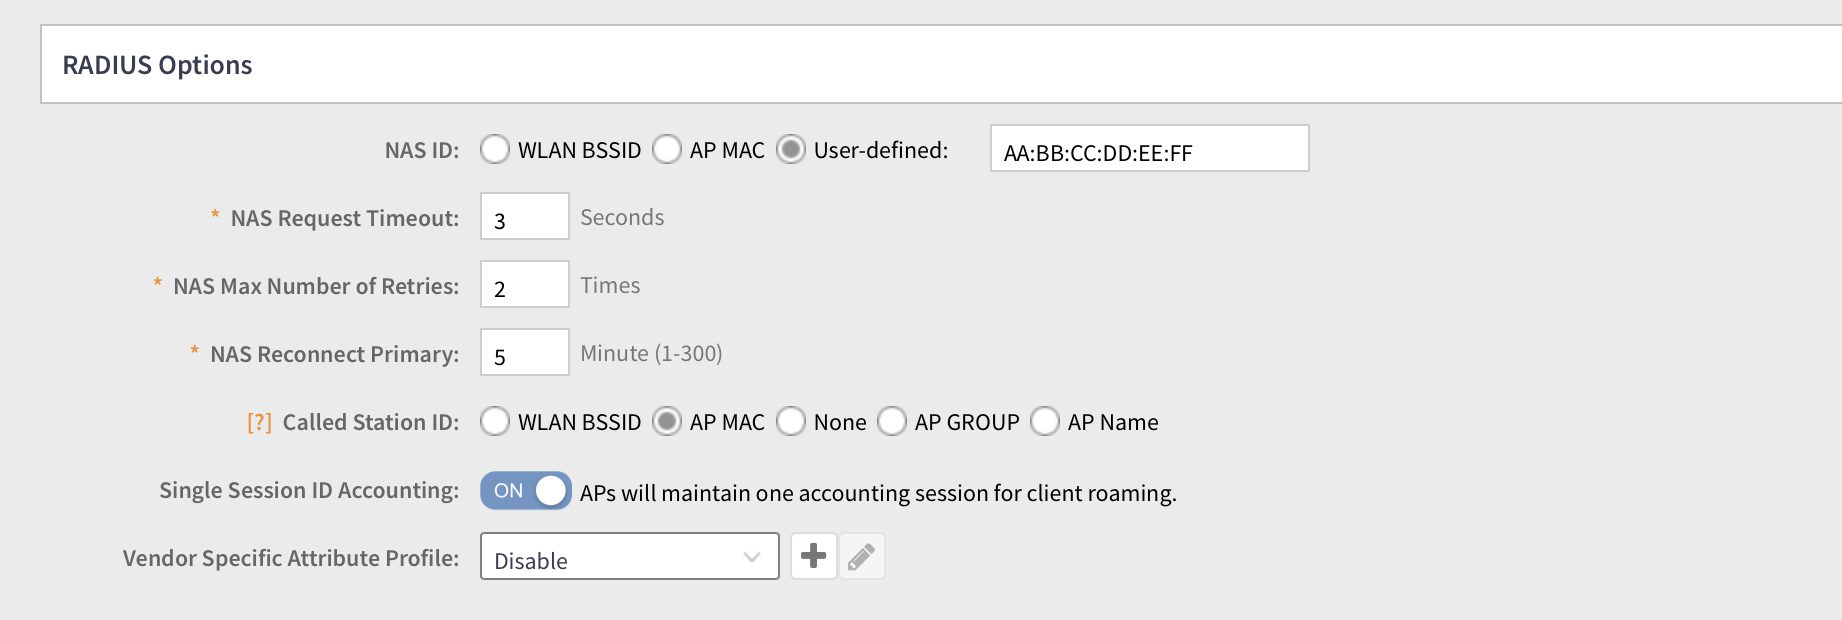
- Click OK