Add Device to ChirpStack via gRPC
ChirpStack offers a gRPC API to facilitate interactions with ChirpStack such as creating device profiles, applications, and devices. Additionally, ChirpStack provides SDKs in Go, Python, JavaScript, and Rust for interacting with the gRPC API. Please refer to the protocol documentation for information regarding the gRPC API specification offered by ChirpStack.
Overview
This guide, outlined by the five step process below, demonstrates how to add a device to ChirpStack via the gRPC API.
- Create an API key using the ChirpStack console
- Identify the tenant ID using the ChirpStack console
- Create a Device Profile via the gRPC API
- Create an Application via the gRPC API
- Create a Device via the gRPC API
Create an API Key Using the ChirpStack Console
Access ChirpStack Console
To create an API key using the ChirpStack console, first access your ChirpStack instance. The
ChirpStack console UI is accessible at http://<public_ip_address>:8080. If no user has been set,
utilize the default credentials to log in:
Username: admin
Password: admin
Generate an API Key
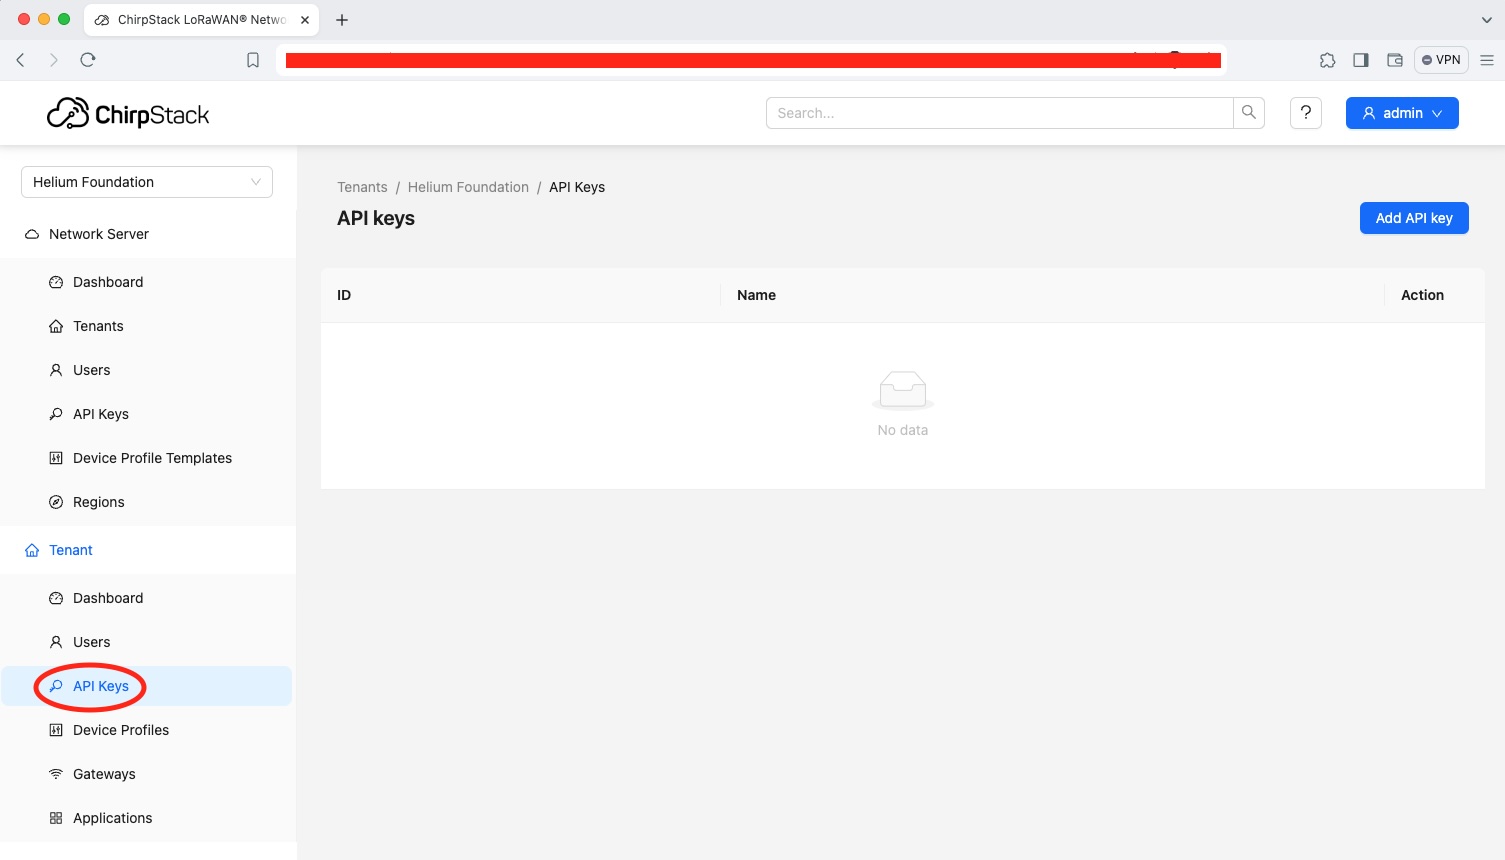
From the dashboard, click on API Keys under the Tenant header on the left side panel.
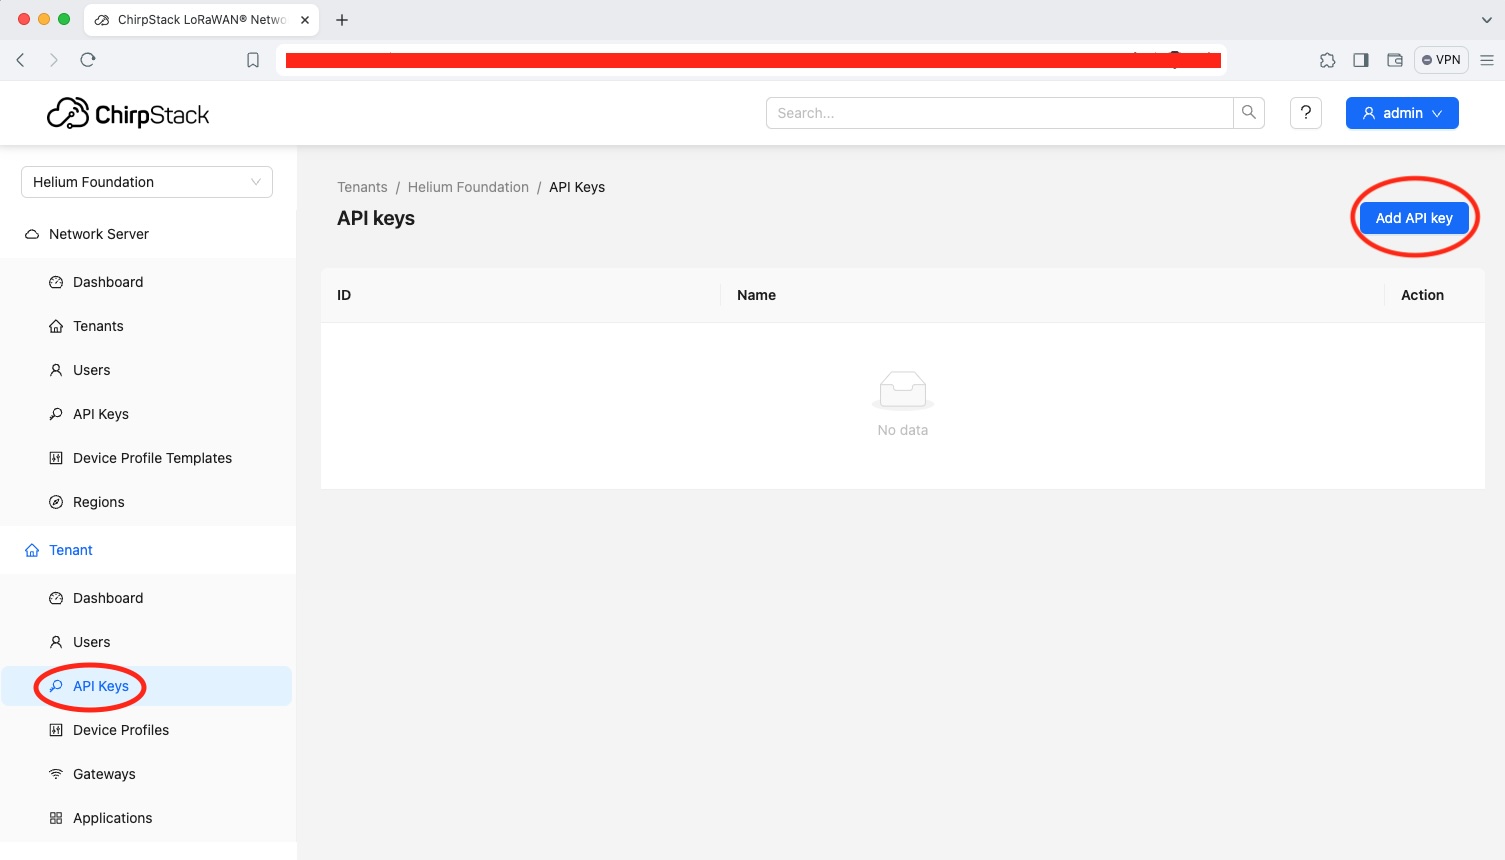
Next, click the on the Add API Key button in the upper right hand portion of the screen.
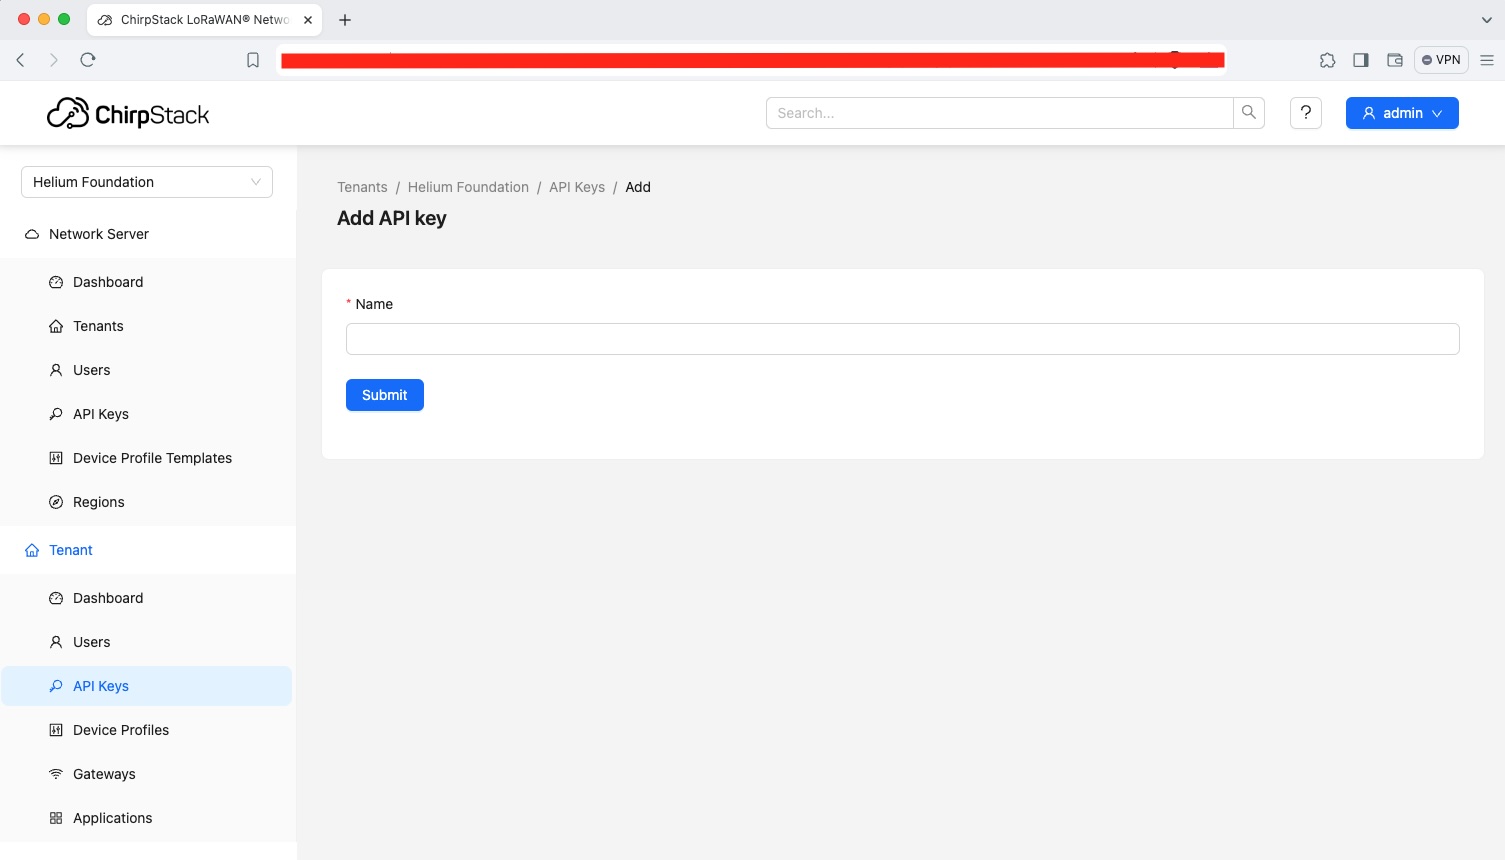
Finally, provide a name for the API key and click Submit.
When complete, take note of the API key as it will not be provided again once you navigate away from the page.
Identify Tenant ID Using the ChirpStack Console
Still using the ChirpStack console, the Tenant ID can be found by found by clicking on Dashboard
under the Tenant header of the left side panel. The Tenant ID will then be found near the top
middle of the tenant dashboard page.
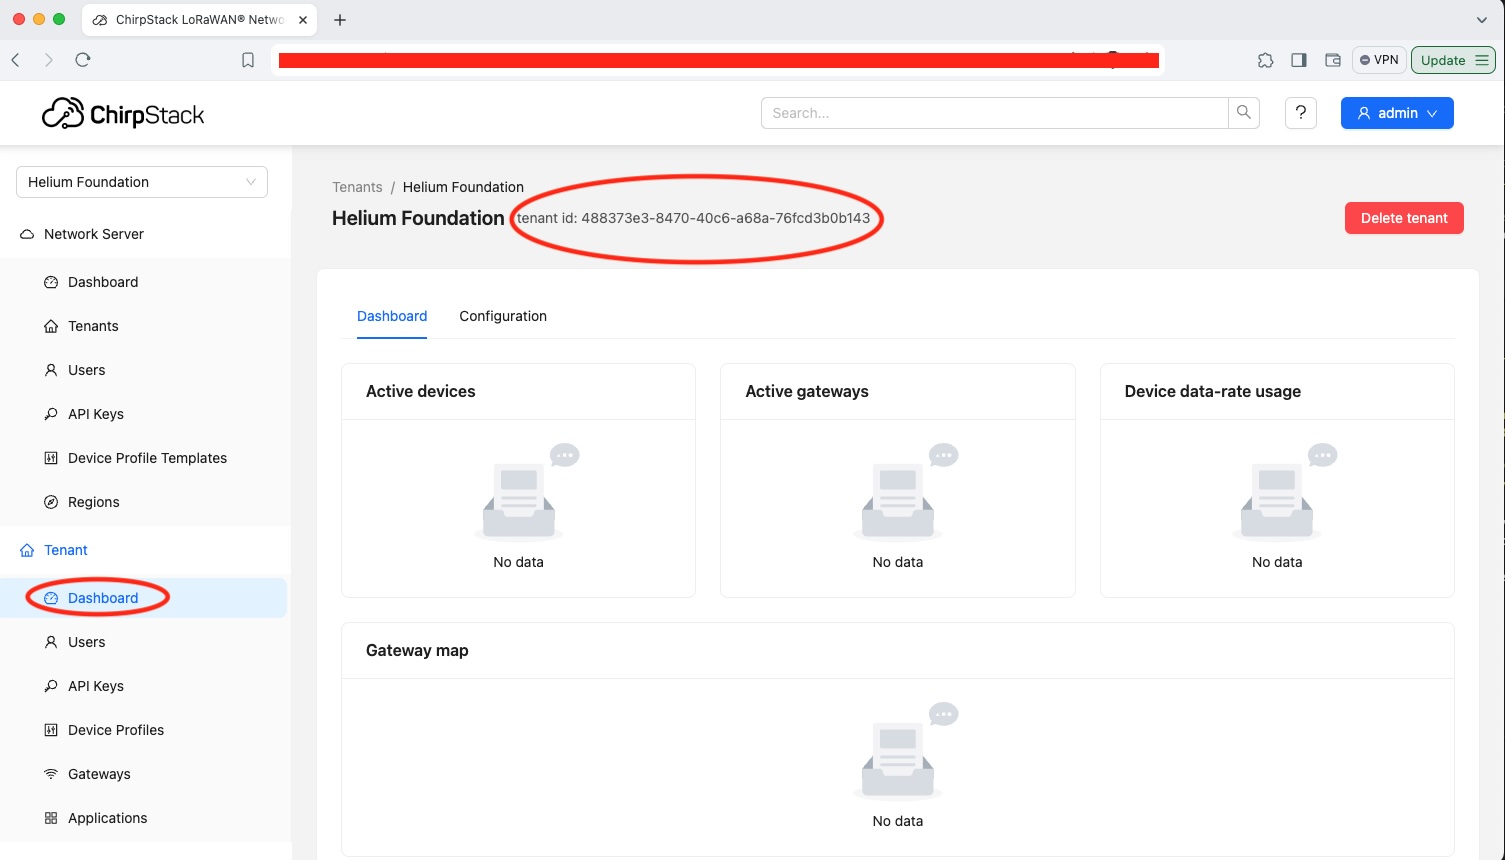
Take note of the Tenant ID as it will be required when using the gRPC API.
Create a Device Profile via the gRPC API
The Node.js file provided below demonstrates how to create a device profile via the ChirpStack gRPC
API using the JavaScript SDK. Please note that <public_ip_address> corresponds to the IP address
of the ChirpStack instance, <your_api_key> corresponds to the API key created through the steps
above, and <your_tenant_id> corresponds to the tenant ID identified in the steps above.
// Required imports
const grpc = require('@grpc/grpc-js');
const deviceProfileGrpc = require('@chirpstack/chirpstack-api/api/device_profile_grpc_pb');
const deviceProfilePb = require('@chirpstack/chirpstack-api/api/device_profile_pb');

// This must point to the ChirpStack gRPC API which is provided by default on port 8080
const server = '<public_ip_address>:8080';

// The API token obtained from the "Create an API key from ChirpStack Console" section above
const apiToken = '<your_api_key>';

// Create the client for the DeviceProfileService
const deviceProfileService = new deviceProfileGrpc.DeviceProfileServiceClient(
  server,
  grpc.credentials.createInsecure(),
);

// Create the Metadata object
const metadata = new grpc.Metadata();
metadata.set('authorization', 'Bearer ' + apiToken);

// Instantiate a DeviceProfile message and provide requisite information
const deviceProfile = new deviceProfilePb.DeviceProfile();
deviceProfile.setTenantId('<your_tenant_id>');
deviceProfile.setName('<device_profile_name>');
deviceProfile.setRegion(2); // 2 = US915
deviceProfile.setMacVersion(3); // 3 = LoRaWAN 1.0.3
deviceProfile.setRegParamsRevision(0); // 0 = A
deviceProfile.setAdrAlgorithmId('default'); // default = Default ADR algorithm (LoRa only)
deviceProfile.setUplinkInterval(3600);
deviceProfile.setSupportsOtaa(true);

// Instantiate a CreateDeviceProfileRequest message and provide the DeviceProfile
const createDeviceProfileRequest = new deviceProfilePb.CreateDeviceProfileRequest();
createDeviceProfileRequest.setDeviceProfile(deviceProfile);

// Use the deviceProfileService client to invoke the create method, providing
// the CreateDeviceProfileRequest and Metadata as arguments
deviceProfileService.create(createDeviceProfileRequest, metadata, (err, resp) => {
  if (err !== null) {
    console.log(err);
    return;
  }

  console.log(resp.toObject());
});
Create an Application via the gRPC API
The Node.js file provided below demonstrates how to create an application via the ChirpStack gRPC
API using the JavaScript SDK. Similar to the file above for creating a device profile, please note
that <public_ip_address> corresponds to the IP address of the ChirpStack instance,
<your_api_key> corresponds to the API key created through the steps above, and <your_tenant_id>
corresponds to the tenant ID identified in the steps above.
// Required imports
const grpc = require('@grpc/grpc-js');
const applicationGrpc = require('@chirpstack/chirpstack-api/api/application_grpc_pb');
const applicationPb = require('@chirpstack/chirpstack-api/api/application_pb');

// This must point to the ChirpStack gRPC API which is provided by default on port 8080
const server = '<public_ip_address>:8080';

// The API token obtained from the "Create an API key from ChirpStack Console" section above
const apiToken = '<your_api_key>';

// Create the client for the ApplicationServiceClient
const applicationService = new applicationGrpc.ApplicationServiceClient(
  server,
  grpc.credentials.createInsecure(),
);

// Create the Metadata object
const metadata = new grpc.Metadata();
metadata.set('authorization', 'Bearer ' + apiToken);

// Instantiate an Application message and provide requisite information
const application = new applicationPb.Application();
application.setTenantId('<your_tenant_id>');
application.setName('<application_name>');

// Instantiate a CreateApplicationRequest message and provide the Application
const createApplicationRequest = new applicationPb.CreateApplicationRequest();
createApplicationRequest.setApplication(application);

// Use the applicationService client to invoke the create method, providing
// the CreateApplicationRequest and Metadata as arguments
applicationService.create(createApplicationRequest, metadata, (err, resp) => {
  if (err !== null) {
    console.log(err);
    return;
  }

  console.log(resp.toObject());
});
Create a Device via the gRPC API
The Node.js file provided below demonstrates how to create a device via the ChirpStack gRPC API
using the JavaScript SDK. Similar to the files above, please note that <public_ip_address>
corresponds to the IP address of the ChirpStack instance, <your_api_key> corresponds to the API
key created through the steps above, and <your_tenant_id> corresponds to the tenant ID identified
in the steps above.
Additionally, <application_id> and <device_profile_id> correspond to the application and device
profile created via the files above.
Lastly, <dev_eui> and <join_eui> are unique identifiers for the device being added to
ChirpStack.
// Required imports
const grpc = require('@grpc/grpc-js');
const deviceGrpc = require('@chirpstack/chirpstack-api/api/device_grpc_pb');
const devicePb = require('@chirpstack/chirpstack-api/api/device_pb');

// This must point to the ChirpStack gRPC API which is provided by default on port 8080
const server = '<public_ip_address>:8080';

// The API token obtained from the "Create an API key from ChirpStack Console" section above
const apiToken = '<your_api_key>';

// Create the client for the DeviceServiceClient.
const deviceService = new deviceGrpc.DeviceServiceClient(
  server,
  grpc.credentials.createInsecure()
);

// Create the Metadata object.
const metadata = new grpc.Metadata();
metadata.set('authorization', 'Bearer ' + apiToken);

// Instantiate a Device message and provide requisite information
const device = new devicePb.Device();
device.setApplicationId('<application_id>');
device.setDeviceProfileId('<device_profile_id>');
device.setName('<device_name>');
device.setDevEui('<dev_eui>');
device.setJoinEui('<join_eui>');

// Instantiate a CreateDeviceRequest message and provide the Device
const createDeviceRequest = new devicePb.CreateDeviceRequest();
createDeviceRequest.setDevice(device);

// Use the createDeviceRequest client to invoke the create method, providing
// the CreateDeviceProfileRequest and Metadata as arguments
deviceService.create(createDeviceRequest, metadata, (err, resp) => {
  if (err !== null) {
    console.log(err);
    return;
  }

  console.log(resp.toObject());
});