LHT65
Dragino LHT65
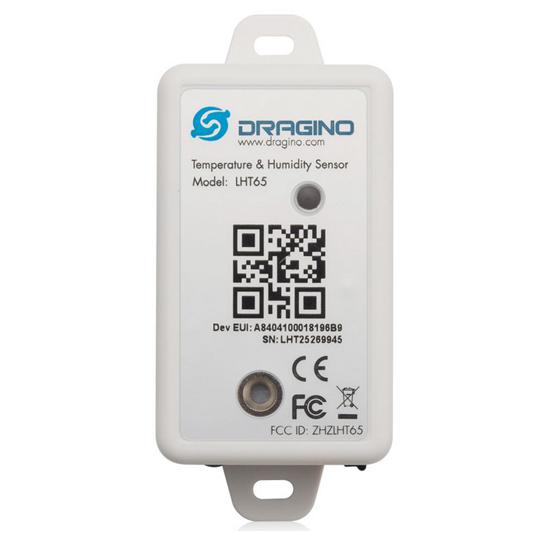
The Dragino LHT65 is a multi-sensor device with a built-in temperature and humidity sensor and an external sensor connector that supports temperature, soil moisture, tilting, and illumination sensors. The device includes a non-chargeable battery that can last for more than 10 years.
Resources
Specifications
LoRaWAN device type:
- Class A end-device
Sensors:
- humidity
- temperature
Dimensions:
Device:
- width: 70 mm
- length: 135 mm
- height: 30 mm
Weight:
- 105 grams
Battery:
- type: 2400 mAh non-chargeable
- replaceable: True (Battery Replacement Kit: LHT65-BAT-CA; includes: LHT65 battery + Enclosure + Sticker without Dev EUI.)
Add Device to Console
To start, you'll need to add your device to Console. You should have been provided with a DevEUI, AppEUI, and AppKey inside the device packaging. Follow our quick start for instructions on how to add a new device to Console.
Join Device to Network
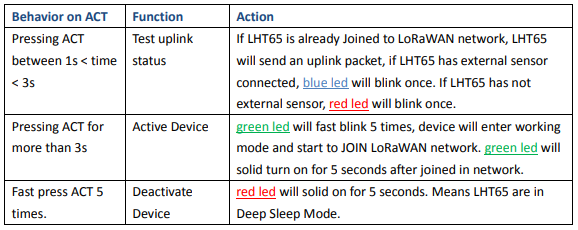
Your device will be in deep sleep mode when you receive it. To activate the device and place it in a normal operating state, hold down the ACT button for three seconds until you see the LED blink green five times quickly. The operating mode table is shown below for reference.
The device should now begin attempting to join the Network. Within a minute or two, you should see an activation event on the Console device page, as shown below. The device LED will also show solid green for five seconds after it has joined.
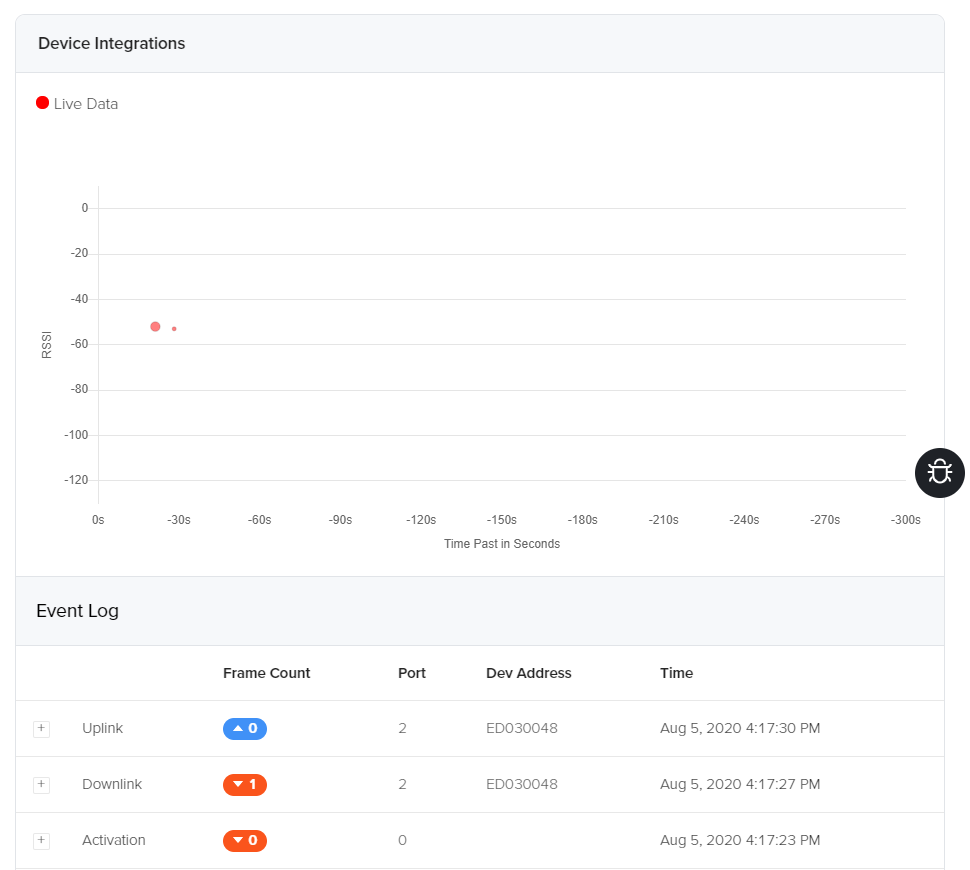
Once you have seen an event similar to above, your device is now joined to the Network and will send its sensor values every ten minutes by default. The transmit frequency and many more settings can be changed; please refer to the manual for instructions.
myDevices Cayenne
If you would like to easily view your device's data on a web or mobile dashboard for free, this the device is supported out of the box by myDevices Cayenne via the integration on Console.
To add the LHT65 to myDevices Cayenne, you do not need to set up a Decode script as described below. Cayenne takes the encoded payload directly and parses the temperature and other data elements from it.
Be careful to select Helium when adding the LHT65 to Cayenne. As described here, select
- "Add new..."
- "Device/Widget"
- "LoRa"
- "Helium"
- select Dragino LHT65
On the Helium Console, select Flow and directly connect the LHT65 Device to the Cayenne
Integration. Do not use a Decoder.
Decode Device Payload
When this device transmits its data, it does so space-efficiently by packing the bytes of data in a specific way so that no space is wasted; learn more about this in our short primer. This device's manufacturer, Dragino, uses their own encoding scheme to define which bytes hold which piece of data. Below is a table taken from the manual showing the size and location of each piece of data.

If you would like to decode the device payload to view it in Console or send it to your own application, this section will show you how. We'll use a Console Function Decoder to unpack the device payload into a human-readable form; you can learn more about Functions in general here.
Create Function Decoder
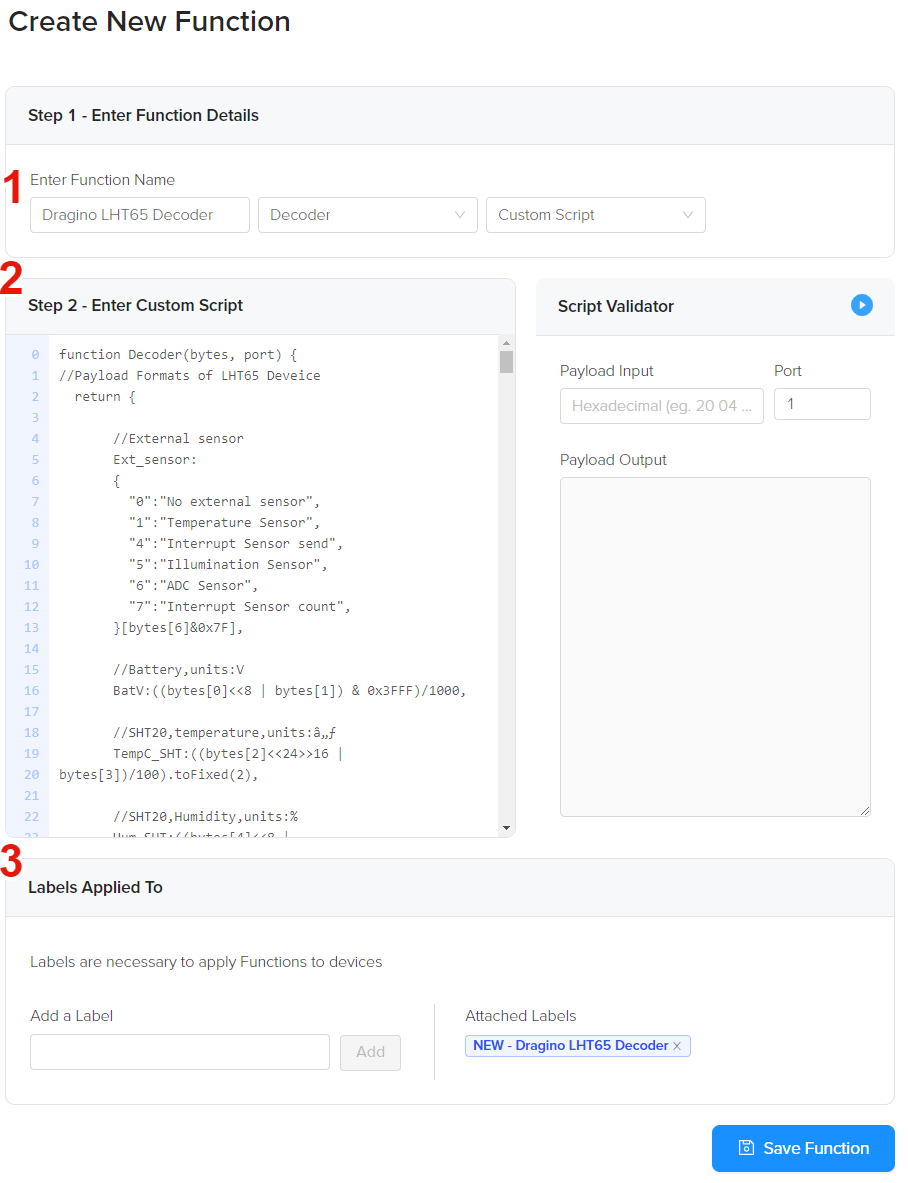
Let's begin by creating a new custom function decoder. First, enter a name, select decoder for function type, and finally, custom script since we'll input our own script. Next, remove the template custom script, and copy and paste the entire script found here into the script editor. Last, create a label that we'll use to attach this decoder to the device with.
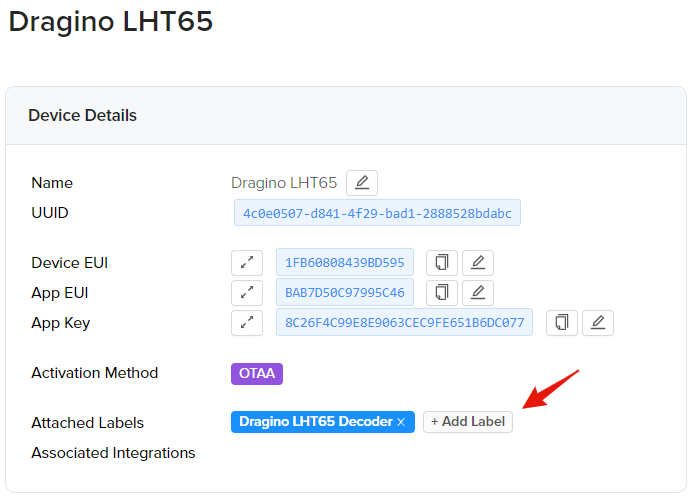
Attaching Function Decoder
Next, navigate to the device page and attach the label we just created for the function decoder as shown below.
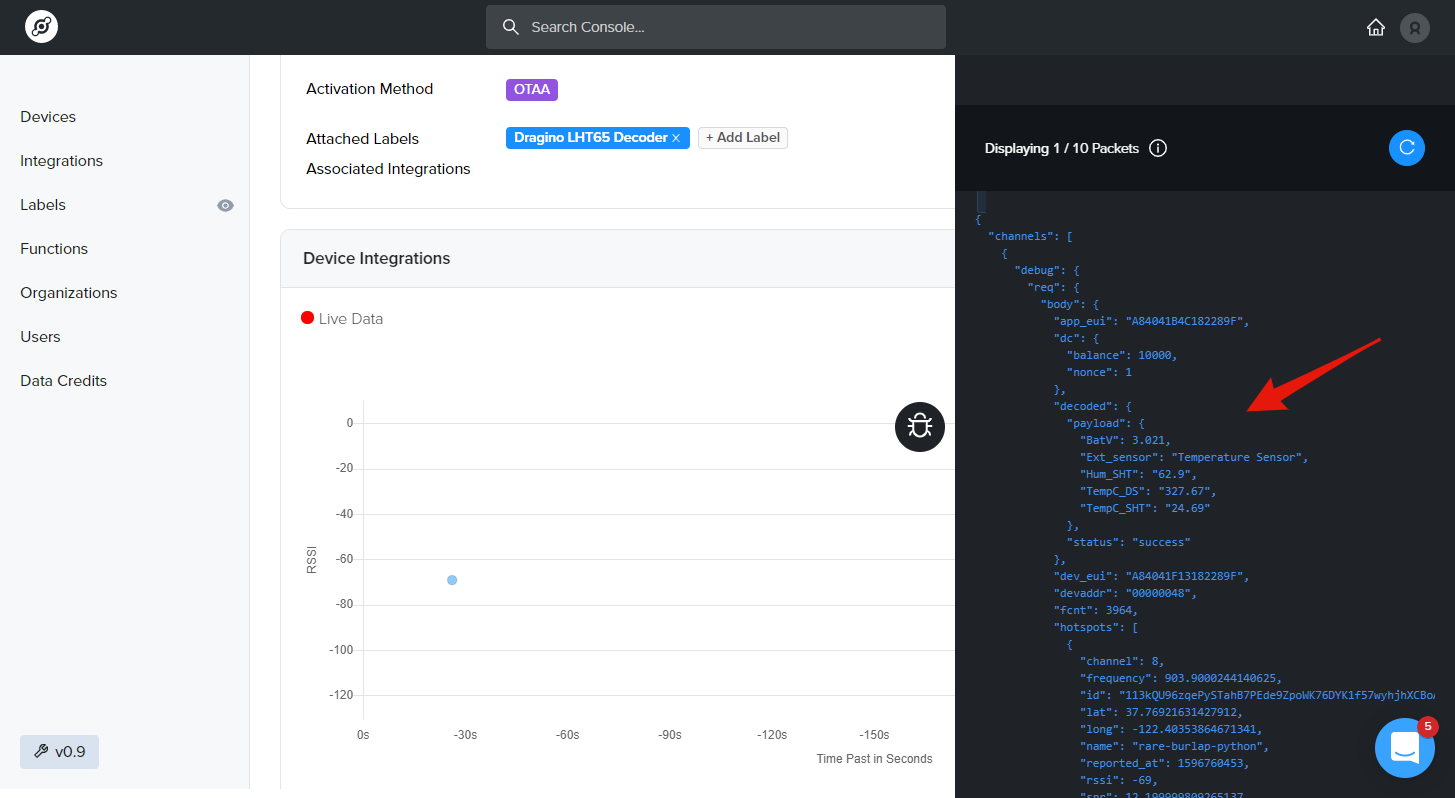
Viewing Decoded Device Data
Once you have attached the decoder, we can now open the Debug window to view the decoded device payload in the received uplink. You can learn more about the Debug tool here. To open the Debug window, click on the bug icon on the right side of the device page. Once you open the Debug window, you can wait for the next packet to transmit or force a manual transmission by holding down the ACT button for more than one second and less than three. You'll see the LED turn green while you hold it down, and then it should turn red briefly after release. You should see the uplink message with the decoded fields below.
Sending Device Payload to Your Application
To learn more about how to send the device data payload to your own application, check out the Console integrations here.