Victor Trap V450 & V460
Victor Trap V450 & V460
Self Provisioning Guide for Victor Connected Rodent Control Devices.
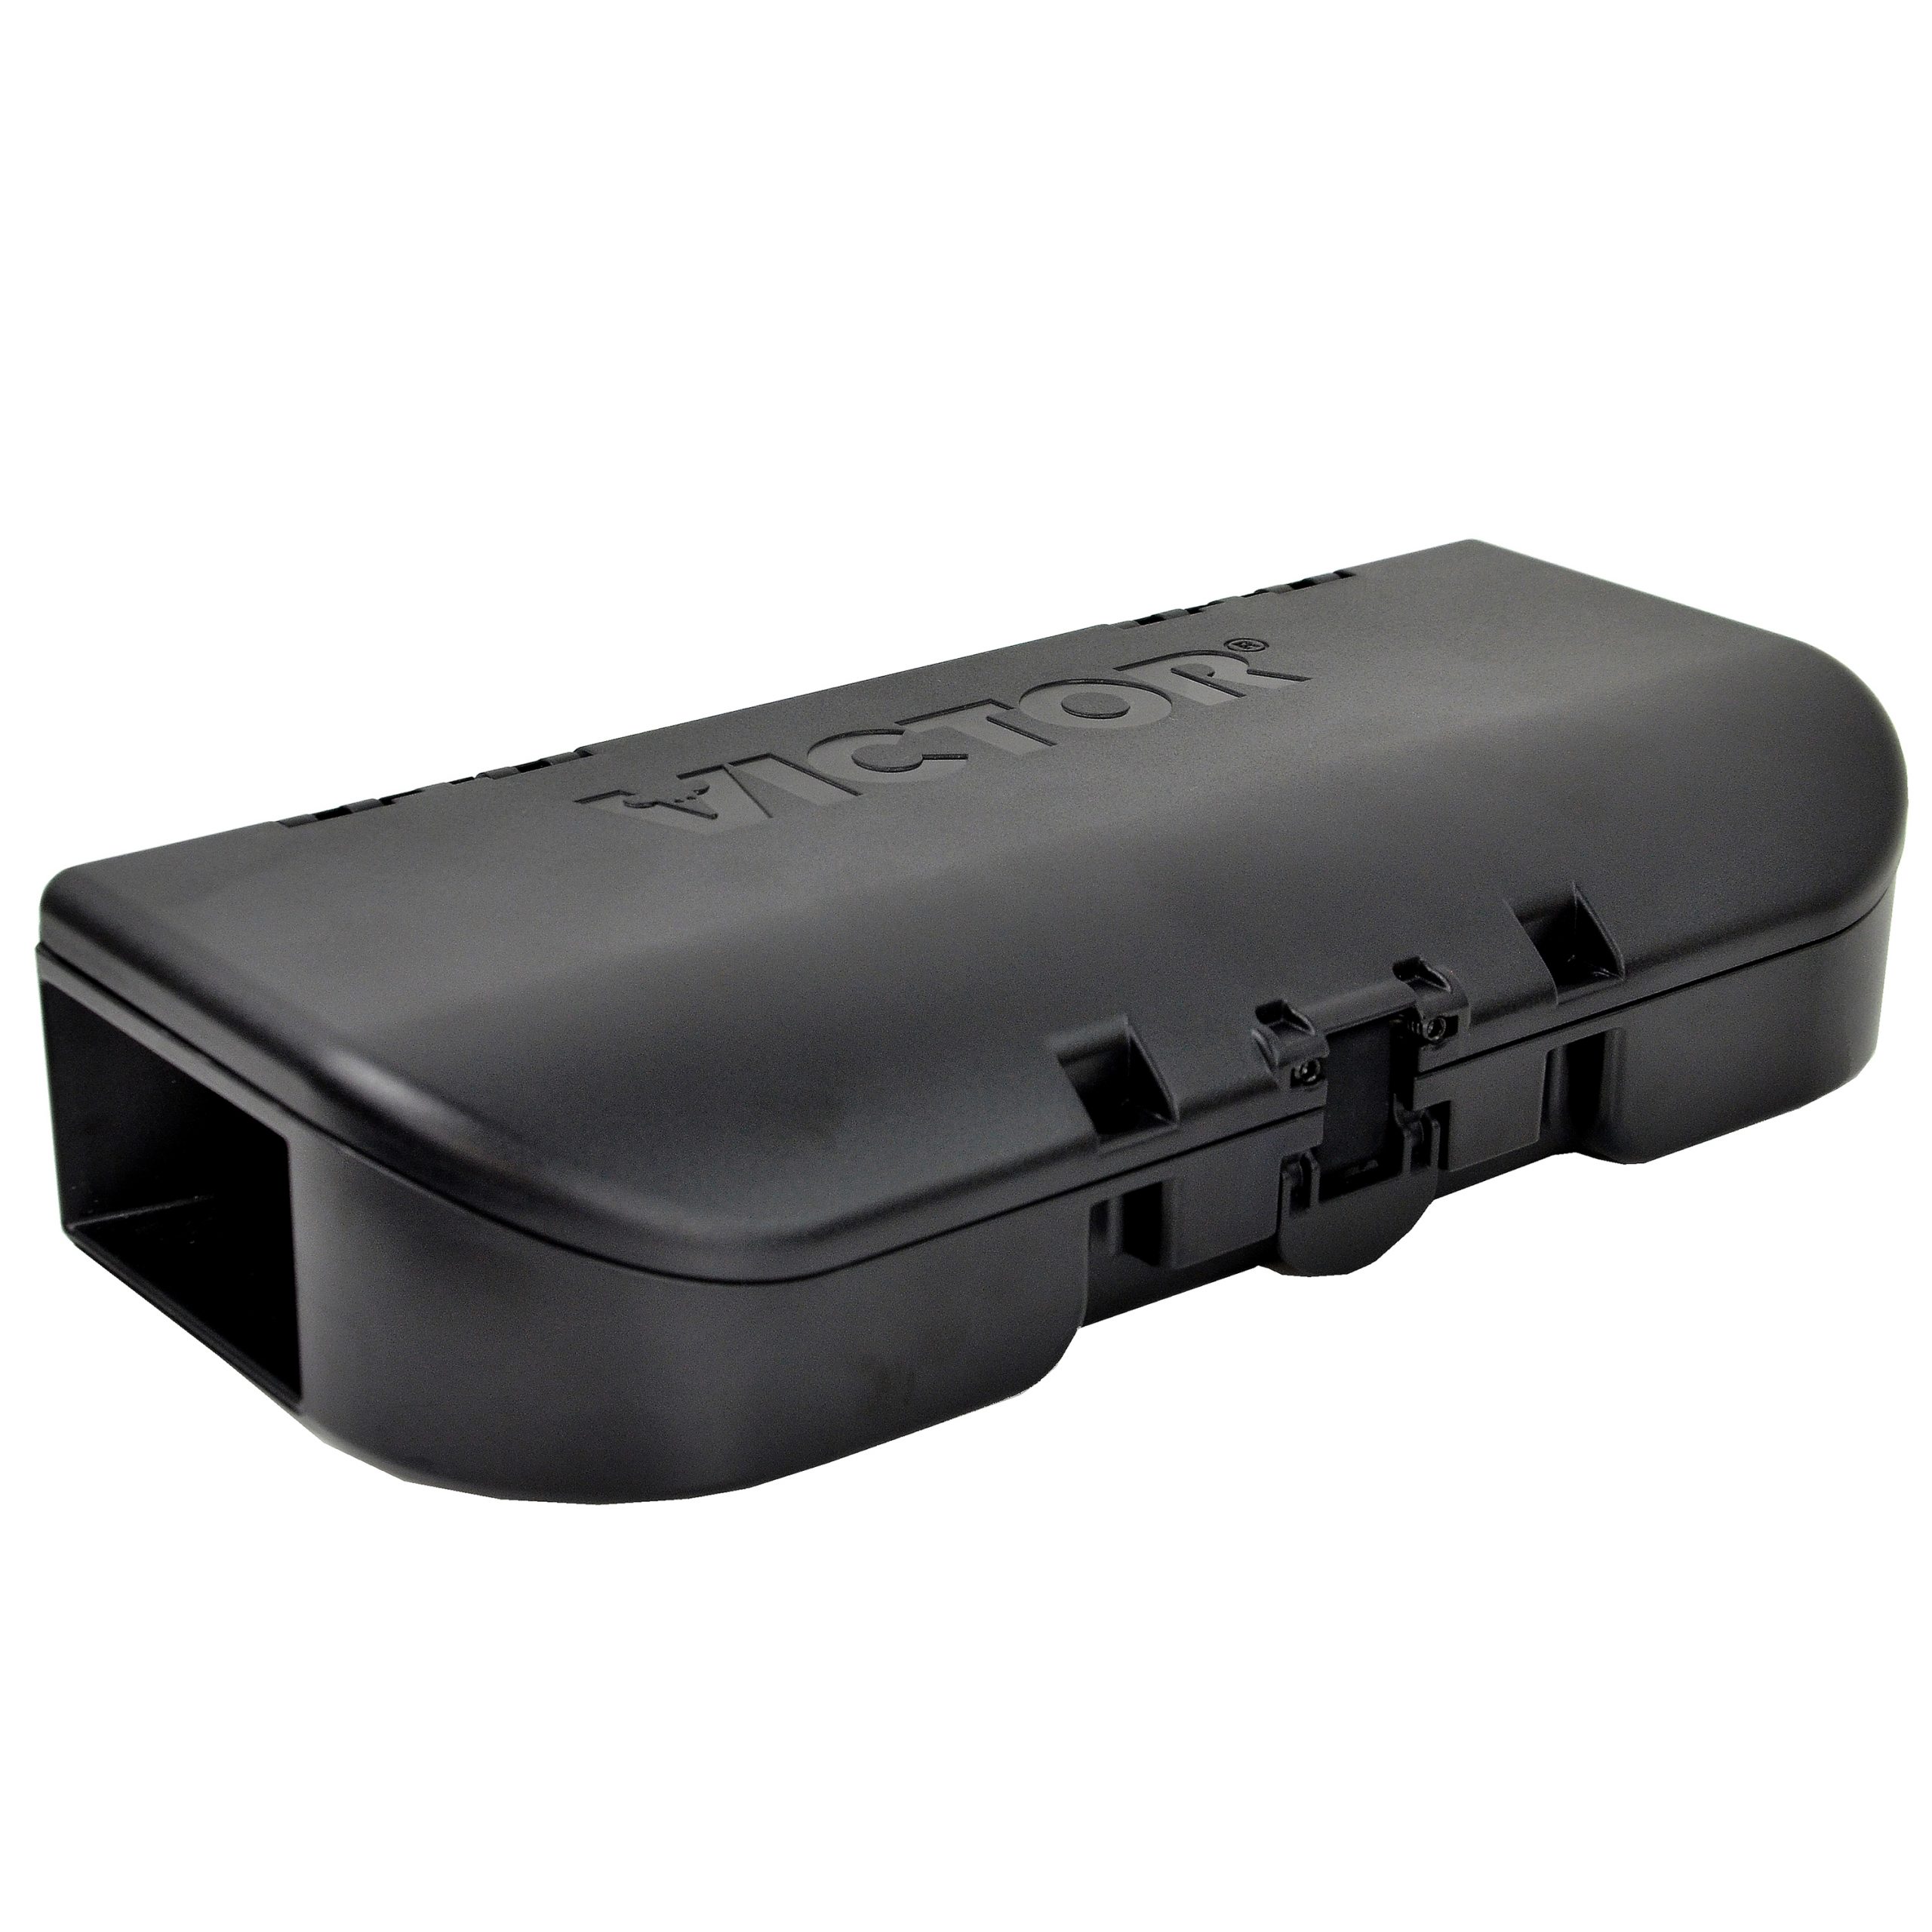
The V450 is the "Electronic Mouse Trap", while the V460 is a significantly larger "Electronic Rat Trap". The only difference is the longer & wider tunnel and rail spacing. ("Trap" is a euphemism here. It does electrocute the rodents that enter the tunnel.) Both units share the same installation and operation.
If you need any help provisioning this sensor, please join the #console channel on
the Helium Discord Server.
Resources
Add device in Console
To start, you'll need to create a Helium Console account and add your device.
Your trap vendor should have provided a corresponding DevEUI, AppEUI, and AppKey for each
delivered device. Regrettably, these important values are not included anywhere in the box,
packaging, or unit labeling. If you did not receive these key values, you must contact the seller
and obtain them before proceeding.
Once you have these three values, follow our quick start for instructions.
Add a Label for your device, so that one shared configuration can be used by any additional devices you install.
Victor VLINK Portal
Victor has not published the a Payload decoder or data documentation for these traps, so you must use the hosted monitoring solution at Woodstream's victorhq.com.
You will need an approved login at victorhq.com. In some cases, the device seller may have worked with Woodstream to create an account for you at a pre-arranged email address, or you might have to create one and wait for approval to use it. There is no way to complete this step yourself, as each new account needs manual approval.
Go to https://vlink.victorpest.com/ and select "Sign In" in the upper-right. Do not sign in at "Registered Customers", but use the Admin Portal Login instead. Once your login is successful, you must create a "Site" regardless of how solo simple your trap installation might be. Create a Site, including a full floorplan with a Building, Floor, and Room. You can not add a Trap until you have these defined.
Integration Configuration for VLINK
Once you have added your device to Console, and a login and Site layout on VLINK Portal, you will add an Integration to the Helium console to send data from your device to VLINK.
Create HTTP Integration
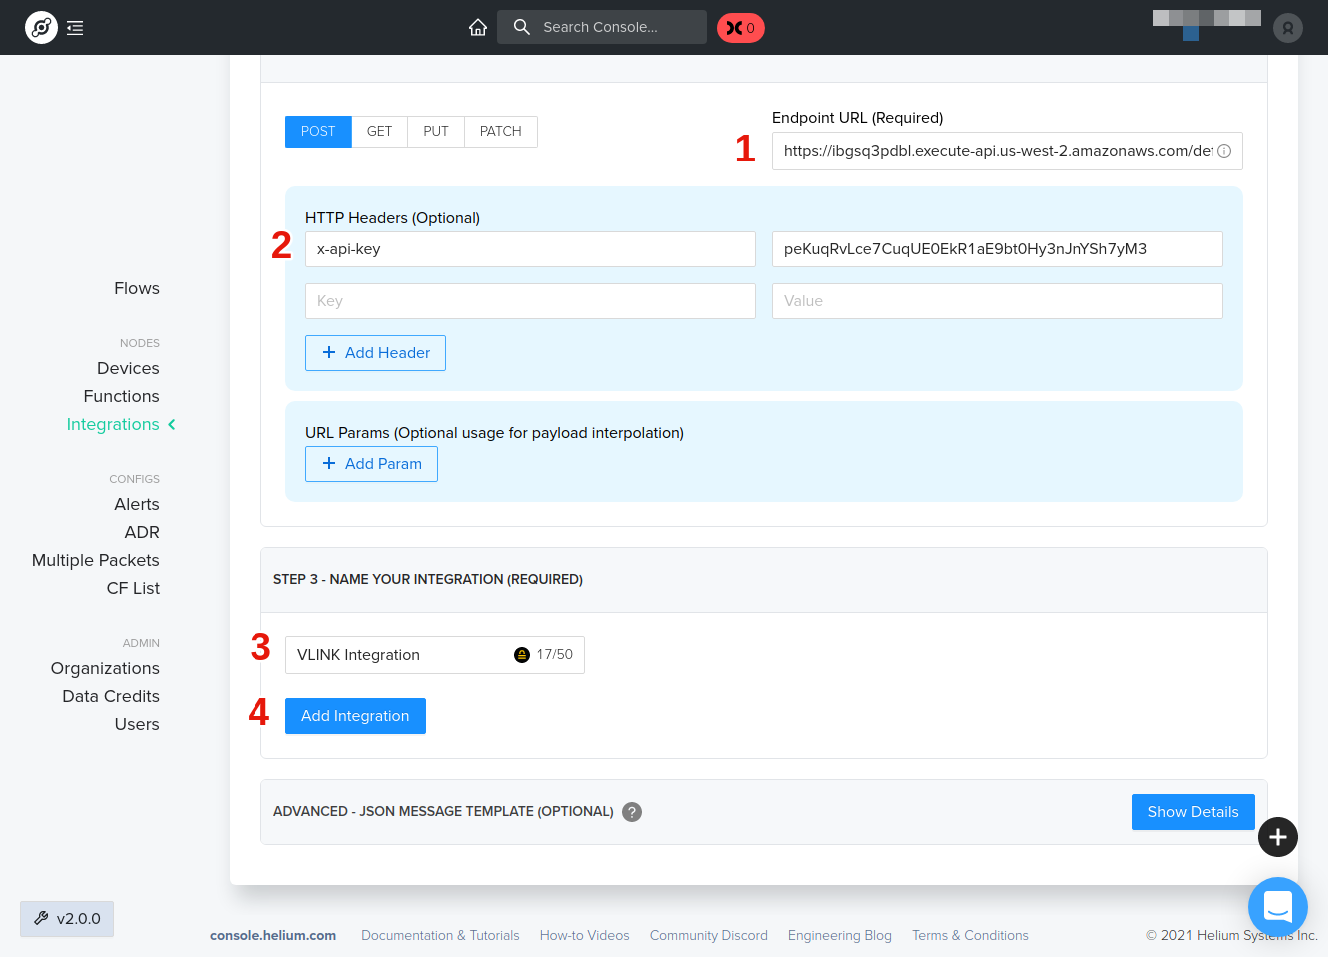
For your first trap, create a new HTTP integration in Console. Navigate to the Integrations page using the left navigation and then select the HTTP integration.

Next we'll fill in the details, see instructions and image below.
- Enter the VLINK Endpoint URL:
https://ibgsq3pdbl.execute-api.us-west-2.amazonaws.com/default/console-to-victormouse-translator - Enter the HTTP Header - Key:
x-api-keyand Value:peKuqRvLce7CuqUE0EkR1aE9bt0Hy3nJnYSh7yM3 - Enter the name for this Integration: VLINK Integration
- Finally, click Add Integration to complete.
Create a Flow to connect trap Devices to the Integration.
On the Helium Console, select Flows. Add a Node using the Label you assigned your Device. Add a node for the VLINK Integration and draw a connecting line from the Label to the Integration. The solid line will change to a dotted line to indicate data is flowing.
Add Device to VLINK Platform
You are now ready to add your device to VLINK, using the App or VLINK Portal interface. For this
step, you will use a (non-Helium) serial-number provided by Victor and shown on the QR Sticker
inside the trap. This is likely to be a 15-character identifier that starts with LM, entered
manually or by QR code.
The App will guide the onboarding process and provide instruction for when to turn the device on. Pause there to set up Console observation.
Power up the device
Install the (included) Lithium AA Batteries and close the bottom panel with the included screws, fully sealing the weatherproofing gasket. Before powering on the device, open the Helium Console, select the Device, and open the Debug panel or scroll down to the recent Packet list to observe activity.
Power on the unit by pressing the power button. You should see a few LED blinks from the middle indicator near the power button, and also see initial data packets in the Console Device listing.
If you do not see any Join or Uplink packets, pause here and ensure the unit is correctly added in Console. Double-check each of the three key values. Once you see packets arriving from your unit, you are ready to continue with registration and naming, add it to a Site/Building/Floor/Room in the Portal, bait the trap and wait for victory over rodents.
FAQ
What does ErrorCode in the Event Log mean?
- ErrorCode: 0 = Lid Closed
- ErrorCode: 1 = Lid is Open
What sequence of messages should I expect (in Console)?
- Series of 10-15 messages - These include network join, power up status, other status messages
- Then 5 messages 10 minutes apart
- Then a status message every 23 hours
These messages are sent with Acknowledgement requested, so you will see both Uplink and
Acknowledge packets.
What sequence of messages should I expect in the VLINK dashboard?
In the Activity Log you will see "Trap Powered Up" and a series of "Trap Status" logs.
What are the button presses?
If unit is off:
- Pressing the button will turn it on and initialize the unit
If unit is on:
- 1 quick button press will send a status message
- 1 Long button press will turn the unit off
Note that there is only one button (Power) and the adjacent indicator is a Blue LED that flashes on network activity. It is not a button.