LoRaWAN Roaming on Helium
Before getting started, make sure to have the following:
- Helium Network Organizationally Unique Identifier (OUI).
- Data Credits (>3.5M DC).
- A NetID issued by the LoRa Alliance.
- A roaming endpoint so your LNS can receive roaming traffic.
- Helium Config Service CLI installed.
For guidance on purchasing and funding an OUI, refer to the following guides:
Roaming Quickstart
While your roaming endpoint is up and running, you need to let the Helium config service know of its existence. Initialization of some CLI environment variables will streamline the process:
Run helium-config-service-cli env init
- Fill in the relative path of the delegate key pair file for
Keypair Location - Fill in
Your Net IDforNet ID - Fill in your assigned OUI for
Assigned OUI - Fill in the number of
multi-buyyou want forDefault Max Copiesas a default for your routes. - Export the environment variables. This needs to be done manually. The CLI will list values to be
exported. Add
exportto each line and run it. For instance, runexport HELIUM_MAX_COPIES=15to set the max_copies value in the session. Be sure not to put a space around the=sign
export HELIUM_KEYPAIR_BIN=<./your/path/to/delegate/keypair.bin>
export HELIUM_NET_ID=00003C
export HELIUM_OUI=<OUI_ID>
export HELIUM_MAX_COPIES=15
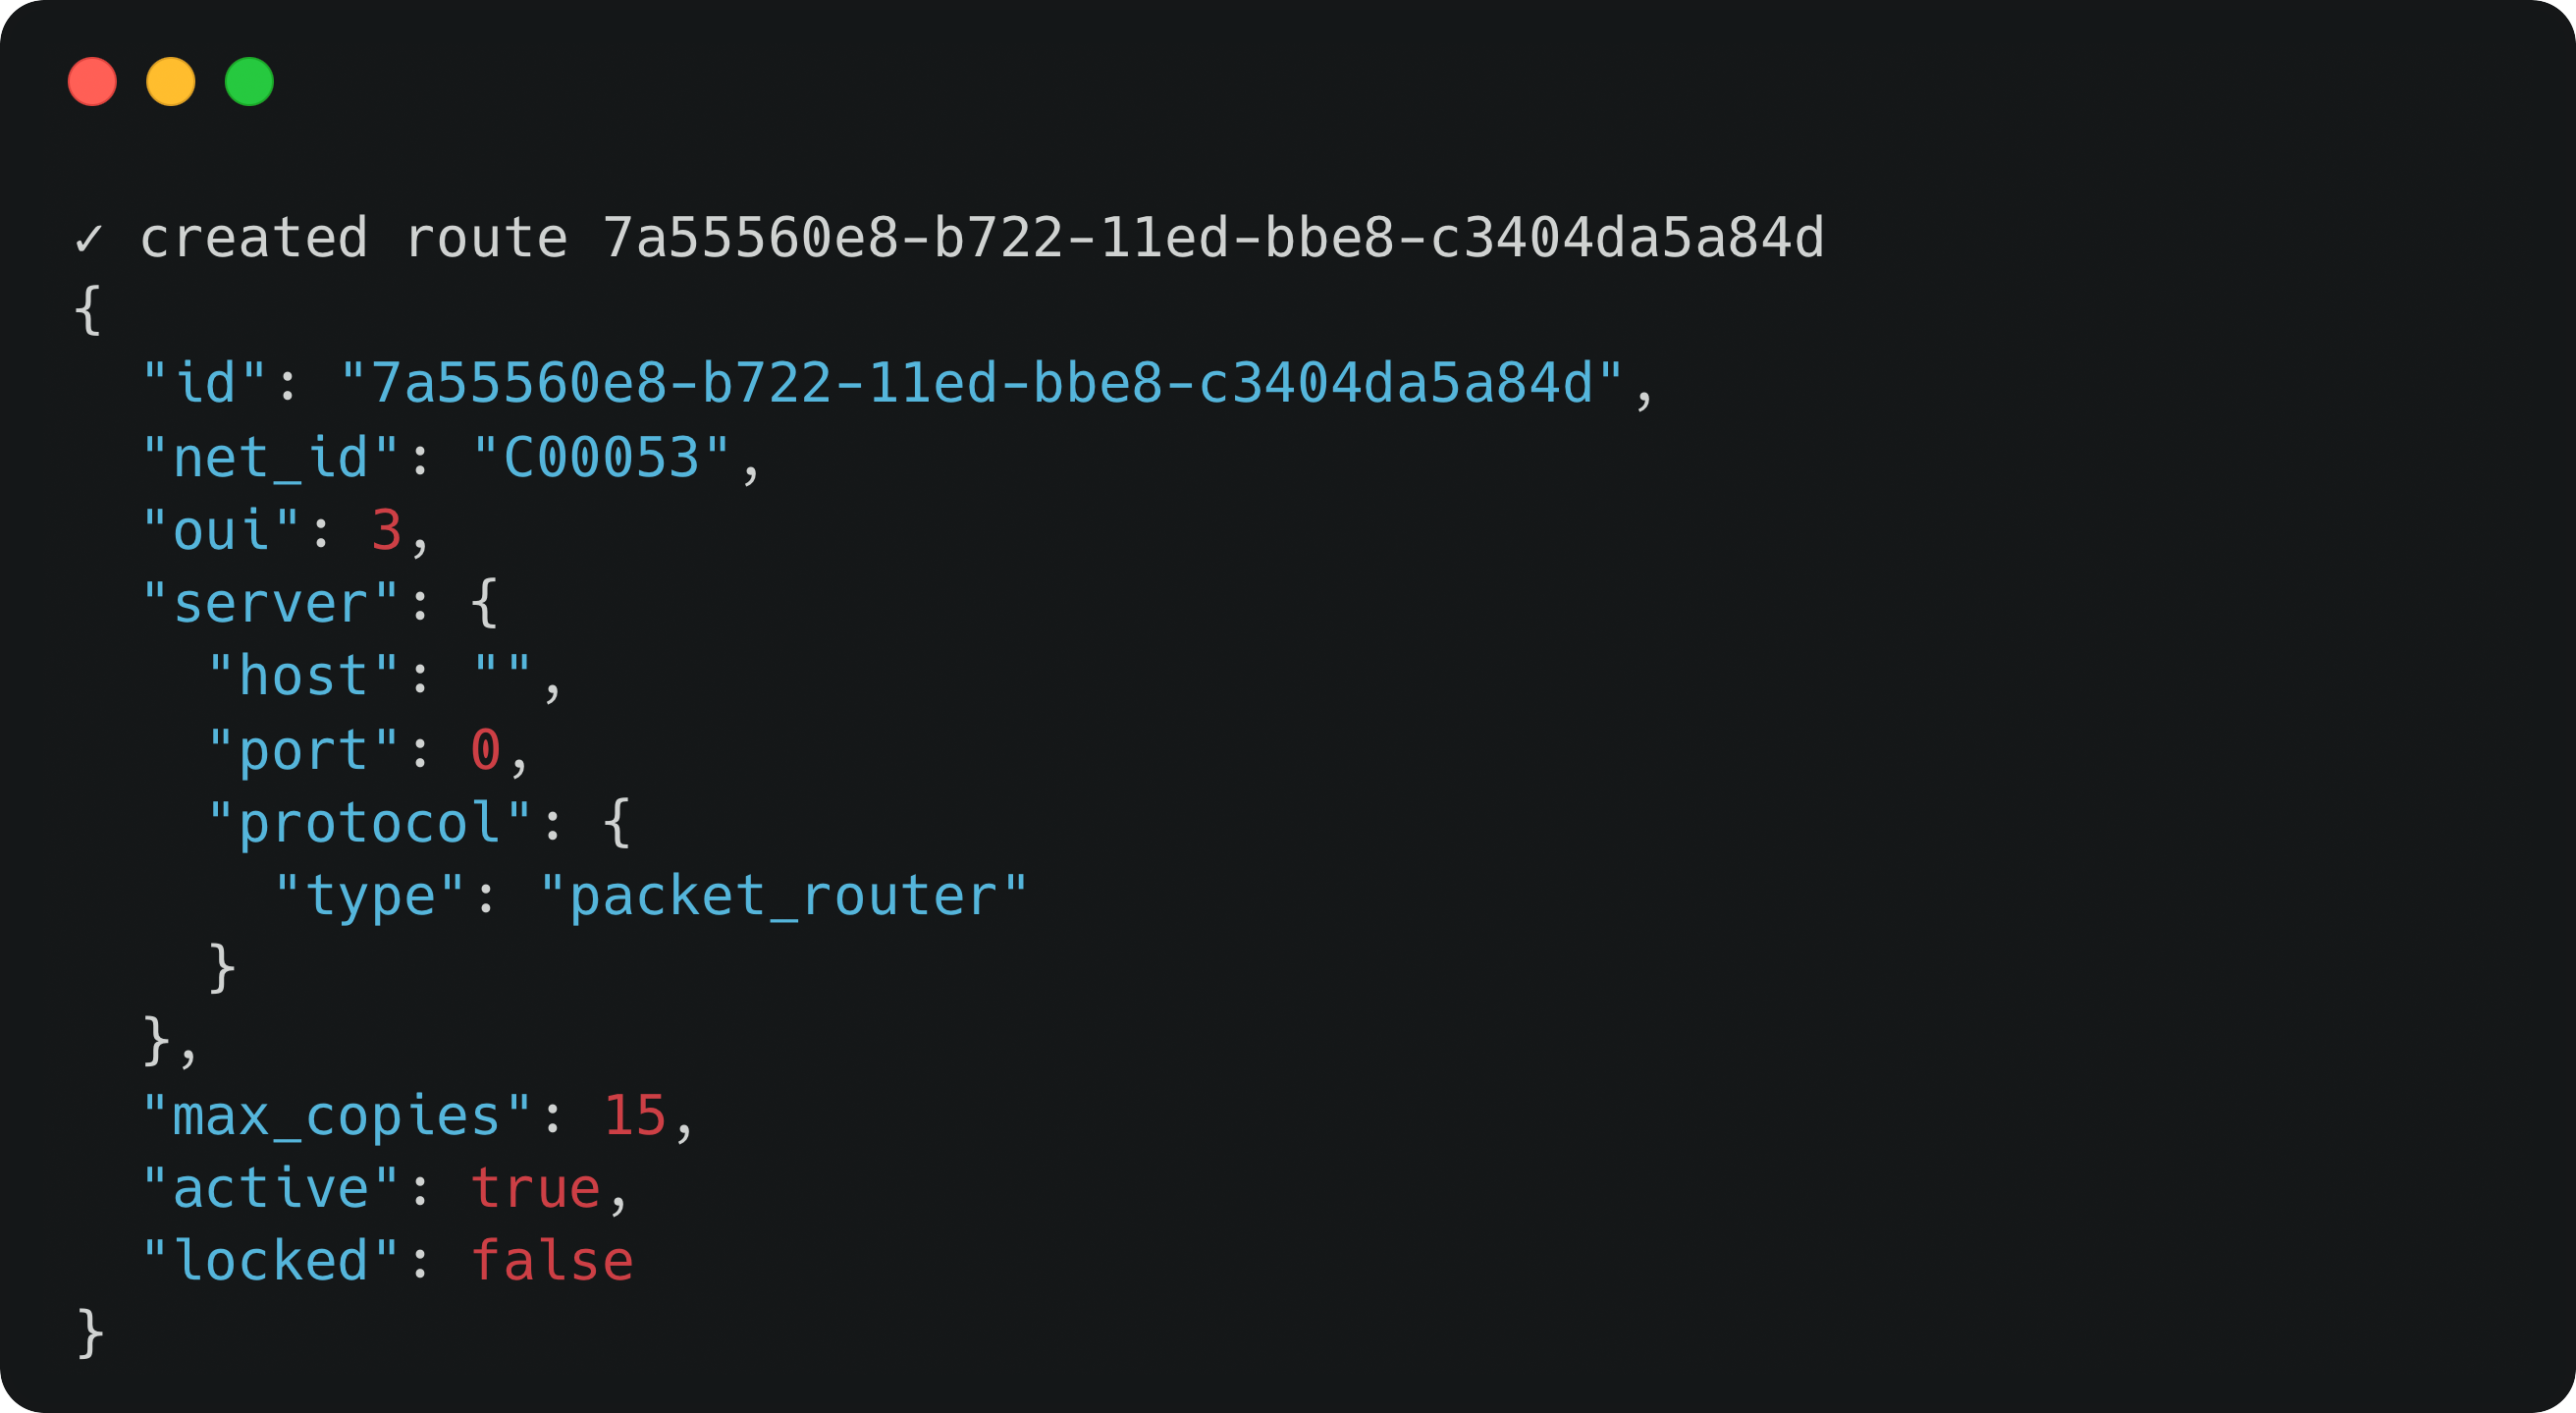
Now, you are ready to generate your first route. Routes contain the necessary information for us to know how to route a packet — DevEUI+AppEUI (for routing join requests), DevAddr range (for routing uplinks), endpoint (so the network knows where to send the packet), etc.
- Run
helium-config-service-cli route new --commit - You can then see the empty route template. It should look like this, except that you should be seeing your NetID, assigned OUI, and max_copies value:
Next, let's define the endpoint that you use for ingesting traffic. You can run:
$ helium-config-service-cli route update server --host <roaming endpoint> --port <roaming port> --route-id <route-id> --commit
If you are using HTTP roaming, you need to run:
- Note that the auth-header and receiver-nsid are optional.
$ helium-config-service-cli route update http --dedupe-timeout <dedupe timeout> --path <roaming endpoint sub-path> --auth-header <auth header> --receiver-nsid <ReceiverNSID> --route-id <route-id> --commit
If you are using GWMP roaming, you need to run:
$ helium-config-service-cli route update add-gwmp-region --route-id <route-id> --commit
Make sure your endpoint, port and protocol are set correctly, otherwise, we may not be able to send traffic to your LNS.
How to Add Your First Device
In this example, we will show you how to add your first device to start roaming. To receive join request for your device, you need to let Helium know which EUI pair to watch out for. You can run the following
If you are a roaming partner migrating from Roaming Console, please read the
Migrating from Roaming Console section below first.
$ helium-config-service-cli route euis add --route-id <route-id> -d <dev-eui> -a <app-eui> --commit
While this allows your Helium to forward your device's join request, you also need to specify a DevAddr range on that route so that Helium can forward its uplinks.
$ helium-config-service-cli route devaddrs add -s <start devAddr> -e <end devAddr> --route-id <route-id> -- commit
Migrating from Roaming Console
If you are a roaming partner migrating from Roaming Console to the new OpenLNS Architecture, please carefully test out your roaming connections before the full switch.
While the Roaming Console currently coexists with the OpenLNS Architecture, it is not possible to have the same device to simultaneously send traffic to both Roaming Console and through OpenLNS Architecture.
Migrating EUI Pair for Join Requests
Let's say you had 100 devices on Roaming Console, you can start the migration slowly by registering 1 EUI pair with the CLI, so that 99 of your devices will roam through Roaming Console and 1 of your devices will roam through OpenLNS. Then, you can keep migrating, possibly registering 50 EUI pairs with the CLI, so that 49 of your devices will roam through Roaming Console and 51 will roam through OpenLNS. Eventually, you will have registered all 100 EUI pairs with the CLI, so that all of your devices will roam through Roaming Console.
Migrating DevAddr Range for Uplinks
Let's say you have 10 DevAddrs, you can start the migration slowly by registering 1 DevAddr with the CLI, so that 9 of your DevAddrs will roam through Roaming Console and 1 of your DevAddrs will roam through OpenLNS. Then, you can keep migrating, possibly registering 5 DevAddrs with the CLI, so that 4 of your DevAddrs will roam through Roaming Console and 6 will roam through OpenLNS. Eventually, you will have registered all 10 DevAddrs with the CLI, so that all of your devices will roam through Roaming Console.
Advanced Roaming
The session key filter gives an operator the ability to accept and reject specific roaming traffic on a device level. Leveraging the session key filter is recommended for all operators. Read more about the session key filter and other advanced configurations in the Advanced Configuration section.
Roaming Proxy Service
If Helium's OpenLNS architecture is incompatible with a roaming partner's setup, then they can leverage the roaming proxy service prototype, which should provide a standard roaming interface. Note that Helium is not in active maintenance of this service. Helium does not necessarily recommend the usage of this architecture but appreciates the diverse needs of roaming partners.