Getting started with Helium and PlatformIO
PlatformIO is a cross-platform, cross-architecture, multiple framework, professional tool for embedded systems engineers and for software developers who write applications for embedded products.
Before we begin, please make sure you've followed the steps from this guide, which goes over some initial setup steps.
Introduction to Guide
This guide will walk through installing PlatformIO and deploying a Helium Arduino program on a target device. Here, as an example, we will detail the steps required to integrate a specific board type, the RAKwireless WisBlock family of boards.
However, this guide can be also used to on-board many other types of target devices. In most cases one can just substitute your target device in place of the WisBlock developer board.
Objective and Requirements
In this guide, you will learn:
- How to setup your PlatformIO IDE environment
- How to create, build, upload a simple embedded application
- How to program a basic application that will send packets over the Helium Network
- Verify real-time packets sent to the Helium Console via Hotspot that's in range
For this example, we are going to use the RAKwireless WisBlock Starter Kit. This procedure should work as a starting point if your particular device contains more of the WisBlock components. Follow on RAKwireless products may work but have not been tested at this point.
Hardware
- RAKwireless WisBlock Starter Kit
- Micro USB Type B Cable - Example
Software
PlatformIO is not a standalone IDE, it installs as an extension to Microsoft VSCode. The Helium Console is a cloud based device management tool that we will use to enable our device access to the Helium network. There is no installation required however one will need to create a user account with the Helium Console.
Hardware Setup
Attaching the LoRa and BLE Antennas
Your WisBlock Starter Kit should have come with two U.FL antenna.
- the one that resembles an "I" is the LoRa antenna, this one connects to the connector on the core module marked LoRa, which is below the large K in the RAK logo.
- the one that resembles a "T" is the BLE antenna, this one connects to the connector on the core module marked BLE
Connect Target Board to Development PC
The target boards are typically connected to the host computer via a USB 2.0 A-Male to Micro B cable.
Software Setup
Install Development Machine Serial Device Driver
Some operating systems, especially Windows, may require the installation of hardware specific USB device driver code. In general it's best to just try to upload a built application before installing new device drivers. If the upload fails and you believe it is a device driver issue refer to the WisBlock support forum for the most up to date information. RAKwireless Support Forum.
Installing PlatformIO
The WisBlock Starter Kit is not currently supported by PlatformIO out of the box. One must install VSCode/PlatformIO and then take some extra steps to add support for WisBlock.
This guide will walk you through the following basic steps to get a simple Helium enabled embedded application up and running. The steps will include
- install VSCode and the PlatformIO extension
- install the Nordic nRF52 Arduino framework
- Implement patch files for RAK WisBlock Core boards
- Add WisBlock Core RAK4631 Variants Definition Files to PlatformIO
- create a new PlatformIO project
- prove out the install via a sample RAKwireless WisBlock project
- add a project dependency library, SX126x-Arduino
- integrate your device specific Helium network configuration keys, Device EUI, APPEUI, APPKEY which you obtain from the Helium console device definition.
- add your target LoRaWAN region defines to the platformio.ini configuration file
- compile and upload the device application
Install VSCode and PlatformIO Extension
Using the VSCode instructions found here download and install Microsoft's Visual Studio Code. PlatformIO IDE is built on top of VSCode as an extension. Once the VSCode is installed:
- Open VSCode Extension Manager by clicking on the Extensions icon on the left side of the main view.
- Within the Extensions Marketplace search for official "PlatformIO IDE" extension
- Click on the "Install" button contained within the PlatformIO IDE item
- Addtional details for the PlatformIO extension can be found here

It is highly recommended to give the PlatformIO quick-start guide a read. It will help you navigate the unfamiliar interface. The guide can be found here.
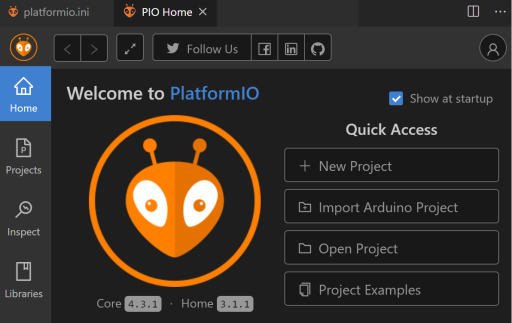
Once PlatformIO is installed, you should be welcomed to VSCode with the following "PIO Home" screen:
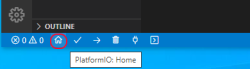
If not already open, the PlatformIO "Home" view can be opened by clicking on the house icon within the VScode status bar.
Updating PlatformIO to Support the WisBlock Developer Board
Install Nordic nRF52 Arduino framework
We now need to install the framework of WisBlock support libraries.
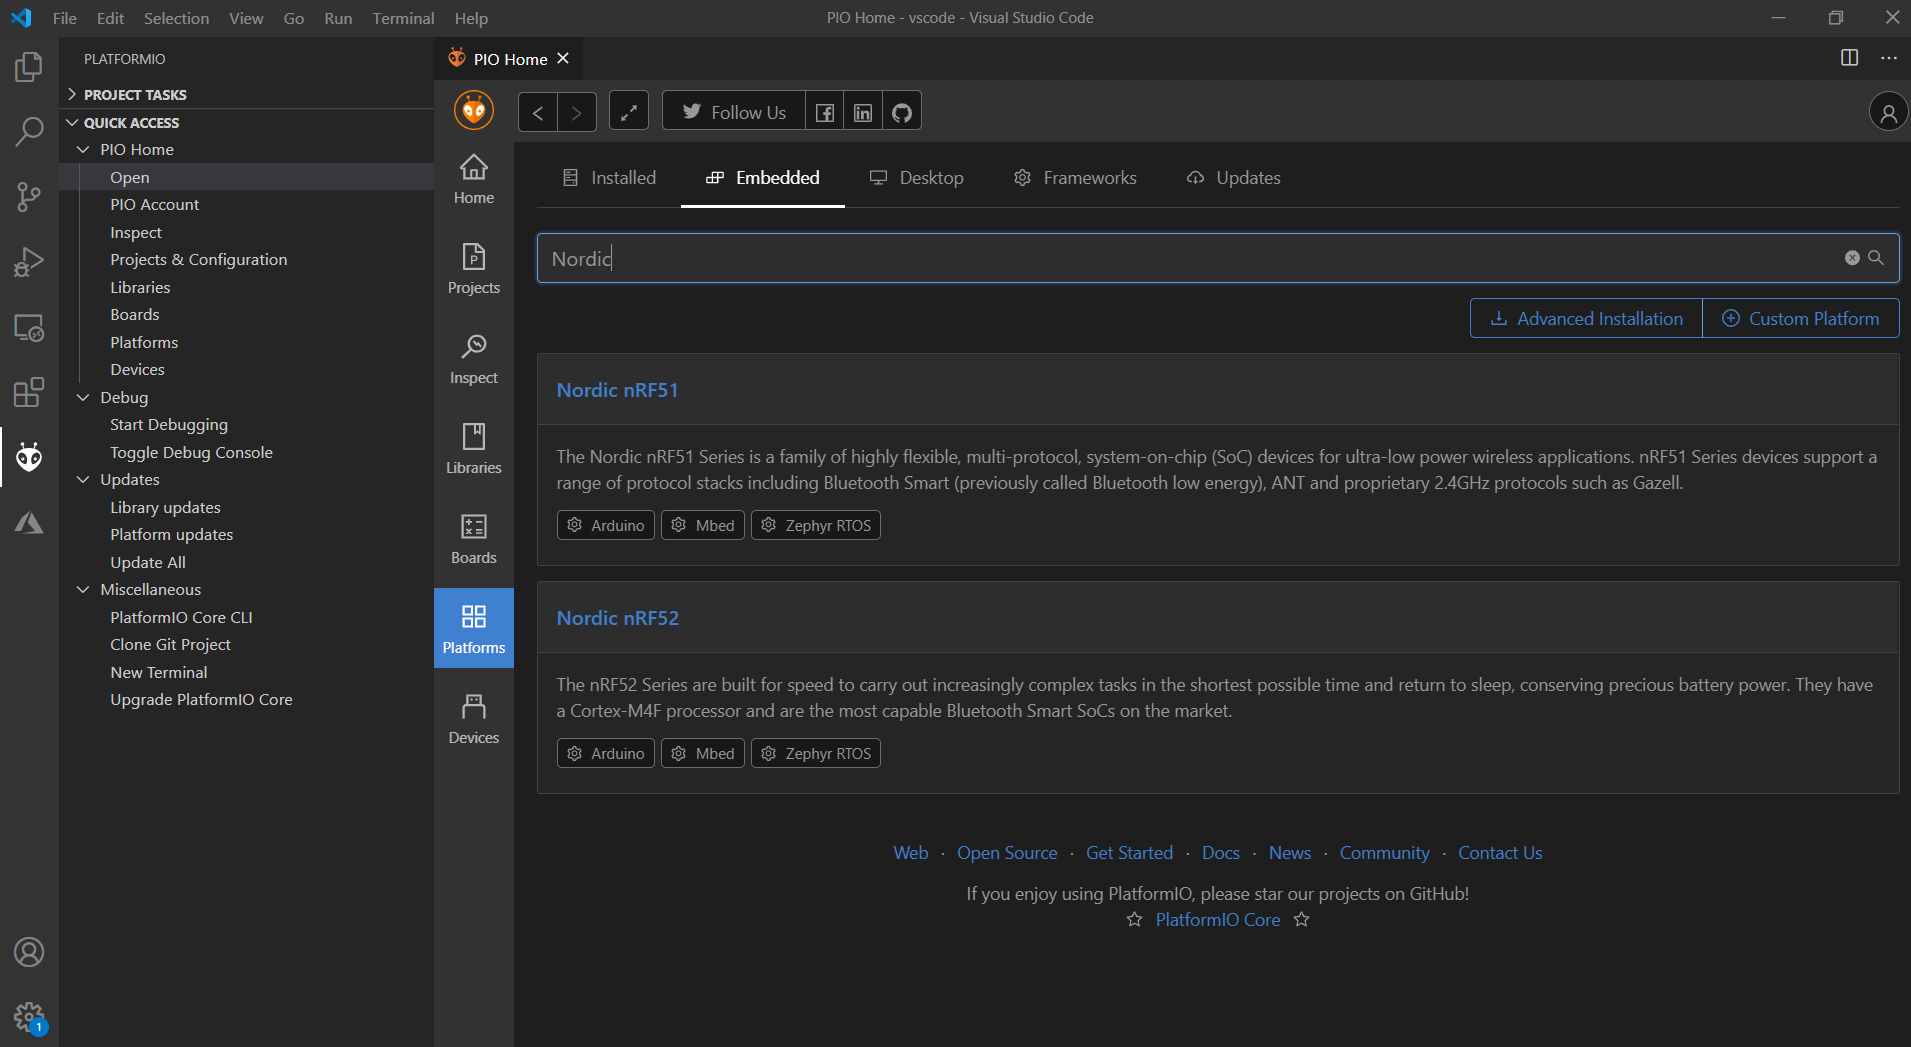
Select the "Platforms" icon located on the left side of the PIO Home view. In the "Filter Platforms by Name" field, enter "Nordic" as follow:
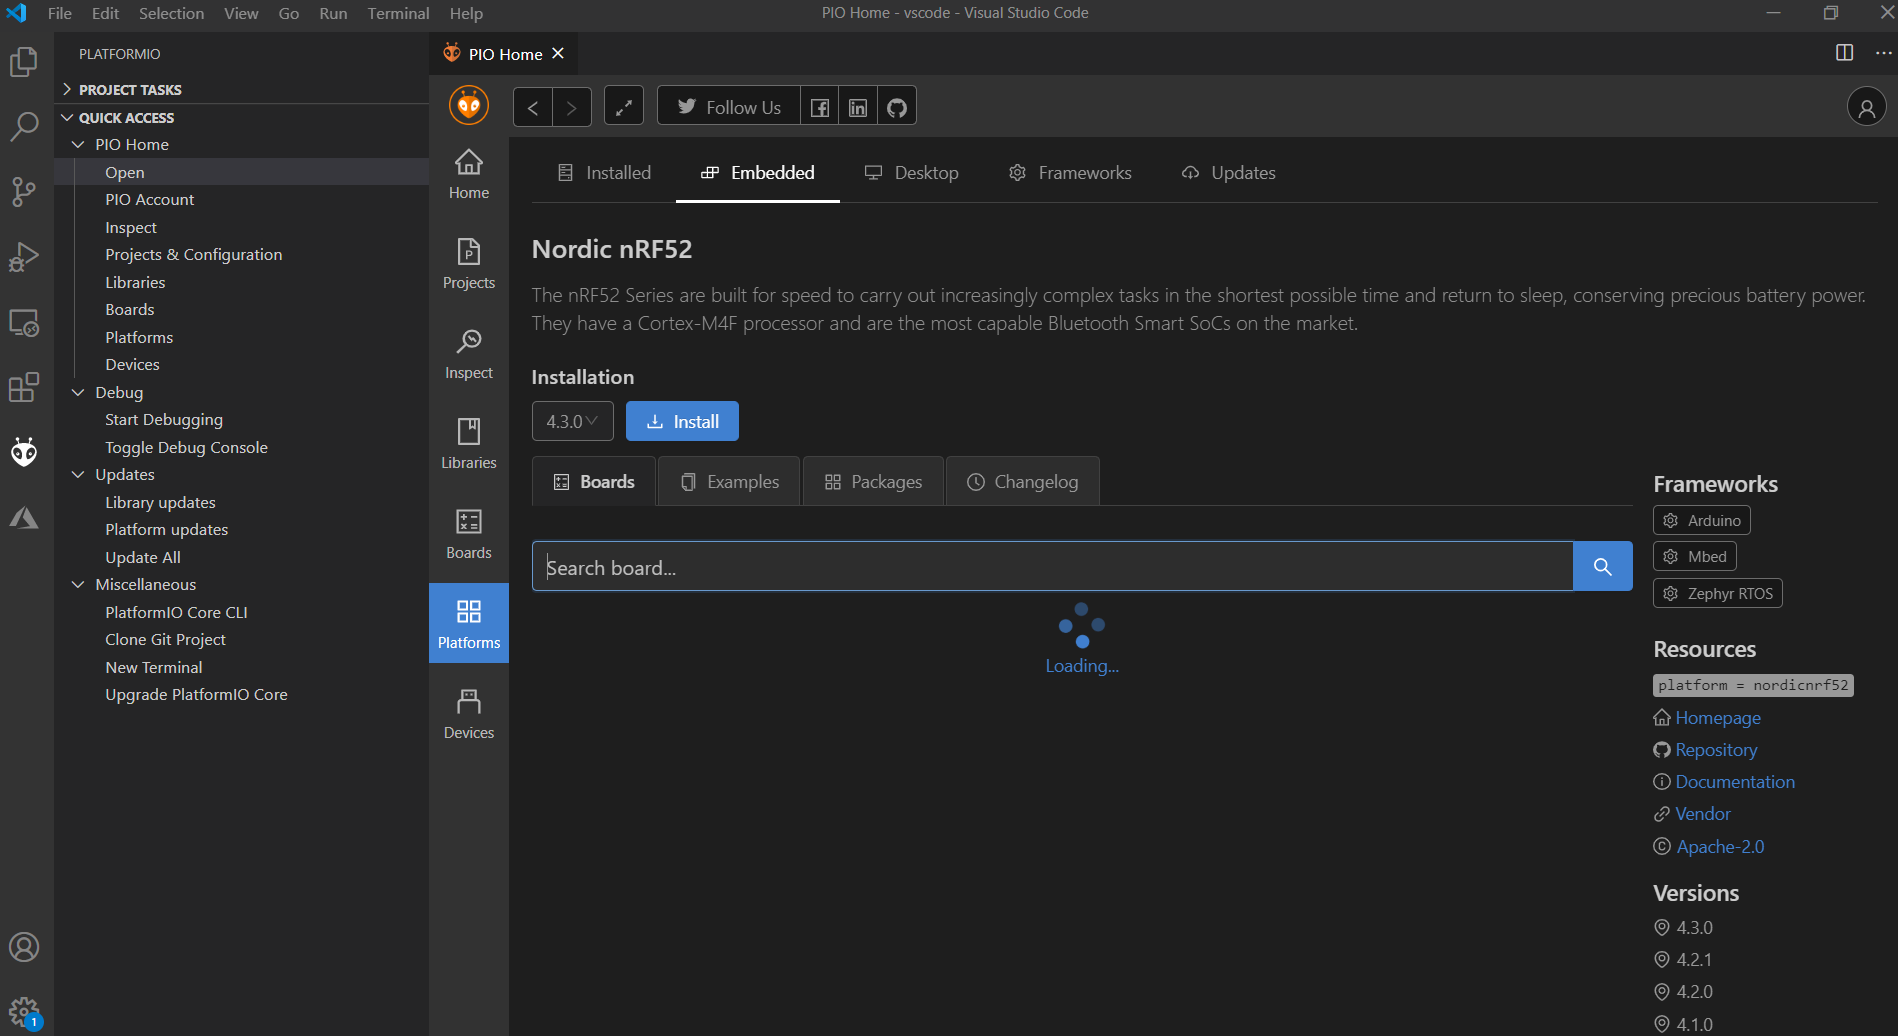
You may see there are several items, just select the "Nordic nRF52" item and then select "Install" as seen below:
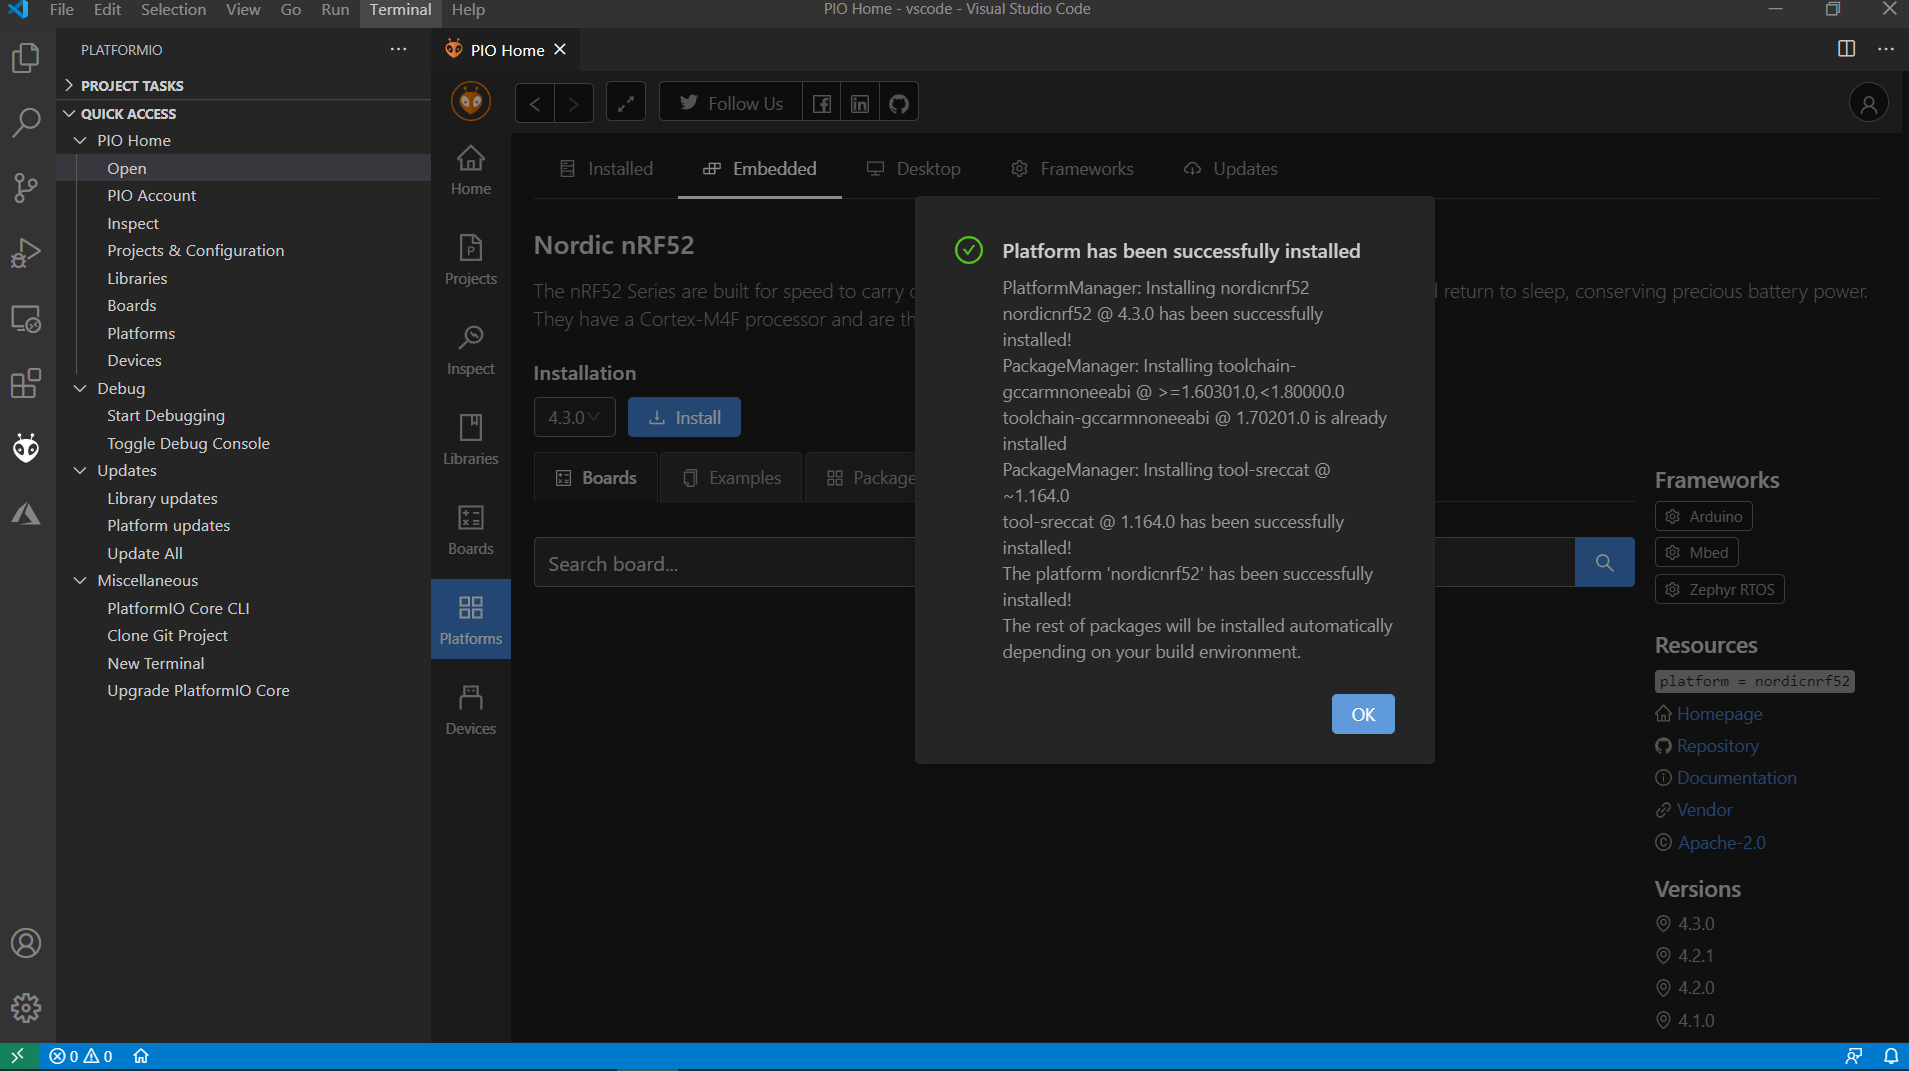
When complete you should see a successful install message such as the one above.
Implement patch files for RAK WisBlock Core boards
Download the PlatformIO folder from:
https://github.com/RAKWireless/WisBlock/tree/master/PlatformIO/
and save it on your computer.
From the downloaded folder copy the file wiscore_rak4631.json to the boards folder of the
nordicnrf52 platform folder.
The path should be similar to:
Windows: %USER%\.platformio\platforms\nordicnrf52\boards
Linux:    ~/.platformio/platforms/nordicnrf52/boards
Mac OS:  /Users/{Your_User_id}/.platformio/platforms/nordicnrf52/boards
Add WisBlock Core RAK4631 Variants Definition Files to PlatformIO
Now, from the folder downloaded above, copy the complete "WisCore_RAK4631_Board" folder into PlatformIO's packages/framework-arduinoadafruitnrf52/variants folder. The path should be similar to:
Windows: %USER%\.platformio\packages\framework-arduinoadafruitnrf52\variants
Linux: ~/.platformio/packages/framework-arduinoadafruitnrf52/variants
Mac OS: /Users/{Your_User_id}/.platformio/packages/framework-arduinoadafruitnrf52/variants
When complete you will have a new sub folder under variants called "WisCore_RAK4631_Board".
Restart PlatformIO
This completes the necessary WisBlock updates to PlatformIO. To fully implement these changes shutdown, then restart PlatformIO
Creating a New PlatformIO Project
If you have not already used PlatformIO to build, upload and verify the operation of a sample application it is best familiarize yourself with the basic use of PlatformIO before adding the complexity of Helium network access code to the mix.
If you are familiar and confident with the steps required you can continue at "Sample Helium Network Access Code" by clicking here.
Prove out the install with a sample non Helium project
To avoid too many unknowns when first starting out, the following will create, build and upload a non Helium Network device applications. Once the basics are proven we will add more complexity by introducing code that will access the Helium LoRaWAN network. The following steps will walk you through what is required to:
- create a template project
- inspect the default source file, main.cpp as well as the primary project configuration file, platformio.ini
- build the project and inspect the build log output
- upload the sample binary to the target development board.
- inspect serial output debug information.
Open "New Project Wizard" - Select project name and board
-
Within the "PIO Home" view click on "New Project".
-
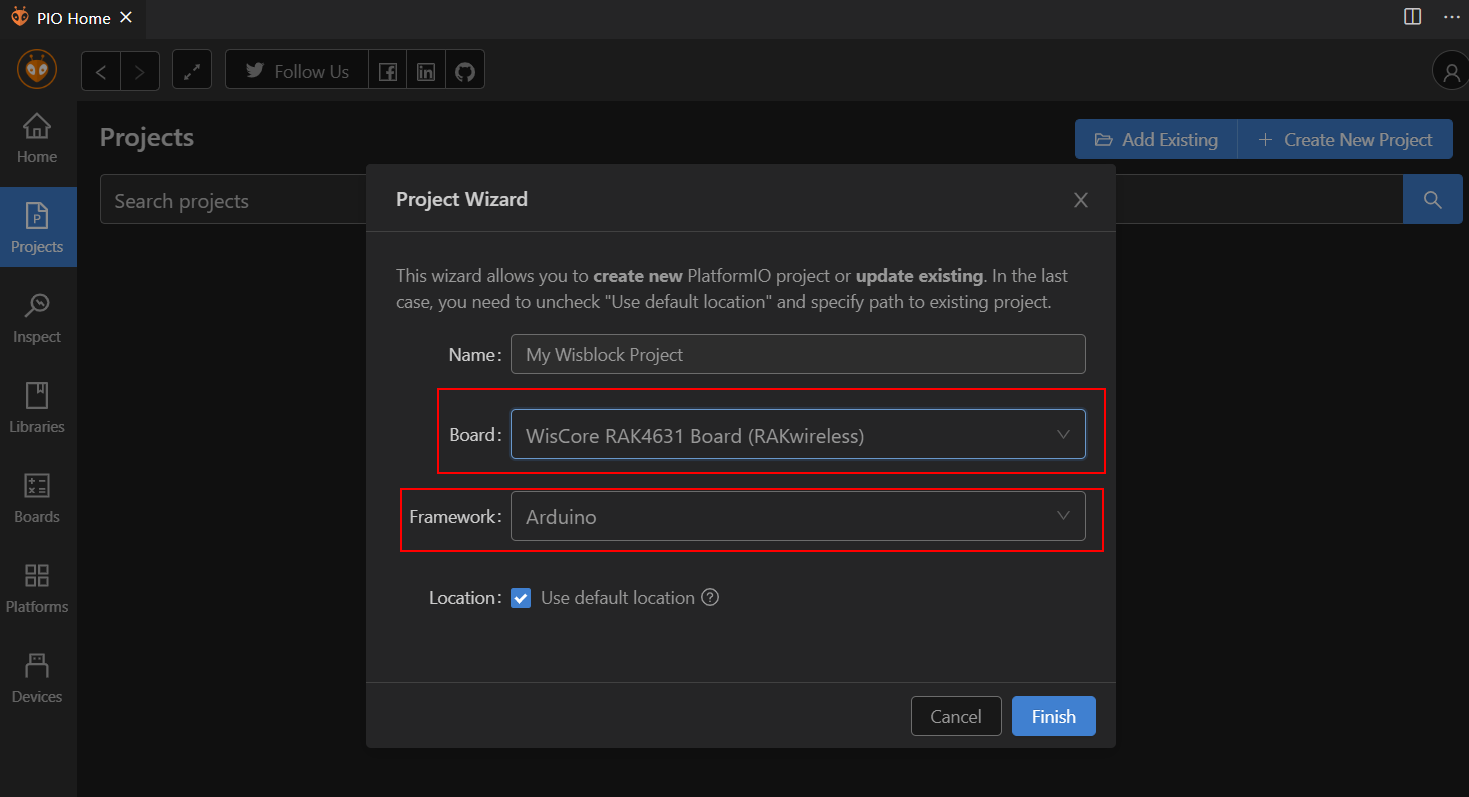
At the "Project Wizard" dialog enter a name for your project in the "Name" field.
-
Within the "Board" field select the appropriate target board by entering the name of the board, "WisCore" for our example. The PlatformIO auto search feature should present you with a known list of supported boards. In our case we should see "WisCore RAK4631 Board (RAKwireless)" presented as a selection.
-
For the "Framework" selection some devices will support more than one framework within PlatformIO, for our WisBlock example make sure "Arduino" is selected.
-
With the Project Wizard items filled in, click on Finish to start the project creation.
The time taken to create a project will vary depending on whether or not the selected platform and framework files have been previously downloaded. When the project has been created it should be shown, as seen below, within the PlatformIO Explorer view typically found on the left side of the IDE.
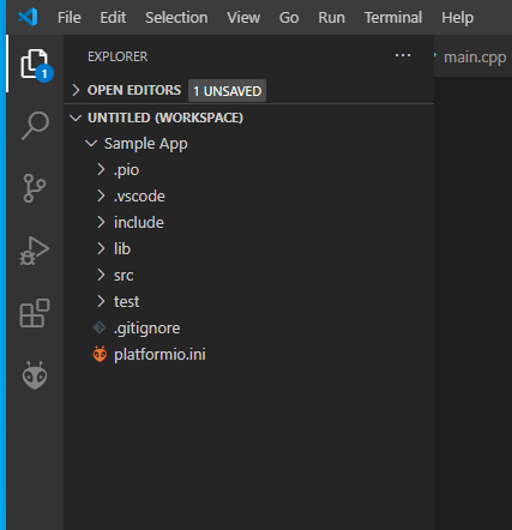
Typical project explorer view.
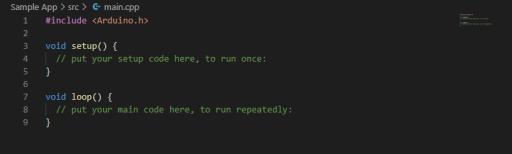
Default project main.cpp
If you are familiar developing within the Arduino IDE, main.cpp is much the same as the Arduino *.ino. It also contains default setup() and loop() functions.
PlatformIO also adds a required \#include <Arduino.h\> statement. This is an important/necessary
difference between PlatformIO and Arduino IDEs.
platformio.ini - project configurations
Let's take a look at the platformio.ini file in the root of our new project. This is where one defines project configuration definitions. In the Arduino world one would do this via the IDE tool bar selections.
NOTE: when this file is modified the entire project will be rebuilt when the project is next built or uploaded.
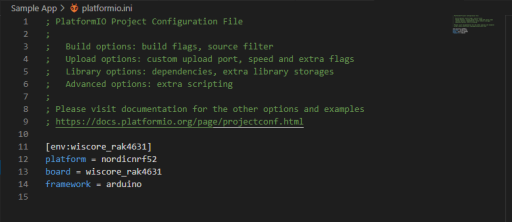
Here we see the platformio.ini file that was created as a result of the running the New Project wizard targeting our WisBlock board.
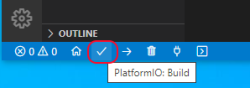
Build the target device application
Now that the template project has been created it's time to build the device application. Within PlatformIO the "Build" button is the check-mark found within the bottom status bar. Clicking on this button should start the build process.
Inspect the build output
Due to the defines within platformio.ini, PlatformIO is able to determine the project board and framework dependencies. Any missing dependencies are automatically installed at build time, thus this process may be seen in the build output. This feature allows us to add libraries into our platformio.ini file, which will then be downloaded for us, if needed, at build time.
The build process results can be found within the "Terminal View" typically found at the bottom of the VSCode window. Much like with Arduino, the build output will dump the calculated amount of Ram and Flash memory used by your application.

Start of the build output displaying configuration information.
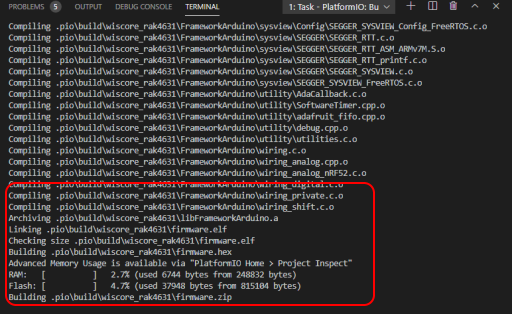
Tail end of build log showing Ram and Flash usage. There is also a Problems output view that may help when trying to resolve build issues.
List of attached devices
For this sections please make sure your target device is connected to your development computer.
If, within the "PIO Home" view, you select the "Devices" icon on the left, you will see listed any attached physical devices as well as their associated comm ports:
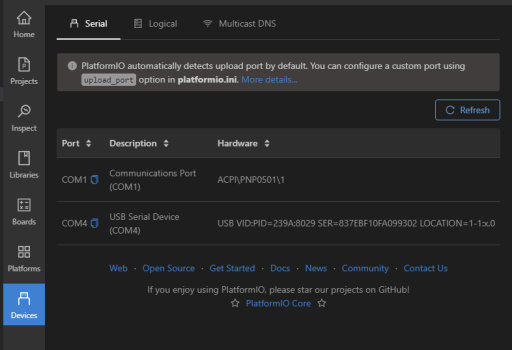
The list should reflect your target device. The exact content will vary depending which operating system PlatformIO is being executed on.
Uploading binary to target device
Now that the code has built successfully, if a target device is attached to your computer the resulting binary can be uploaded to the target device.
The method of uploading the binary to your device may vary depending on the target device. PlatformIO will attempt to configure upload options appropriate for the chosen board. If the default configuration does not work in your instance detailed information can be found within the PlatformIO documentation here or within your target board vendors documentation set.
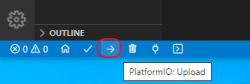
Click on the Upload button within the bottom Status bar.
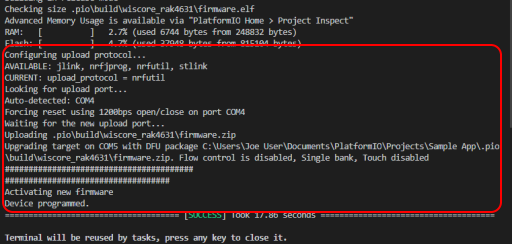
Below you will see a typical output as the binary is uploaded to the target board.
NOTE:
 With some target devices PlatformIO will
 automatically close any open comm port connection.
 An upload error may occur if for some reason the
 comm port cannot be closed. If this is the case you
 must manually close down the terminal emulator's
 connection before retrying the upload.
Now that the application has been uploaded you can connect your favorite terminal emulator to the comm port seen in the list of devices above. Because the above sample project is an empty project you will not see any addition output via the terminal emulator output unless you customize the sample with debug output statements.
Additional RAKwireless supported WisBlock sample code can be found at https://github.com/RAKWireless/WisBlock/tree/master/examples
If you have made it this far then we know your environment can build and upload a device application. Now it's time to connect to the Helium network.
Helium Console - Create Device
In order for a target device to communicate via the Helium Network a user account must first be created. Once the user account is created then a console device must be created.
When creating the console device, make note of the DevEUI, AppEUI, and AppKey device credentials. These are used to connect to the network and will need to be inserted into the device application code below. A console quick start guide can be found here.
Sample Helium Network Access Code
If you have not created a simple template project and you want to try one of the samples you can copy a sample into your workspace where it should build without error. A full PlatformIO project can be found here. Alternatively you can update the template project created above by continuing the following steps.
Update main.cpp
Now that we have the minimum required board and library runtime support installed, let's program the board with an example Helium network enabled application.
To update the sample application created above:
- open, within PlatformIO, your projects src/main.cpp file
- replace this template main.cpp with the content of the sample application found here. Copy and paste the entirety of it.
Add WisBlock LoRaWan Support Library to Project
The WisBlock LoraWan support library is not fully integrated into PlatformIO at this point. It must be included within each WisBlock project. This is accomplished by:
- Open the PlatformIO:Home view by selecting the "house" button located on the VSCode status bar
- Select the "Libraries" icon on the left side of the "PlatformIO:Home" view
- within the "Search libraries" field enter "SX126x-Arduino" and hit the enter key
- When presented with the library entry, click on it.
- Click on the highlighted "Add to Project" button
- In the dialog that pops up, select the project into which you want to include the library, then click on the "Add" button
This process will add a library dependency line into the platformio.ini file similar to:
lib_deps = beegee-tokyo/SX126x-Arduino@^1.3.1
The dependent libraries are also installed into the selected project within it's .pio/libdes directory.
Add device credentials
Next we'll need replace the placeholder AppEUI, DevEUI, and AppKey values found within the sample program with the real values found on the target device page within the Helium Console.
NOTE:
 The endianess required for these credentials varies
 depending on the LoRaWAN runtime library implementation.
 Using a custom library implementation will require an
 understanding of that libraries endian requirement, big
 endian or little endian.
For our WisBlock example all values are big endian (msb), most significant bit on the left.
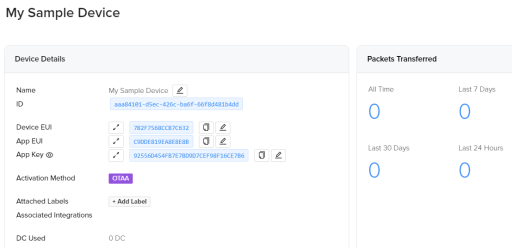
At the top of the main.cpp file, replace the three FILL_ME_IN fields, with the matching field from the Helium Console, example shown below. Your numbers will be different depending on what the console creates when you add your target device.

Verify LoRaWAN channels mask
Runtime library implementations are designed to work across several LoRaWAN regions and networks. The firmware will attempt to join the network using various frequency sub-bands, defined by a channel mask, until the join succeeds. It is recommended that you change the default channel mask to a value that will help the join process complete connection to the Helium network in a more timely manner. The process, where and how, to update this channel mask will vary depending on the LoRaWAN runtime implementation
For our example using the WisBlock and it's runtime the channel mask is set via a runtime API call. The following piece of code can be incorporated into sample projects. Refer to a sample to determine where this code should reside, generally just prior to the call to the join API call is fine.
/* Helium Network LoraWan sub channel 2 is recommended, default channels 0-7*/
 if (!lmh_setSubBandChannels(2))
 {
    Serial.println("lmh_setSubBandChannels() failed");
 }
A Note About Network Join Failures
Within the project main.cpp file there is the following define:
#define JOINREQ_NBTRIALS 10
This define is used by the runtime to determine how many times to attempt a LoRaWAN network join. Once this number of join retries is exhausted the runtime will call a device application level callback, if defined.
The runtime will no longer attempt to join the network once this callback has been called. It is left to the device application to monitor via the join success and join fail callbacks the status of the join process.
If your device application has or may have difficulty joining the network due to poor signal quality the application will need to manage the join retries beyond the number defined by JOINREQ_NBTRIALS. An example project which attempts to handle join failure retries can be found here.
The currently supported device application level callbacks can be found within the sample applications within the following define.
static lmh_callback_t lora_callbacks = { ... };
platformio.ini - project configurations
For our sample application we need a few configuration items added to the project platformio.ini file. These include project defines, serial debug monitor configurations and debugger configurations.
Complete documentation of platformio.ini content can be found here. Serial debug monitor specific items here.
For our example WisBlock project update the projects platformio.ini with the content from the sample project:
- open, within PlatformIO, your projects platformio.ini file
- replace this template file with the content found here. Copy and paste the entirety of it.
Once you have become more familiar with the LoRaWAN/Helium network feel free to experiment with different configuration settings possible within platformio.ini.
NOTE: The comment character for this file type is the semicolon.
Build the device application
After updating the main.cpp and platformio.ini files it's time to build the device application. Within PlatformIO the "Build" button is the check-mark found within the bottom status bar. Clicking on this button should start the build process.
Inspect the build results
The build output results can be found within the "Terminal View" typically found at the bottom of the VSCode window. Verify the build completed successfully.
Possible Arduino to PlatformIO porting issues
When porting Arduino sketches to PlatformIO you may find errors such as undefined functions. These may be functions that are called by setup() or loop() or other custom functions prior to them being defined. This is a side effect of the different C version of C compilers used with PlatformIO vs Arduino. In this instance we just need to define the function prototype before the function is actually called. Another compatibility issue is that unlike Arduino IDE, you must include Arduino.h at the start of your C file if you are using Arduino defined constructs. Generally the compatibility issues are minor.
Upload Binary to target device
If the build process completed successfully, upload the binary to the target device via the "Upload" (right pointing arrow) button found on the status bar.
NOTE:
 With some target devices PlatformIO will
 automatically close any open comm port connection.
 An upload error may occur if for some reason the
 comm port cannot be closed. If this is the case you
 must manually close down the terminal emulator's
 connection before retrying the upload.
Successful upload example, your results will vary.
Viewing Target Device Serial Output
When your firmware update completes, the board will reset, and begin by joining the network. The built-in PlatformIO Serial Monitor or any other virtual serial terminal emulator can be used to view the serial debug output from the board.
If the built-in serial monitor is selected PlatformIO will attempt to connect to it automatically. If using another terminal emulator refer to the Devices view as mentioned above to determine which comm port your device is connected to.
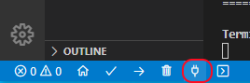
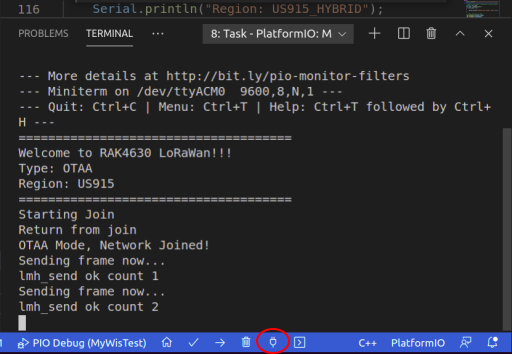
To open the serial monitor click on the "Serial Monitor" button within the status bar.
You should begin to see output similar to below. This example uses VSCode's builtin virtual terminal emulator.
Helium Console Uplinks
Now let's head back to the Helium Console and login to your account. Once logged in select the "Devices" item on the left, then select the target device previously created. Scroll down a bit on the device page and you should see something similar to the screenshot below.
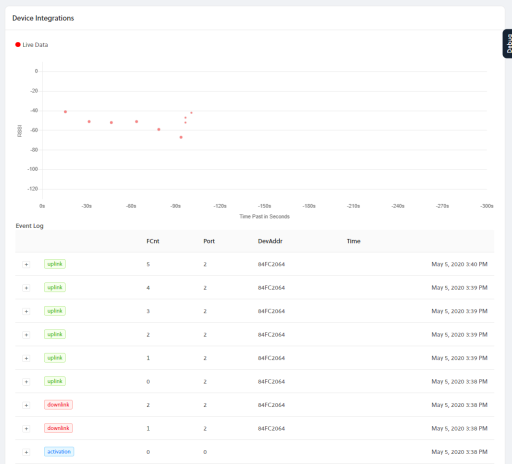
Activation messages are those seen when the device first attempts to join the network. Downlink messages are those delivered from the network to your target device. Uplink messages are those messages delivered from your target device to the Helium network.
Congratulations! You have just transmitted data on the Helium network! The next step is to learn how to use your device data to build applications, visit our integration docs here.
Device Application Code Debugging with PlatformIO
If, as is frequently the case, your application misbehaves VSCode/PlatformIO does support board level debugging via various debug probes/interfaces. A general debug discussion can be found here or debug probe specific discussion here. PlatformIO will attempt to seamlessly support your projects defined target board for debugging but with the vast number of target boards, not all are supported out of the box.
PlatformIO supports out of the box debugging with the WisBlock developer board via the SWD ST-Link protocol. To enable debugging add the following to your project platformio.ini file:
build_type = debug
upload_protocol = stlink
debug_tool = stlink
The ST-Link probe should connect to the SWDIO, SWCLK and GND pins of the Single Wire Debug pins as marked on the WisBlock core board. Complete SWD/ST-Link operation is out of scope for this guide.
Then you can utilize the PlatformIO integrated debugging.

Example WisBlock Starter Kit connected to ST Discovery configured for ST-Link support