Arduino
Heltec WiFi LoRa 32 V2 Arduino Guide
Introduction to Guide
Before we begin, please make sure you've followed the steps from this guide, which goes over some initial setup steps.
Objective and Requirements
In this guide, you will learn:
- How to setup your environment
- How to program a basic application that will send packets over the Helium Network
- Verify real-time packets sent to the Helium Console via Hotspot that's in range
For this example, you will need the following:
Hardware
- Heltec WiFi LoRa 32 V2
- Micro USB Type B Cable - Example
Software
Hardware Setup
Adding the Antenna
Your board should have come with a U.FL antenna. All you have to do is attache it to the U.FL port as shown in the image at the top of the guide.
Connect Board
Next, lets connect our board to our computer with a USB 2.0 A-Male to Micro B cable.
Software Setup
Getting the Arduino IDE
Download and install the latest version of Arduino IDE for your preferred OS.
Arduino Board Support
The Heltec WiFi LoRa 32 V2 requires one Arduino board support package. Follow the instructions below to install.
Arduino-ESP32
To install, open your Arduino IDE:
- Navigate to (File > Preferences), (Arduino > Preferences) on MacOS.
- Find the section at the bottom called Additional Boards Manager URLs:
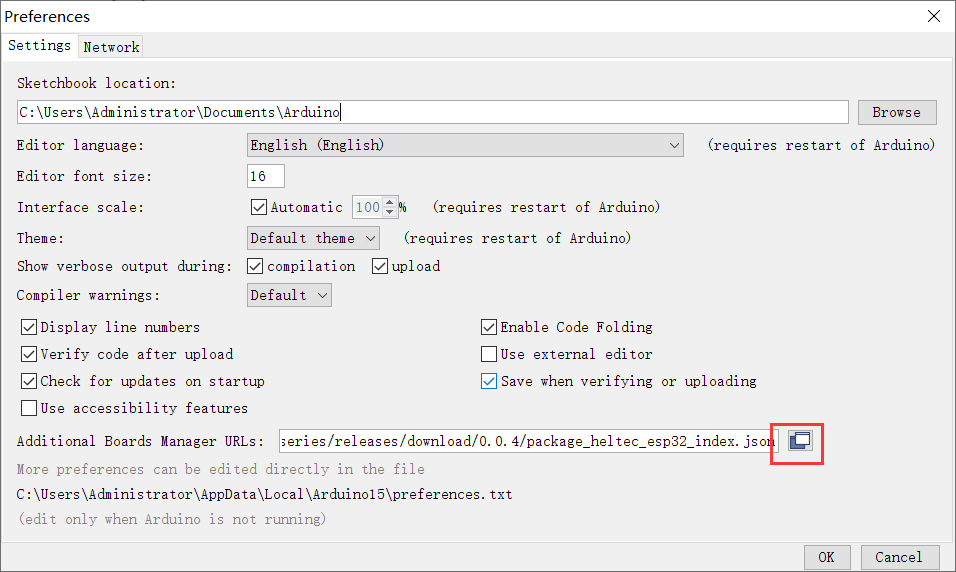
- Add this URL in the text box:
https://github.com/Heltec-Aaron-Lee/WiFi_Kit_series/releases/download/0.0.5/package_heltec_esp32_index.json
The latest versions can be found on Heltec Automation Docs website.
- Close the Preferences windows
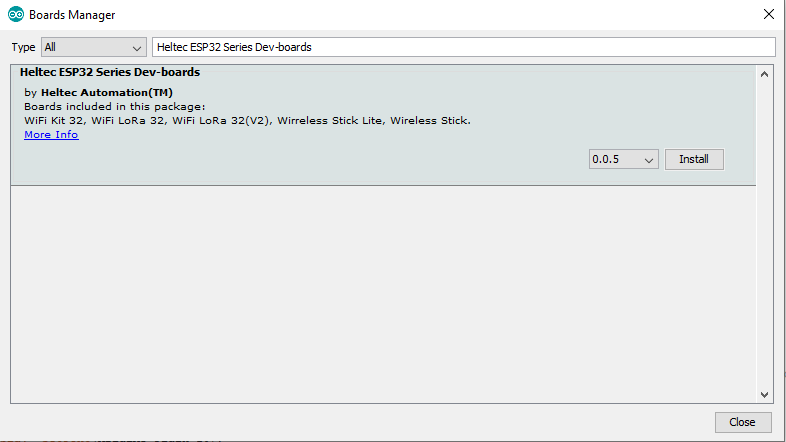
Next, to install this board support package:
- Navigate to (Tools > Boards > Boards Manager...)
- Search for Heltec ESP32
- Select the newest version and click Install
Arduino Library
To communicate with Helium's LoRaWAN network, we'll need to install two Arduino libraries.
Heltec ESP32
To install, open your Arduino IDE:
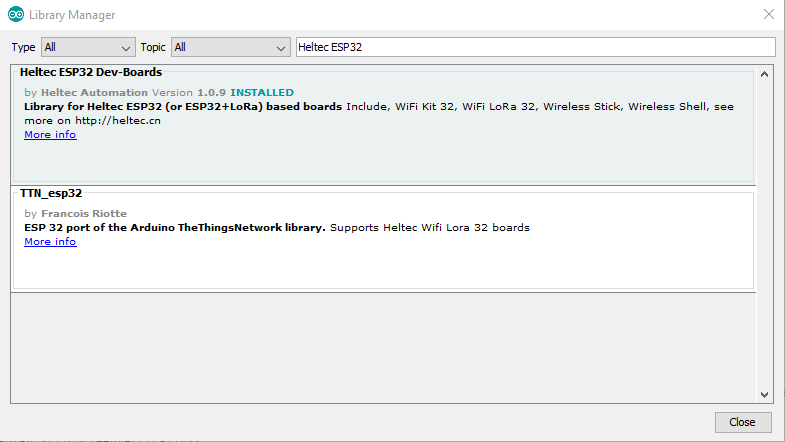
- Navigate to Library Manager (Sketch > Include Library > Manage Libraries).
- In the search box, type Heltec ESP32 into the search, select the version shown below, and click Install.
)
Heltec ESP32 LoRaWAN
Download this find into the directory below and unzip.
linux: /home/{user}/Arduino/libraries
windows: Documents\Arduino\libraries
mac os: Documents/Arduino/libraries
Install Serial Driver
Find Directions on Heltec's website here.
Select Board
Arduino IDE:
- Select Tools -> Board: -> WiFi LoRa 32(V2)
Obtain Heltec License Key
Upload GetChipID example
Arduino IDE:
- Select File -> Examples -> ESP32 -> ChipID -> GetChipID
- Select Tools -> Port: "COM# or ttyACM#"
- Select Sketch -> Upload
- Wait for Done uploading message
- Select Tools -> Serial Monitor Serial Monitor Window
- Select 115200 baud from bottom right dropdown.
- You should see something that looks like this every second
ESP32 Chip ID = ############ - Save this Chip ID
Obtain License Key with Chip ID
- Go to resource.heltec.cn/search
- Enter ChipID
- Save license field, will look like
0x########,0x#########,0x########,0x########
Programming Example Sketch
Now that we have the required Arduino board support and library installed, lets program the board with the provided example sketch.
To create a new Arduino sketch, open your Arduino IDE, (File > New). Next, replace the template sketch with the sketch found here, copy and paste the entirety of it.
Next we'll need to fill in the AppEUI(msb), DevEUI(msb), and AppKey(msb), in the sketch, which you can find on the device details page on Console. Be sure to use the formatting buttons to match the endianess and formatting required for the sketch, shown below.
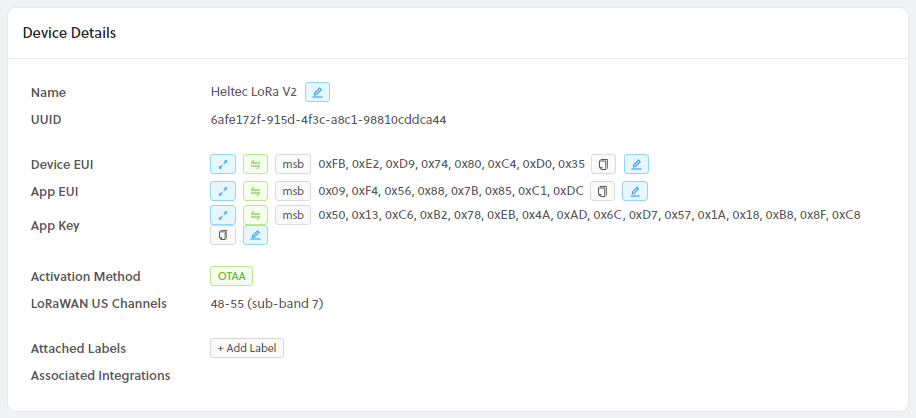
At the top of the sketch, replace the three FILL_ME_IN fields, with the matching field from Console, example shown below.

)
Finally, we will paste in the License Key we obtained above to the sketch. Replace the values in license[4] with the key obtained from resource.heltec.cn/search

Selecting Port
Next, we need to select the correct Serial port in the Arduino IDE. Navigate to (Tools > Port: COM#/ttyACM#). You will also see either COM# or /dev/ttyACM# depending on whether you are on Windows, Mac, or Linux. If you do not see a port, please visit the Drivers section in Heltec's docs to make sure you have what's needed for your operating system.
Select LoRaWAN Region
The last step before we upload our sketch is to select the correct LoRaWAN Region, navigate to (Tools > LoRaWAN Region: > REGION_US915).
Required Change to Default DataRate
In this example sketch, ADR is turned off, therefore you must manually set the desired data rate for your payload size manually. This library uses a default data rate that is not supported by the Helium Network so you must change it to one in the following range DR_0 - DR_4. To do this change the default data rate on line 20 in the file found below for your operating system
linux: /home/{user}/Arduino/libraries/ESP32_LoRaWAN-master/src/ESP32_LoRaWAN.cpp
windows: Documents\Arduino\libraries\ESP32_LoRaWAN-master\src\ESP32_LoRaWAN.cpp
mac os: Documents/Arduino/librariesESP32_LoRaWAN-master/src/ESP32_LoRaWAN.cpp
Change line 20 to:
#define LORAWAN_DEFAULT_DATARATE DR_3
If you don't want to change data rate manually, Helium now supports ADR
Upload Sketch
We're finally ready to upload our sketch to the board. In the Arduino IDE, click the right arrow button, or navigate to (Sketch > Upload), to build and upload your new firmware to the board. You should see something similar to the image below at the bottom of your Arduino IDE, when the upload is successful.
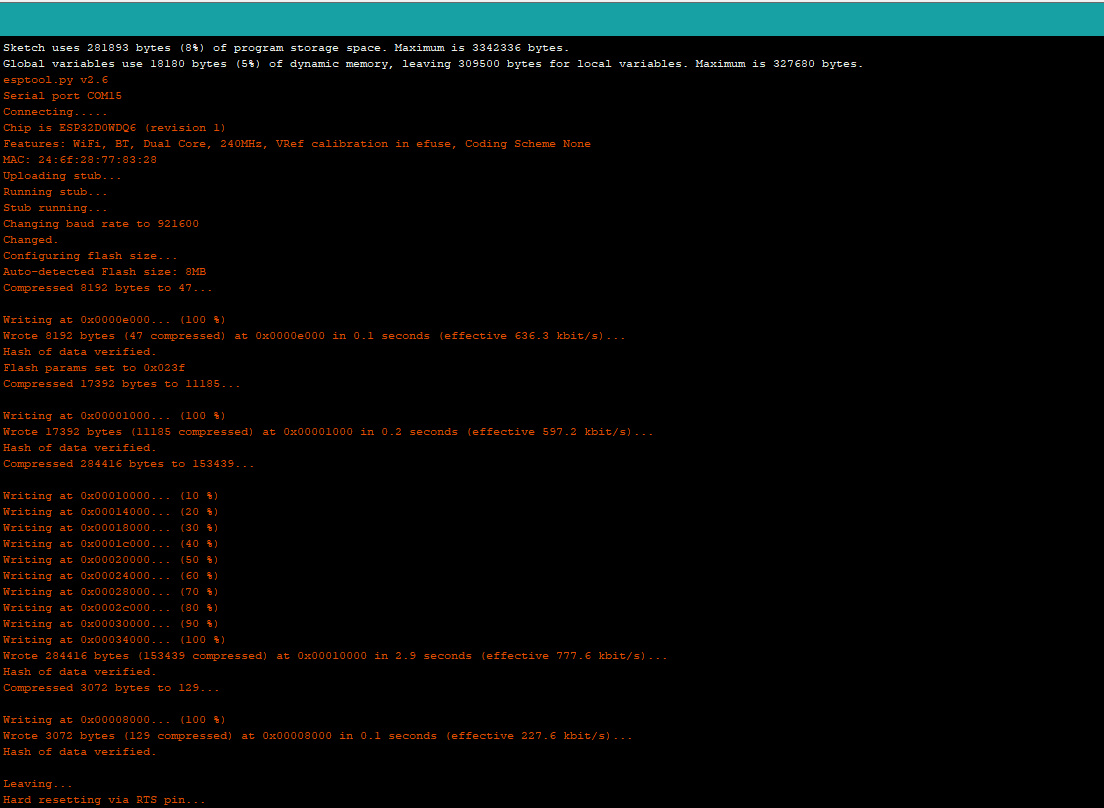
)
Viewing Serial Output
When your firmware update completes, the board will reset, and begin by joining the network. Let's use the Serial Monitor in the Arduino IDE to view the output from the board. We first need to select the serial port again, but this time it will be a different port than the one we selected to communicate with the bootloader. Once again, navigate to (Tools > Port: COM#/ttyACM#), but make sure the serial device, either COM# or ttyACM#, is different! Next navigate to (Tools > Serial Monitor), you should begin to see output similar to below.
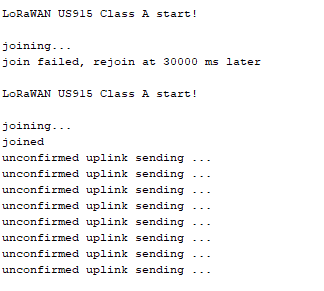
)
Your device may take several minutes to join and begin to send uplink packets because the library is designed to work in several LoRaWAN regions and networks. Because of this, the firmware will attempt different sub-bands until it is successful. If you would like to change the default channel mask in the library to speed up this process you can make the following change below the sketch.
Change line 59 to:
uint16_t userChannelsMask[6]={ 0xFF00,0x0000,0x0000,0x0000,0x0002,0x0000 };
Now let's head back to Helium Console and look at our device page, you should see something similar to the screenshot below.
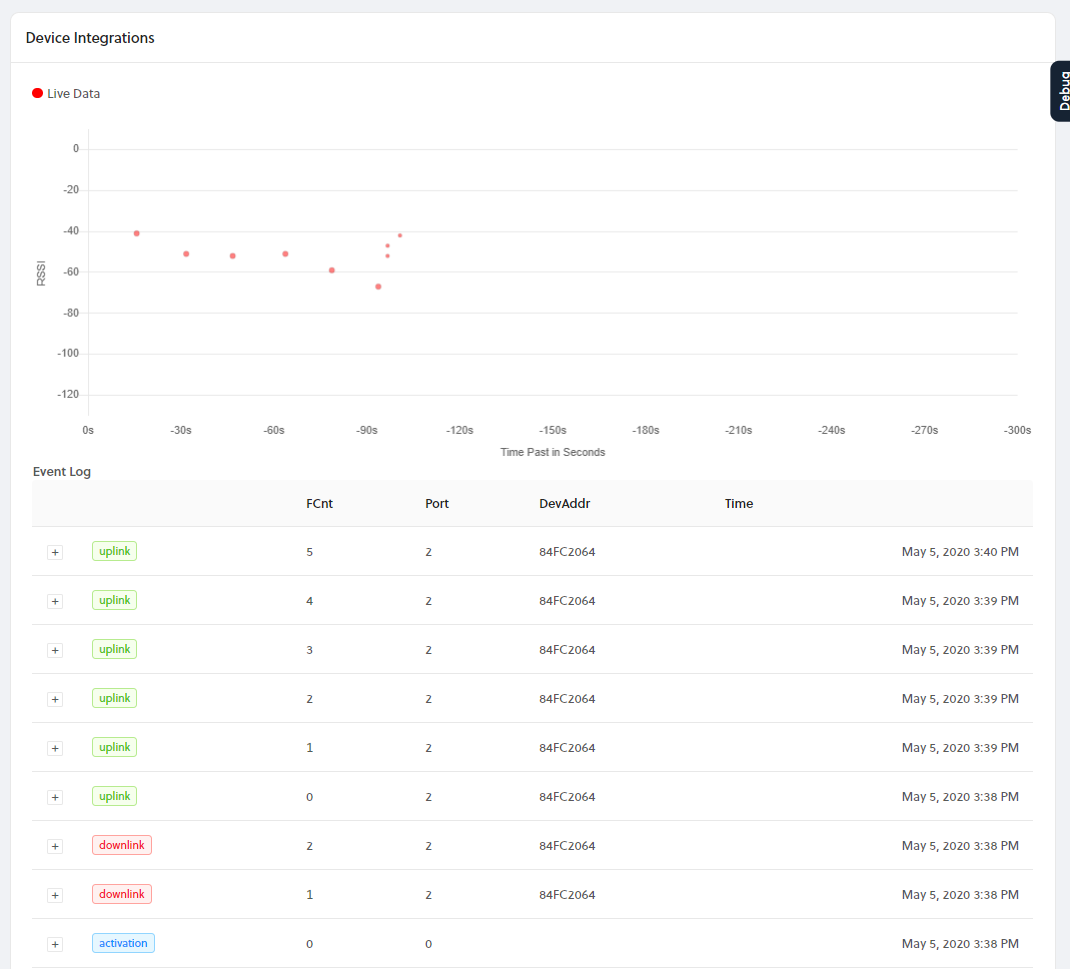
Congratulations! You have just transmitted data on the Helium network! The next step is to learn how to use your device data to build applications, visit our Integrations docs here.