Seeed Sensecap
Seeed SenseCAP
Introduction
The SEEED SenseCAPs are a series of industrial IoT products primarily centered around Smart Agriculture. They are based on the LoRaWAN protocol and deployable worldwide with multiple ISM bands. SenseCAPs are encapsulated in IP66 enclosures, making them applicable in outdoor remote sensing scenarios such as Smart Farming, Smart City, and other IoT applications that need low-power, long-distance, and long-term data collection.

Sensors
| Sensors | Range | Accuracy |
|---|---|---|
| AirTemp&Humi Sensor | -40~90°(0-100%RH) | 土 0.3°C 土 2%RH |
| Soil Temp&Humi Sensor | -30~ 70°(O~ 1 00%RH | 土 0.2°c 土 2%RH (0%~50%) |
| Air Pressure Sensor | 300-1100hPa | 士 1hPa (950hPa~ 1 OSOhPa (0)° (-40°c) |
| CO2 Sensor | 400-10,000ppm | 士 30ppm+3% |
| Light Sensor | Max 188,000Lux | 0.045Lux/LSB |
| Wind Speed Sensor | 0-60m/s | 0.125m/s |
| Wind Direction Sensor | 8 Directions | 45° |
| Water PH Sensor | ||
| Light quantum Sensor | ||
| Electrical Conductivity Sensor | ||
| Dissolved Oxygen Sensor | ||
| Soil VWC&EC&Temp Sensor | ||
| Rainfall Recorder Sensor |
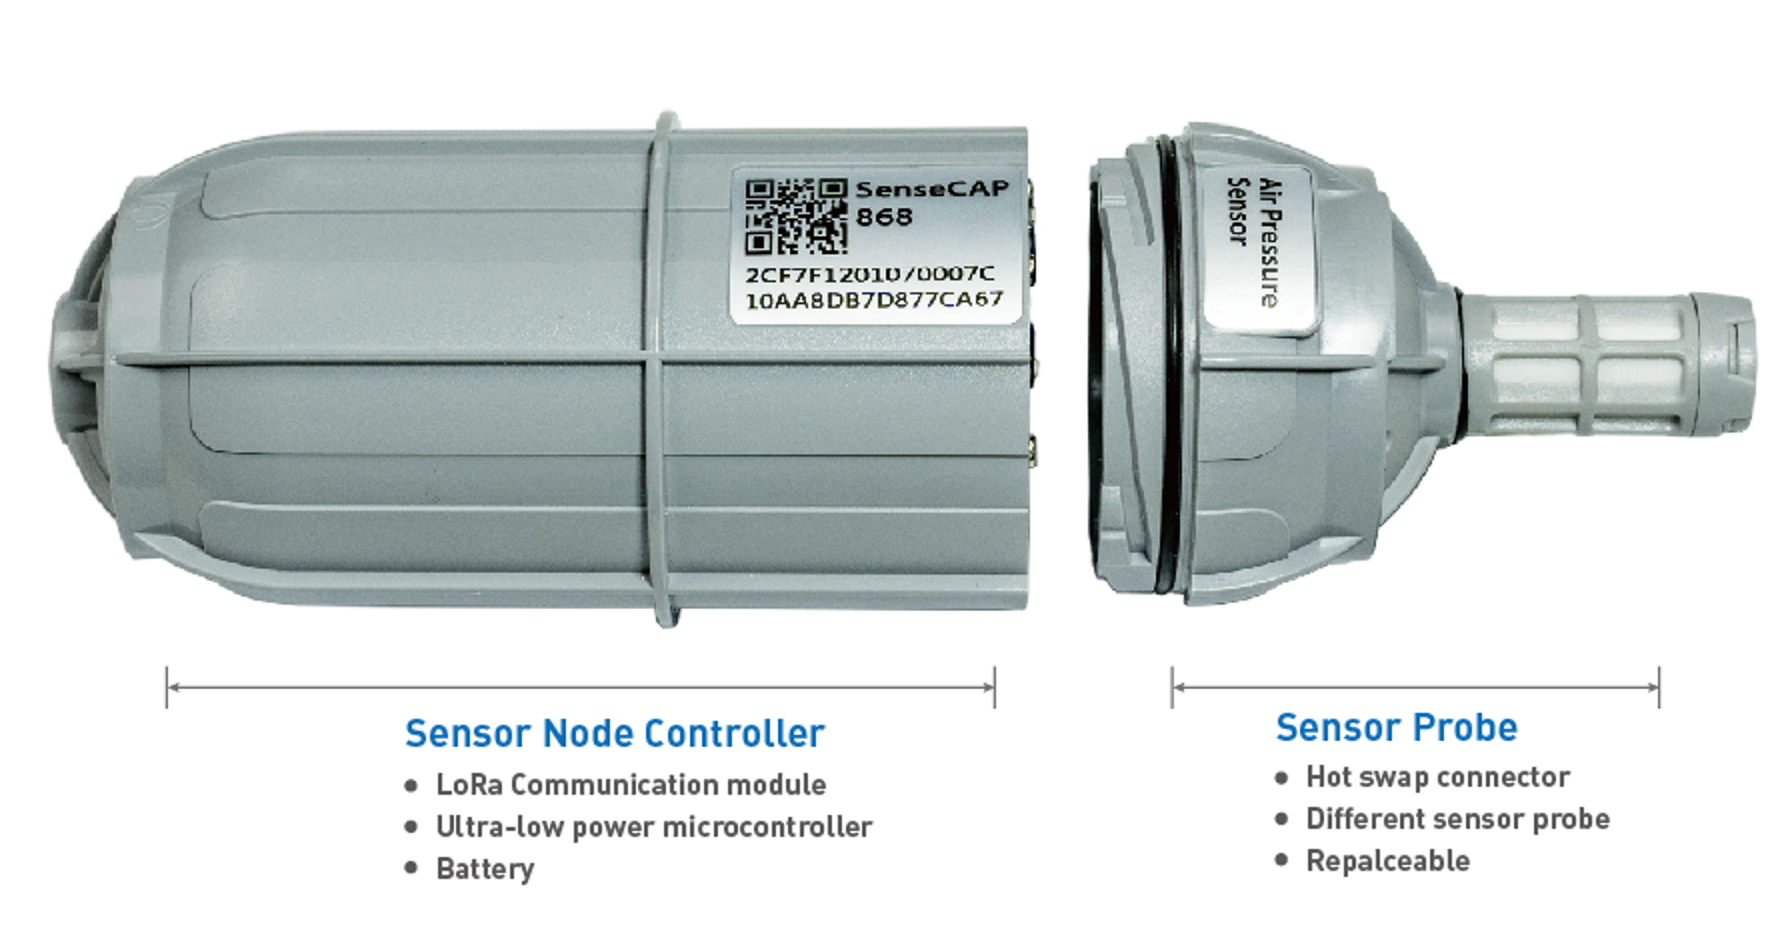
The Sensor Probes can easily be interchanged between Sensor Node Controllers.
Internals
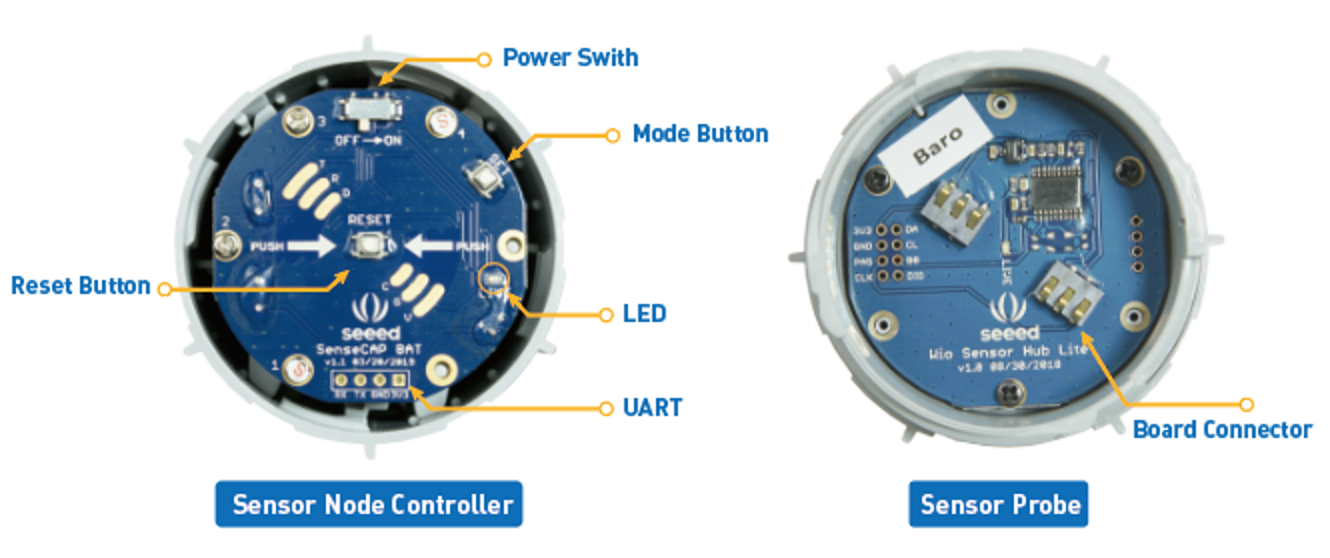
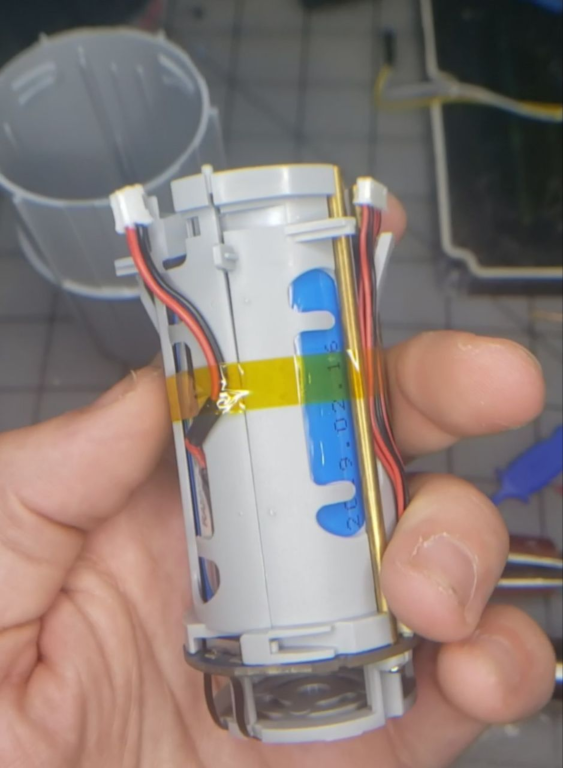
The main SenseCAP module contains the LoRaWAN radio, antenna, and batteries.
Set up new device with existing keys
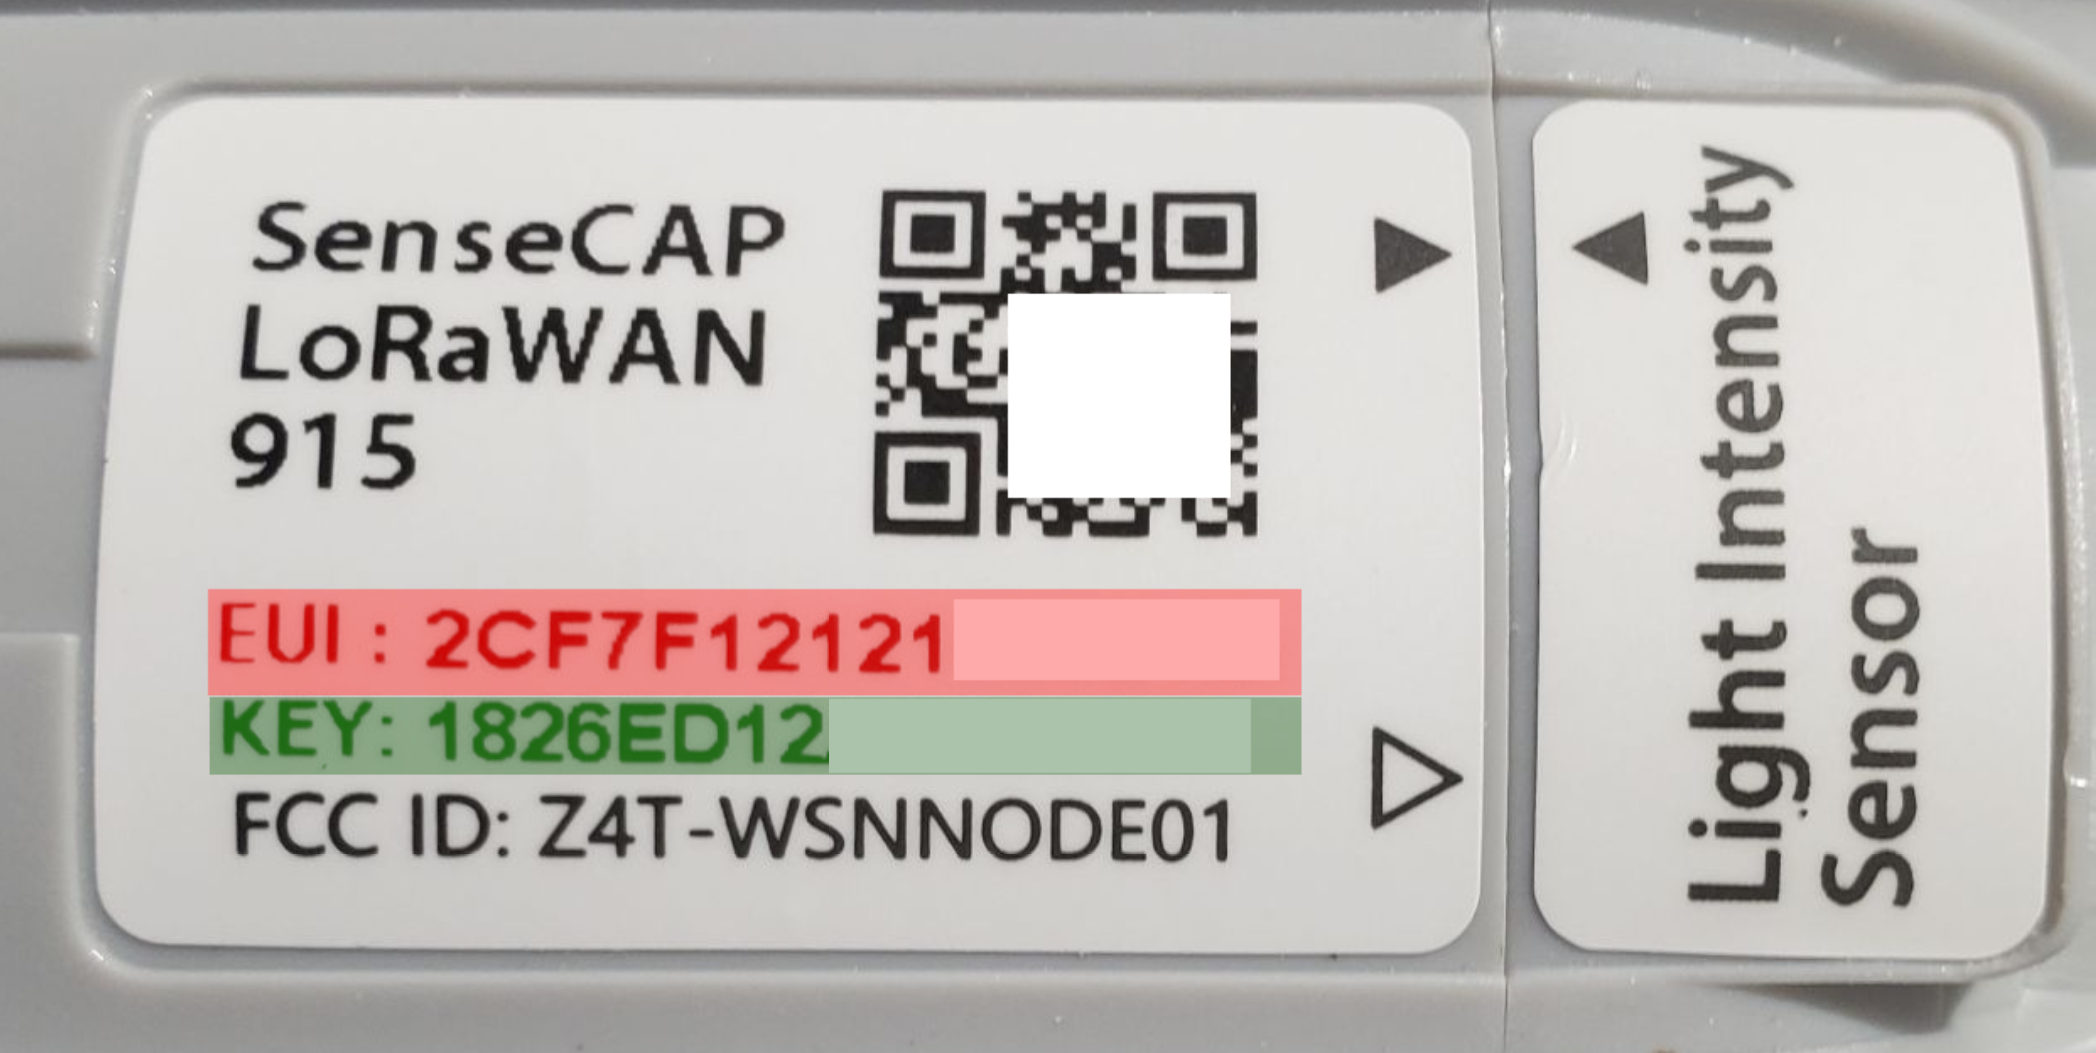
Copy down the "EUI" and the "KEY" from the label on your SenseCAP device:
Understand that there is a bit of a naming issue here. The key names are mapped as such:
KEY = DEVICECODE = Device Code
Now, we need to get those two keys and insert them into the following URL:
https://sensecap.seeed.cc/makerapi/device/view_device_info?nodeEui=
DEVEUI&deviceCode=
DEVICECODE
In the above example, the URL would look like such:
DEVICECODE (Device Code): 1826ed12XXXXXXXX
https://sensecap.seeed.cc/makerapi/device/view_device_info?nodeEui=
2cf7f12121XXXXXX&deviceCode=
1826ed12XXXXXXXX
The SenseCAP sensor device's AppEUI and AppKey have been flashed into the device by SEEED. We will use the HTTP API to retrieve the actual App EUI and App Key.
You can use a browser to issue an HTTP GET request.
We simply paste the URL we constructed above into a browser address bar, and it should return a JSON object in the following format containing the actual keys programmed onto the device:{
"code": "0",
"data": {
"nodeEui": "2cf7f12121XXXXXX",
"deviceCode": "1826ed12XXXXXXXX",
"lorawanInformation": {
"dev_eui": "2CF7F12121XXXXXX",
"app_eui": "8000000000XXXXXX",
"app_key": "3BF3D4C5744A057E0A1A61F4XXXXXXXX"
}
}
}
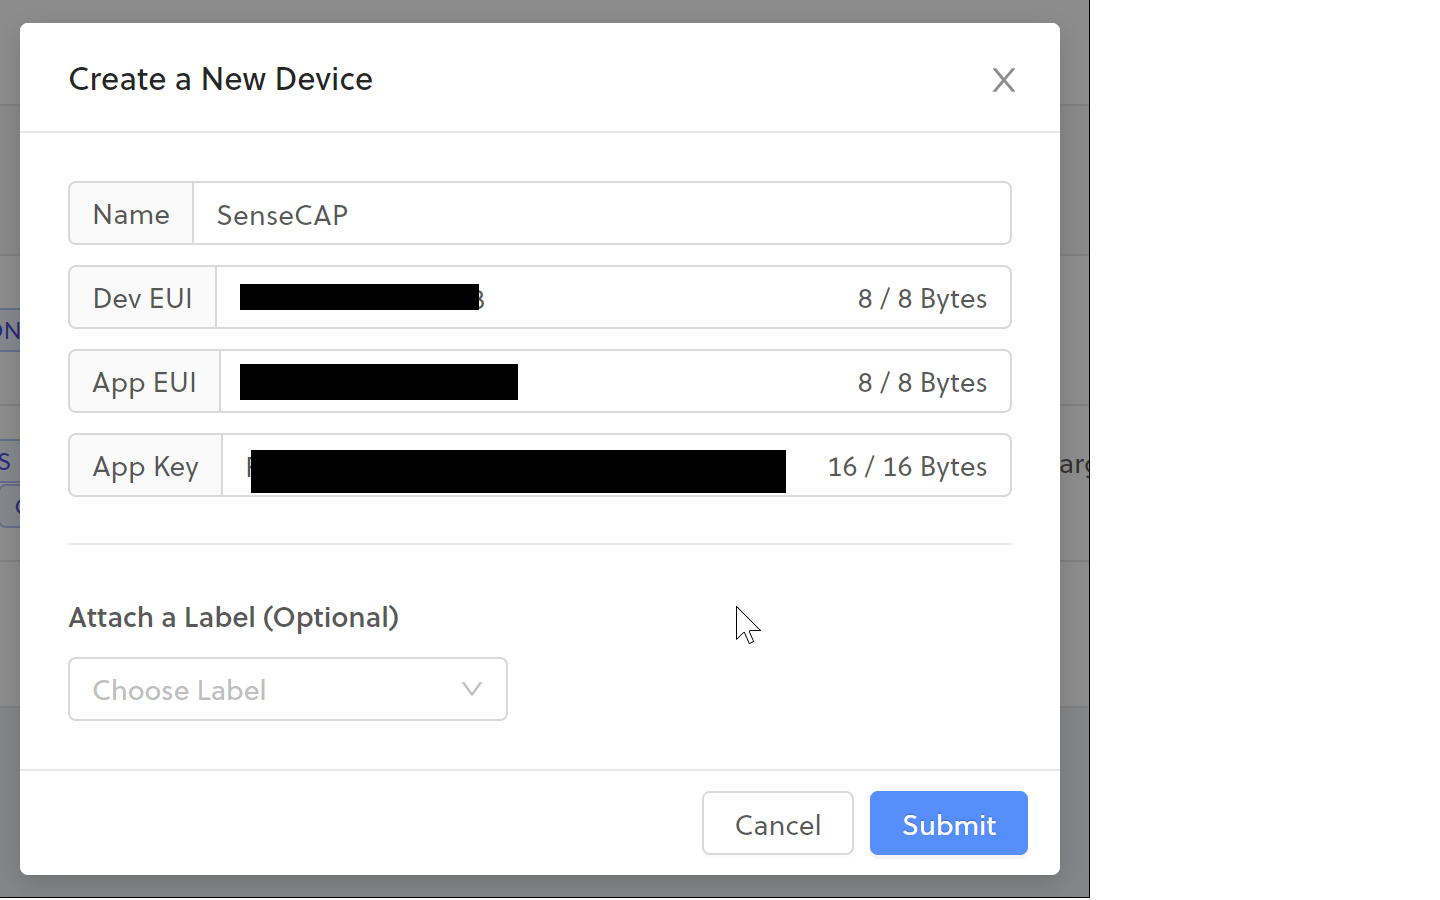
The last three keys in this object (dev_eui, app_eui, and app_key) will be used to create this device in the Helium Console.
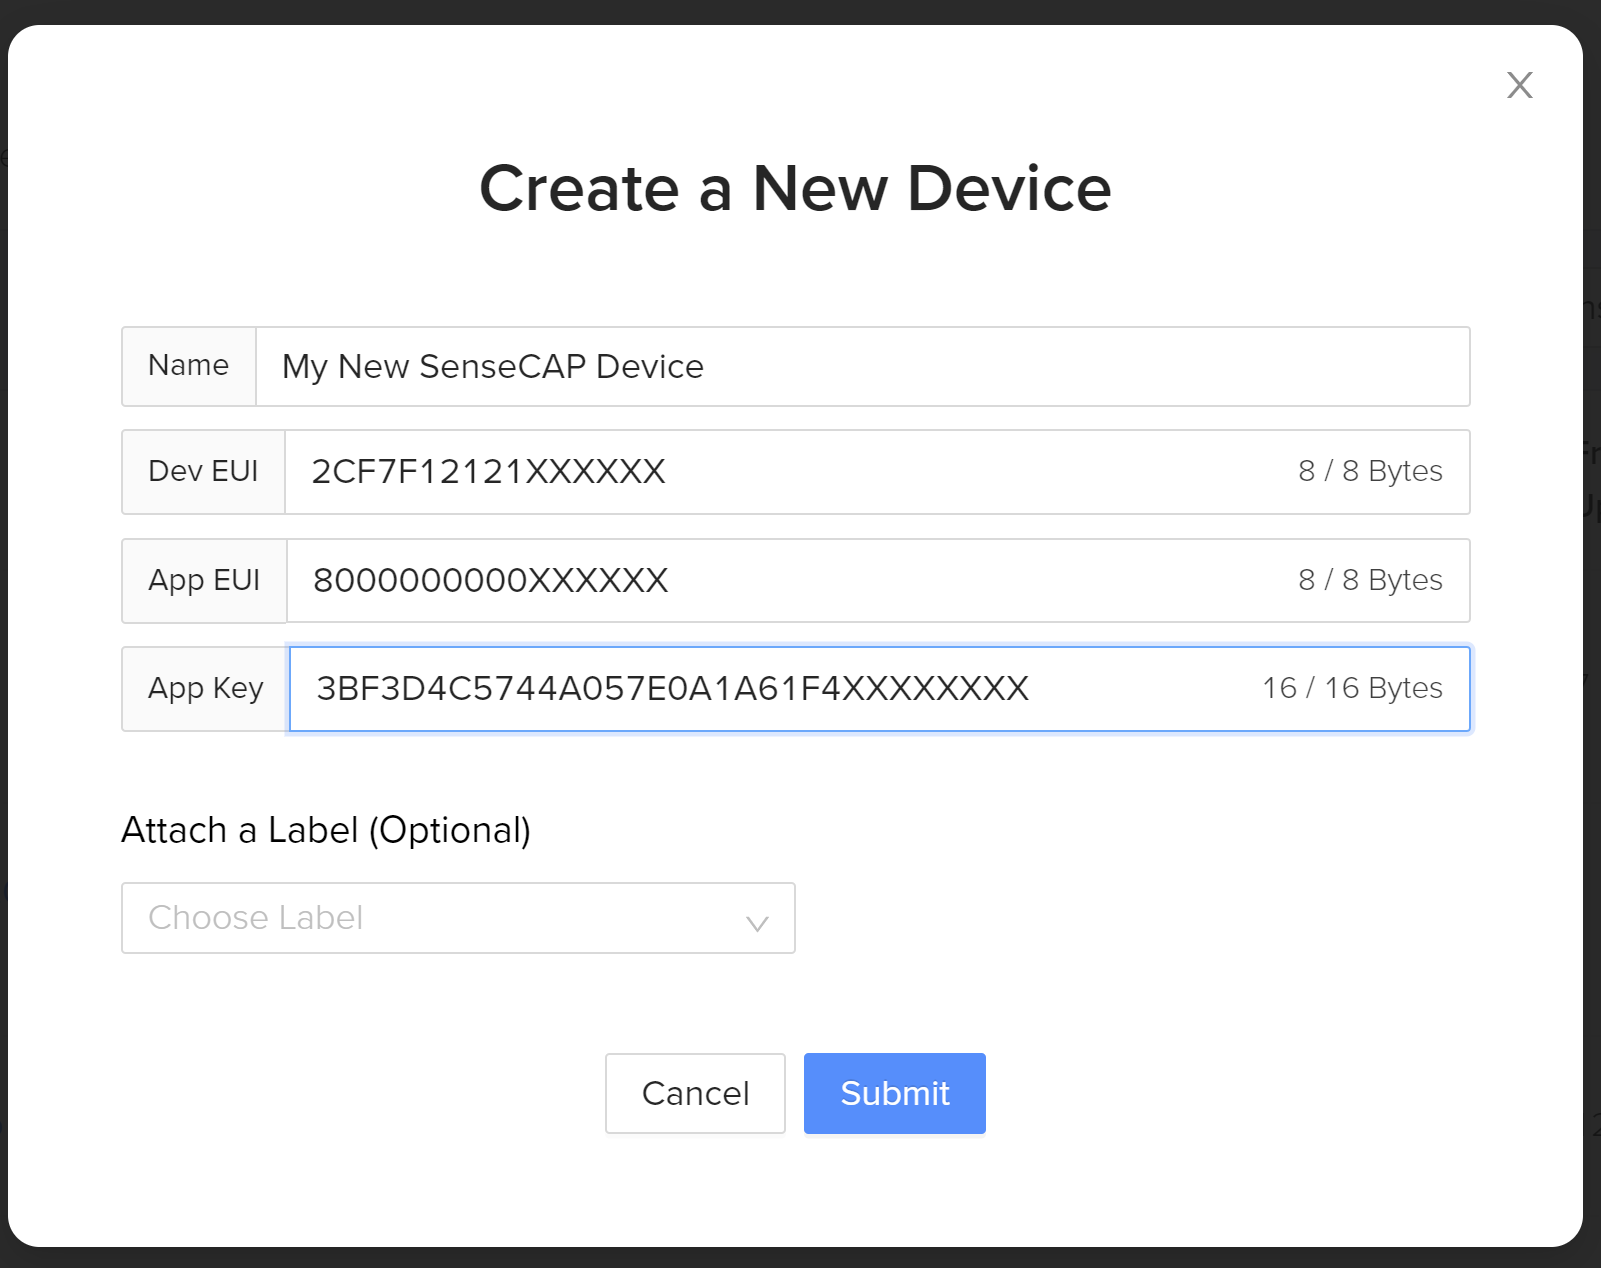
You have now linked your new SenseCAP device to the Helium Console!
We now simply have to turn it on. Carefully unscrew the cap on the SenseCAP node, switch it to the "ON" position, and replace the cap.
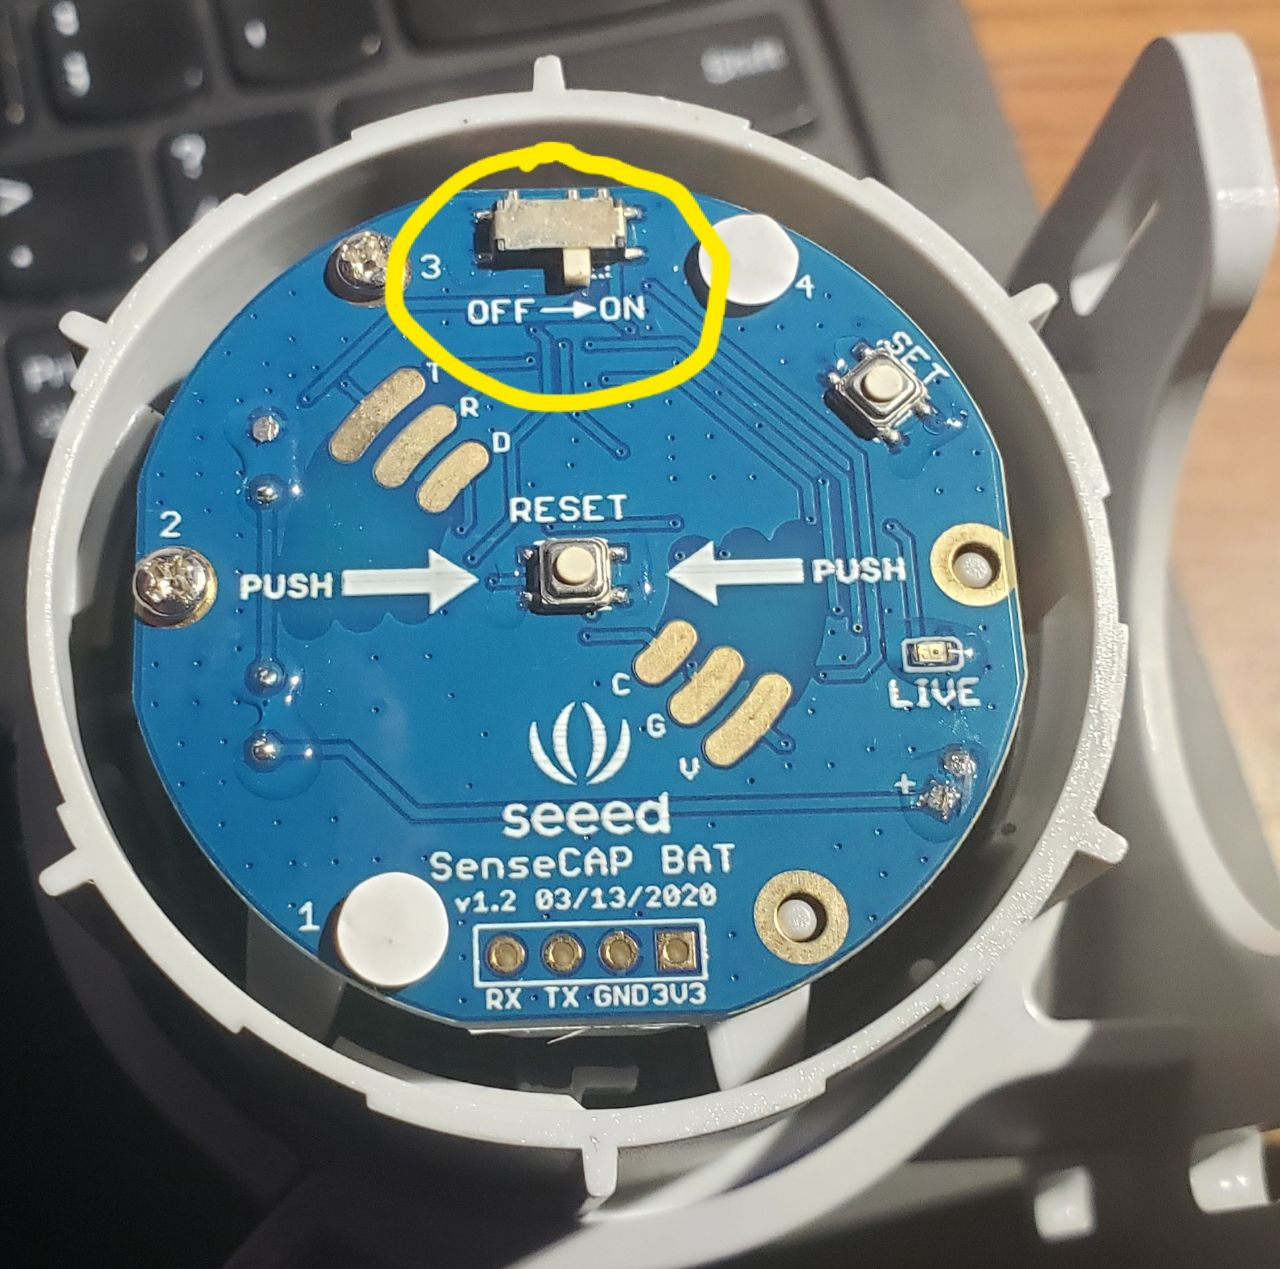
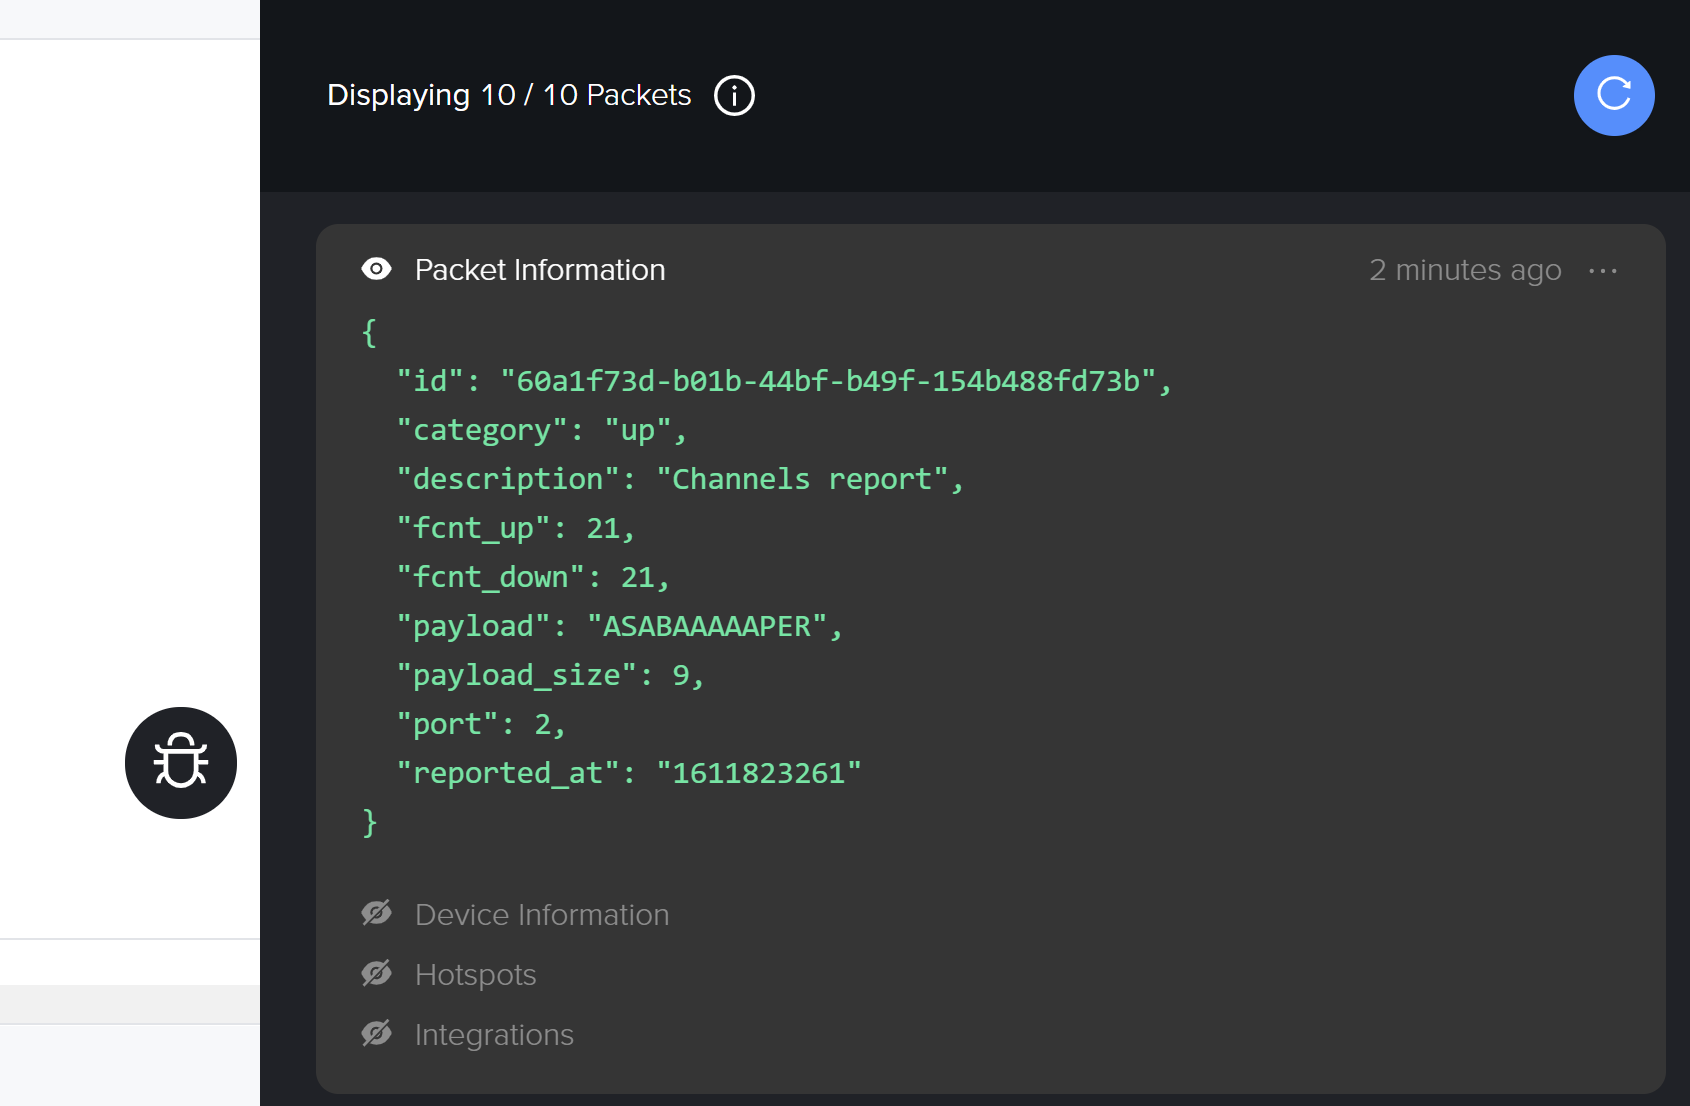
At this point, you may open up the new device within the Helium Console, click the "Debug" icon on the right, and should see packets arriving in short order!
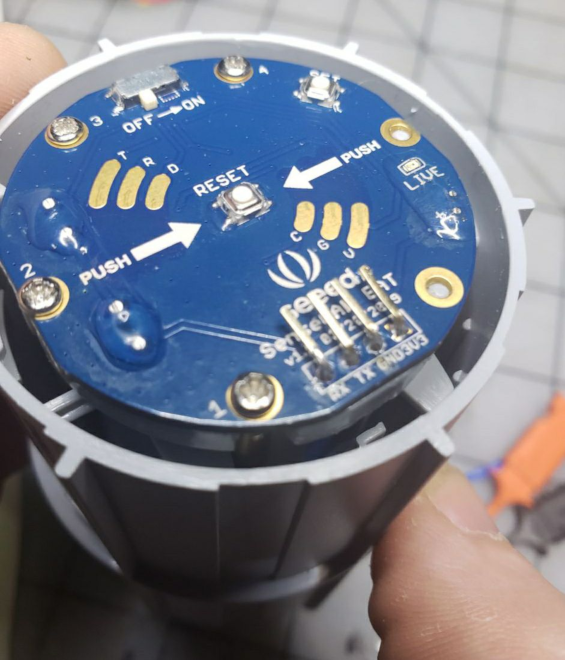
Programming the SenseCAP
In some situations, you may want to change the keys provisioned on the device. To reprogram the SenseCap, you will need a TTL/Serial cable. I added some 90 degree headers on the base unit to make it easier to connect a molex connector, but you may can make do with sliding some pins in there and holding them at an angle to maintain contact. Only connect the Ground and the TX/RX lines; leave the 3v3 pin disconnected. At this point, we can either connect to the device directly using a serial terminal, or use the SenseCAP GUI utility (for Windows and Mac only ATM) found here.
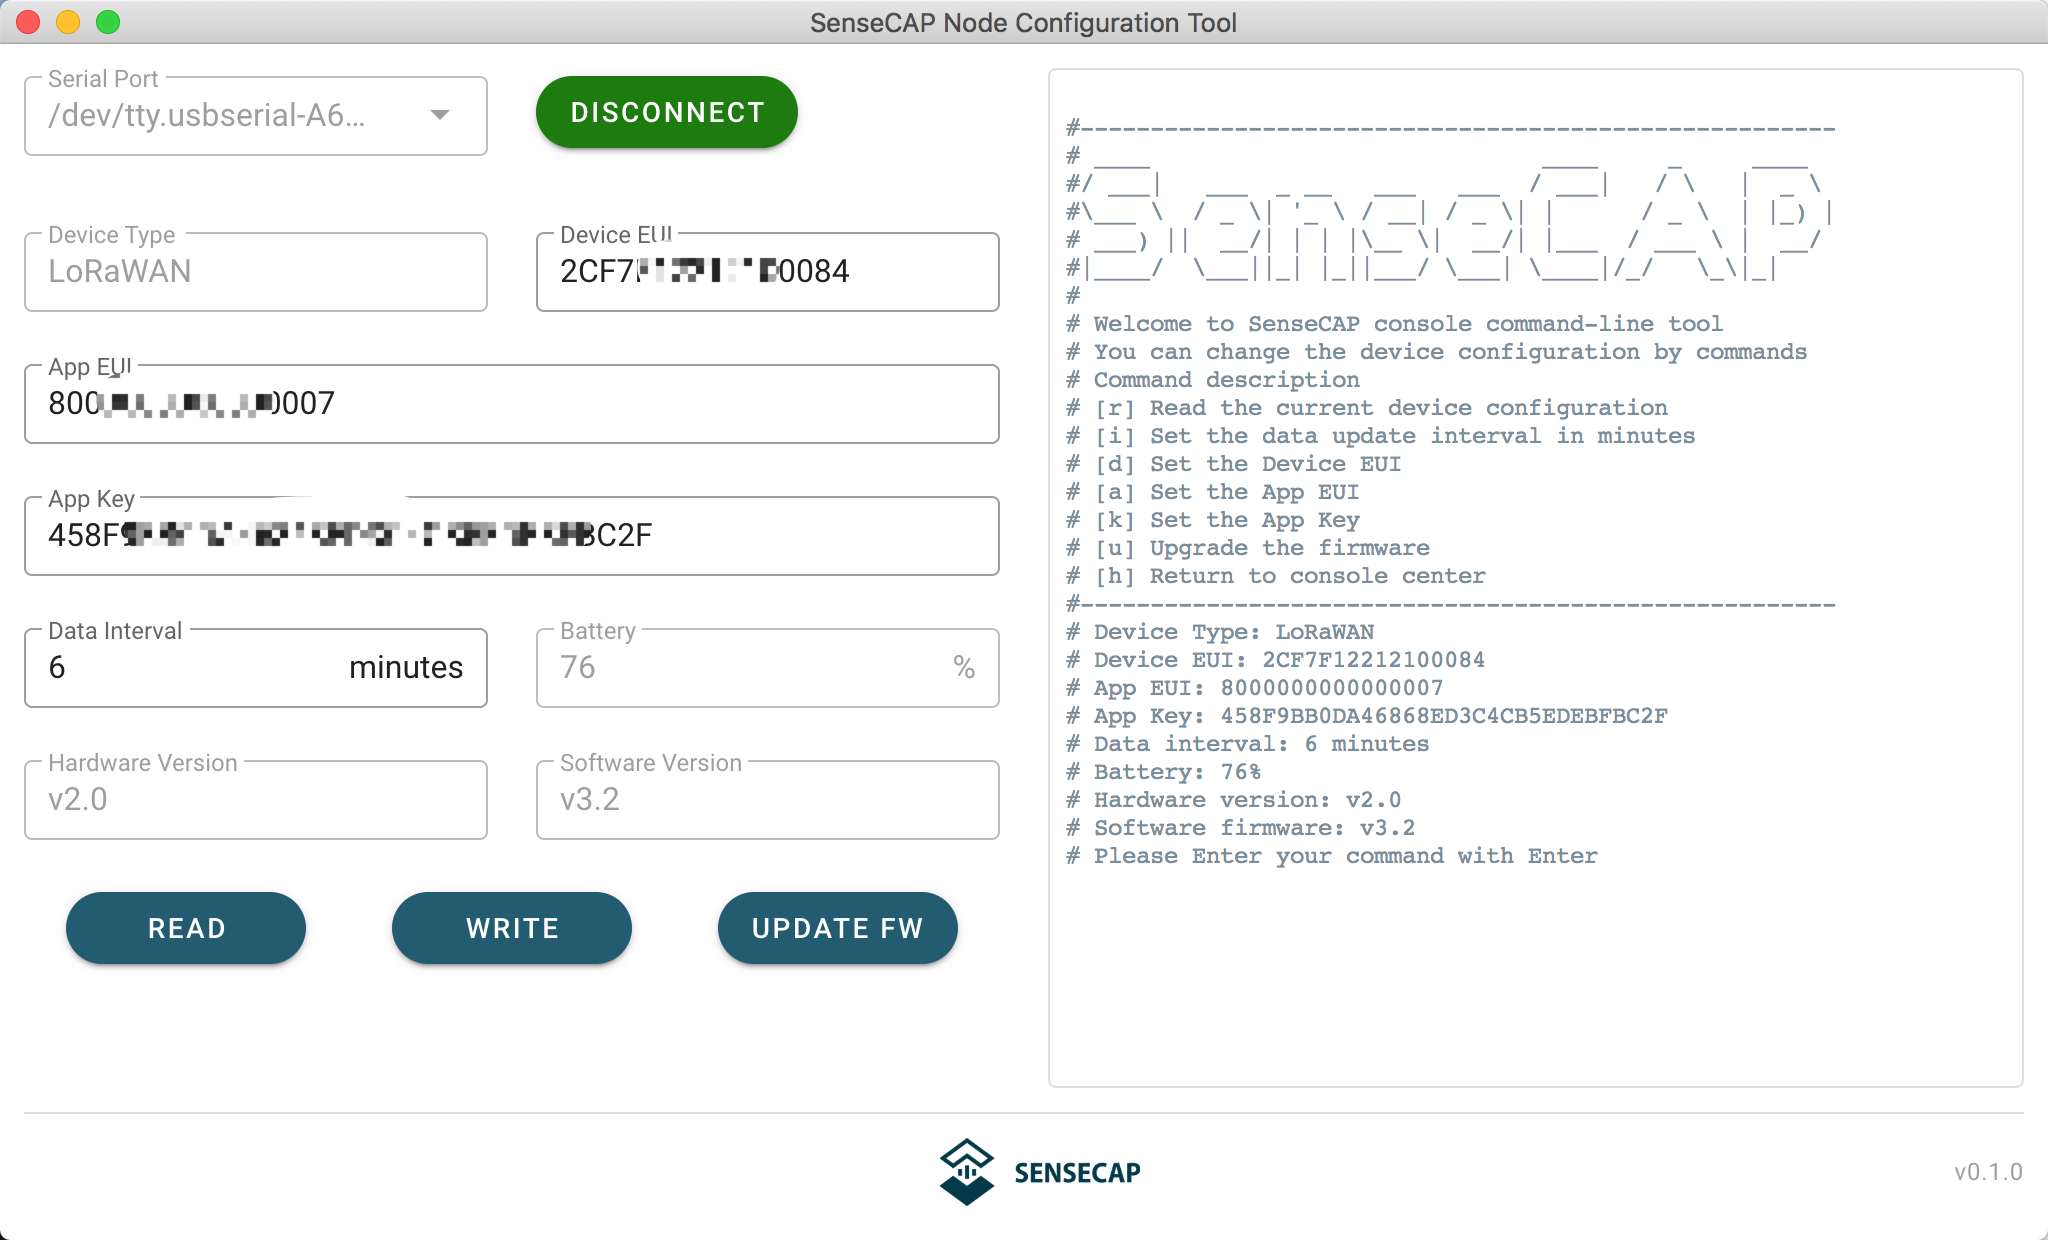
Connect your cable, turn the unit on, and then tap the Reset button while holding the Set button. This will put you into programming mode. Following that, either jot down your Device EUI/App EUI/App Key from the right pane in the utility and enter those into the Helium Console, or get the Helium keys from the Console, enter them in this utility, and write them down to the node.
Voila! Unplug your cable, hit the reset button, wait for the red LIVE led to flash a few times, and you should see an activation come across your Helium Console! At this point, carefully replace the sensor cap, and you should be good to go!