Aruba Mobility Controller Conversion Guide
Prerequisites
- Aruba system must be running AOS 8.10.x.x or later (tested on an Aruba 7005 running AOS 8.10.0.16).
- Guide assumes the network is using an on-prem Aruba Mobility Controller.
- Aruba system has AP(s) linked to the Mobility Controller.
- Aruba system has basic traffic routing working with existing SSID(s).
- SSH or console access to the Mobility Controller, to enable RadSec from the CLI.
- The Helium RadSec certificates from the Helium onboarding process (either from the WiFi Conversion
process or sent to you by your Helium Plus contact): the RadSec Server CA (
ca.pem), and the client certificate and key combined in one PEM file (for example:cat cert.pem key.pem > client_combined.pem). - ACLs or firewalls allow the Mobility Controller to reach the internet on TCP port 2083.
High Level Steps
- Upload Helium RadSec Certificates
- Create the Helium RadSec Server
- Build Helium Passpoint SSID
- Build WLAN
- Link AAA Profile to RADIUS Accounting Server Group
- Build ANQP Profile
- Build Advertisement Profile
- Link ANQP Profile to the Advertisement Profile
- Build Hotspot 2.0 Profile
- Link Advertisement Profile to Hotspot 2.0 Profile
- Link Hotspot 2.0 Profile to Virtual AP
- Connect and Validate
Upload Helium RadSec Certificates
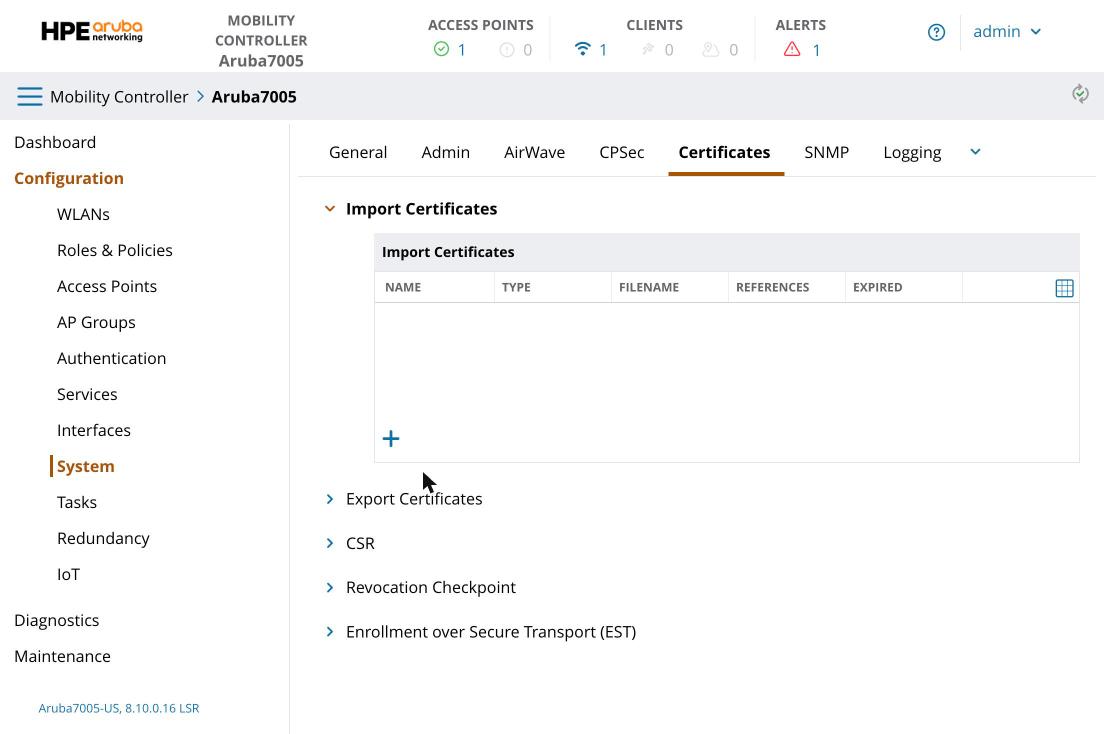
Navigate to Configuration → System → Certificates → Import Certificates and add:
- RadSec Server CA (
ca.pem): TypeTrustedCA, FormatPEM - Combined client certificate and key: Type
ServerCert, FormatPEM
Deploy the pending changes. Note the names you give each certificate; you need them in the next step.
Create the Helium RadSec Server
Uploading the certificates in the web UI only stores them on the controller. The
radsec-trusted-cacert-name and radsec-client-cert lines below attach them to the RadSec server;
without them, both certificate fields show N/A and the TLS connection to Helium cannot start.
The RADIUS server form in the controller's web UI has no RadSec or certificate fields, and the web
UI has no CLI console. Enable RadSec over SSH (ssh admin@<controller-ip>) or the console port:
configure terminal
aaa authentication-server radius Helium-RadSec
  host radius-bf.wifi.hellohelium.com
  enable-radsec
  radsec-port 2083
  radsec-trusted-cacert-name <ca-cert-name>
  radsec-client-cert <client-cert-name>
  nas-identifier <your-nas-id>
  key radsec
exit
write memory
- Enter the server lines while the prompt shows
(RADIUS Server "Helium-RadSec"). Commands entered at the(config)prompt are rejected. - The client certificate keyword is
radsec-client-cert.radsec-client-cert-nameis not accepted. enable-radsecwarns that a trusted certificate is required untilradsec-trusted-cacert-nameis set. This is expected.- Idle SSH sessions time out after a few minutes. If you see
*** IDLE TIMEOUT ***, reconnect before pasting commands.
Verify the configuration:
show aaa authentication-server radius Helium-RadSec
A working configuration looks like this (example output from an Aruba 7005 on AOS 8.10.0.16; your NAS ID and certificate names will differ):
RADIUS Server "Helium-RadSec"
-----------------------------
Parameter                                                         Value
---------                                                         -----
Enable IPv6                                                       Disabled
Host                                                              radius-bf.wifi.hellohelium.com
Key                                                               ********
CPPM credentials                                                  N/A
Auth Port                                                         1812
Acct Port                                                         1813
RadSec Port                                                       2083
Retransmits                                                       3
Timeout                                                           5 sec
NAS ID                                                            <your-nas-id>
NAS IP                                                            N/A
NAS IPv6                                                          N/A
Source Interface                                                  N/A
Use MD5                                                           Disabled
Use IP address for calling station ID                             Disabled
Mode                                                              Enabled
Lowercase MAC addresses                                           Disabled
MAC address delimiter                                             none
Service-type of FRAMED-USER                                       Disabled
RadSec                                                            Enabled
RadSec Trusted CA Name                                            <ca-cert-name>
RadSec Server Cert Name                                           N/A
RadSec Client Cert                                                <client-cert-name>
called-station-id                                                 macaddr colon disable
Access-Request Modifier                                           N/A
Accounting-Request Modifier                                       N/A
Message-Authenticator required in Access-Accept/Reject/Challenge  No
Check these lines:
RadSecisEnabledandRadSec Portis2083.RadSec Trusted CA NameandRadSec Client Certshow your certificate names. IfRadSec Client CertisN/A, theradsec-client-certline was not applied; re-enter it inside the server context.RadSec Server Cert NamestaysN/A; it does not need to be set.
This command shows configuration only. To confirm the RadSec session to Helium is up, check
Diagnostics → Logs for repeated Failed to open TLS socket for server Helium-RadSec errors;
once the connection is established they stop.
Build Aruba Helium Passpoint SSID
The following steps will configure your Aruba Mobility Controller and AP to broadcast an SSID with the needed Passpoint and RADIUS configurations to support Helium Mobile user offload.
To start, log in to your Mobility Controller GUI in your browser. This will be our starting point for all major steps below.
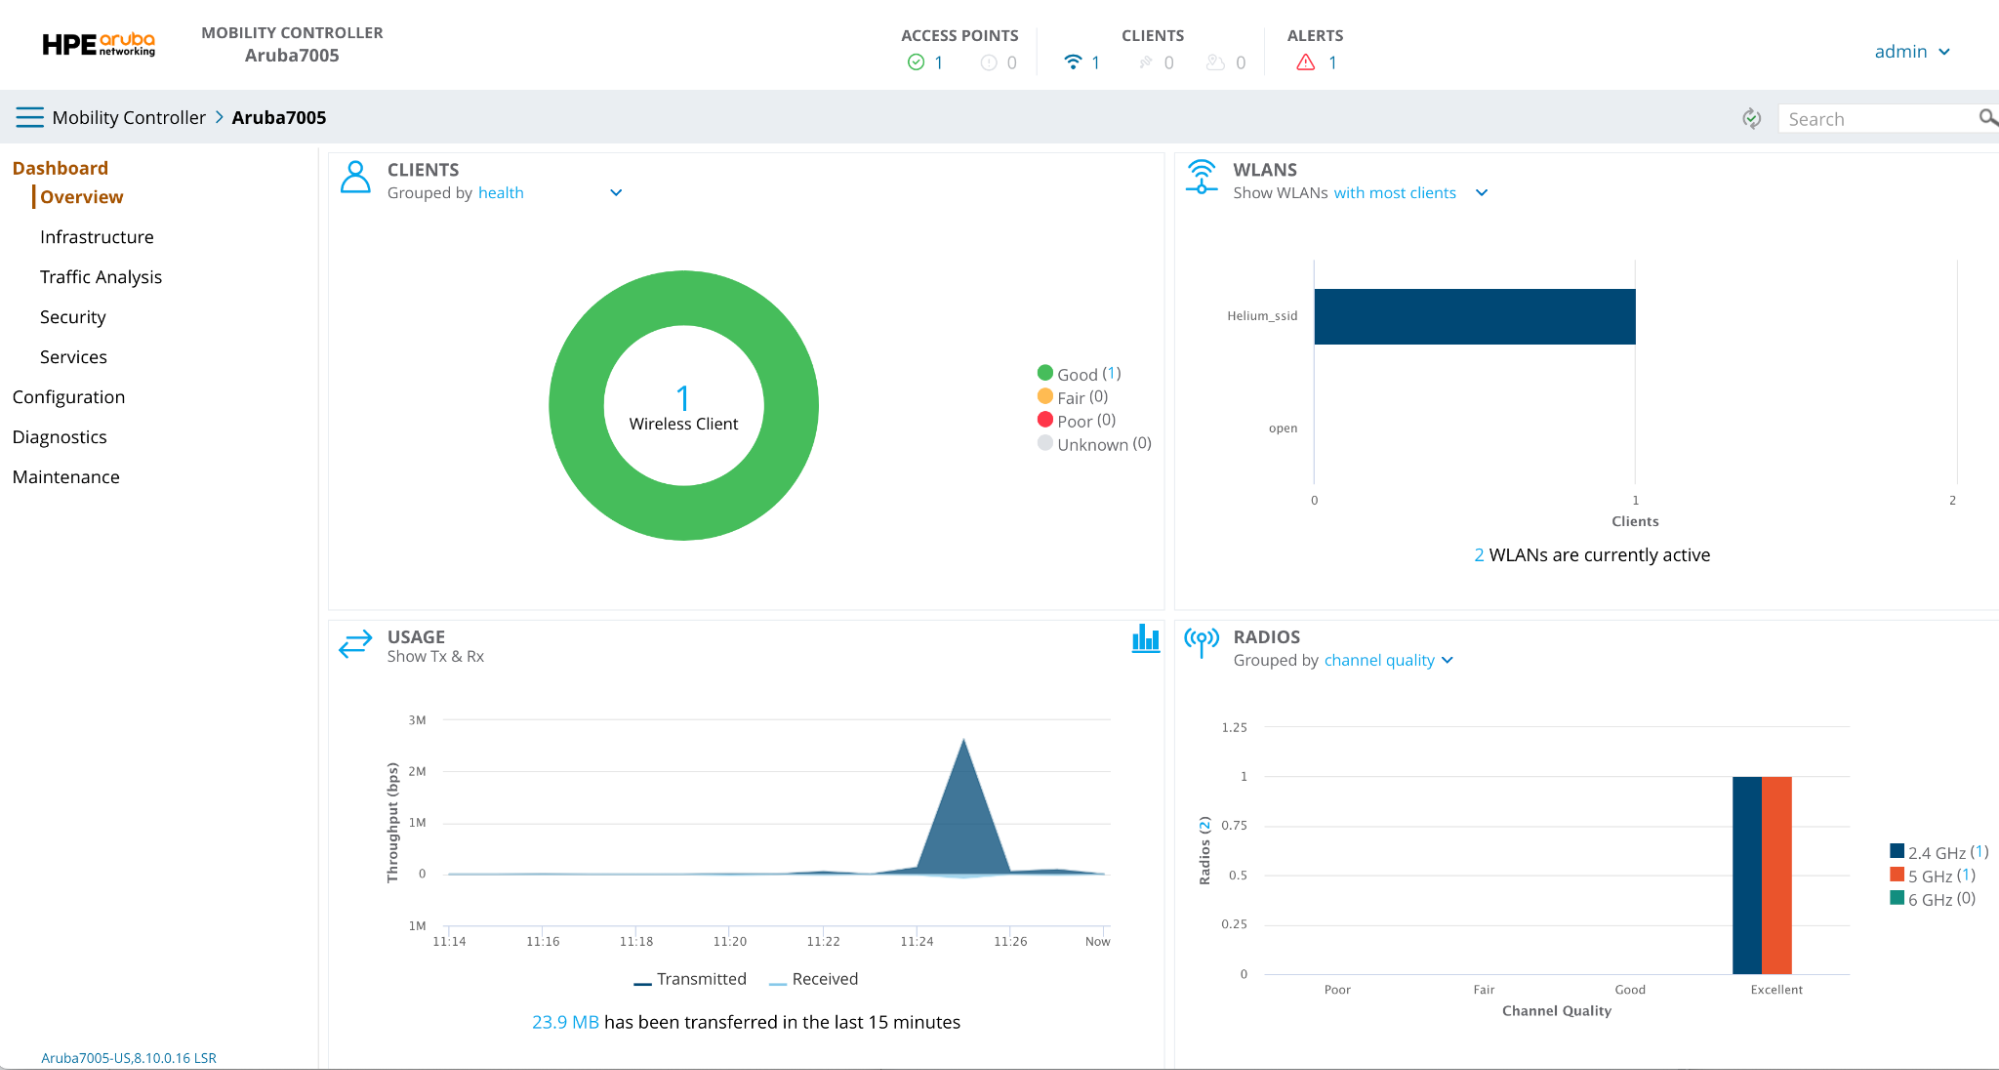
Most windows will have many other parameters with default values set. Leave any unmentioned parameter at its default value.
Build WLAN
- Click on the arrow next to Mobility Controller in the top left corner of the window and select the controller you want to configure.
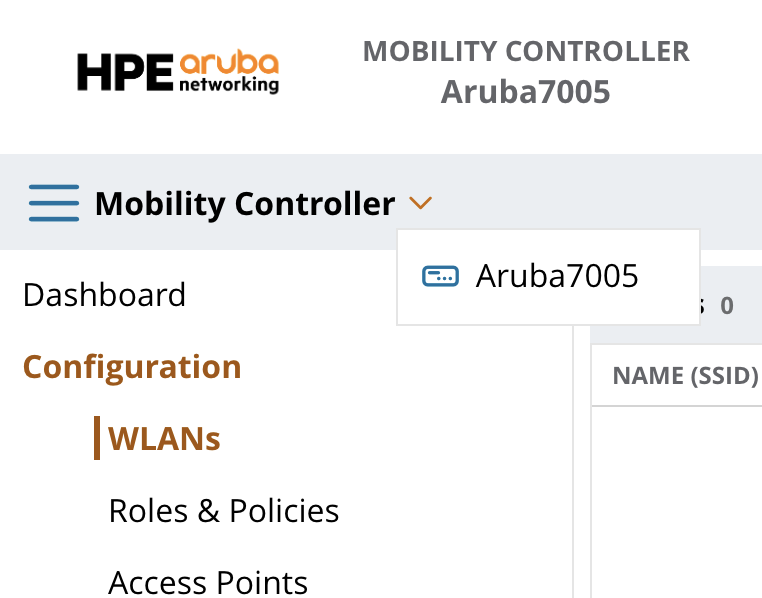
- Click on Configuration and WLAN in the left menu column.
- Click the + in the bottom left of the box to add a new WLAN
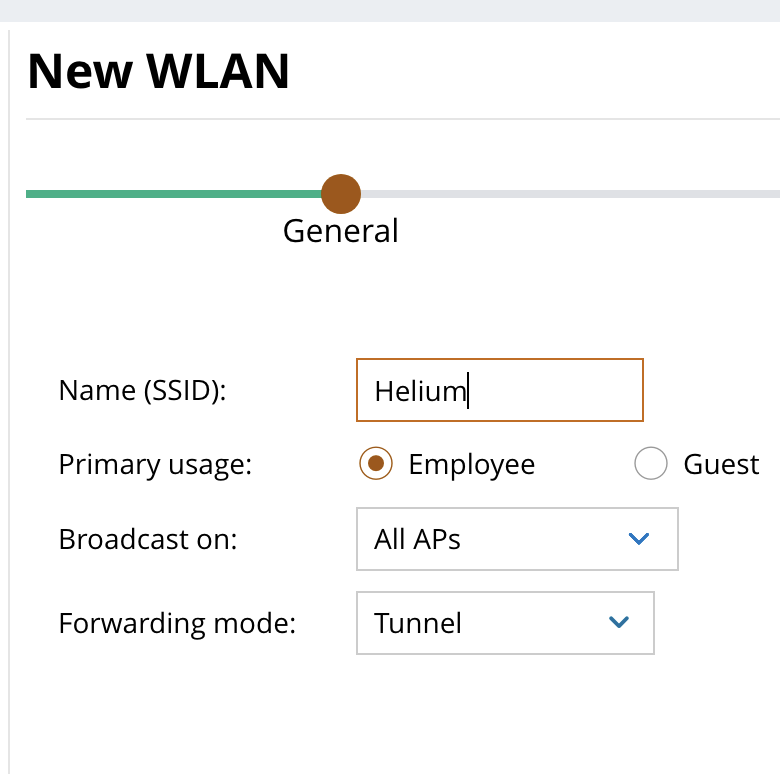
- Enter Name (SSID) = "Helium"
- Edit Broadcast on AP group and Forwarding mode based on your network configuration. In this example we use All APs and Tunnel mode.
- Click Next
- Configure the VLAN settings based on your network configuration. In this example we have a VLAN called "LAN" that we use.
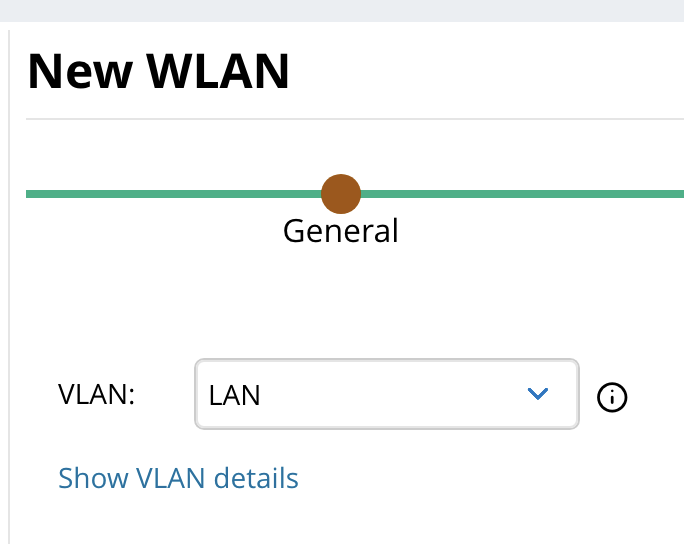
- Click Next
- Select WPA3-Enterprise for Key Management
- Click + in Auth Servers and select Helium-RadSec
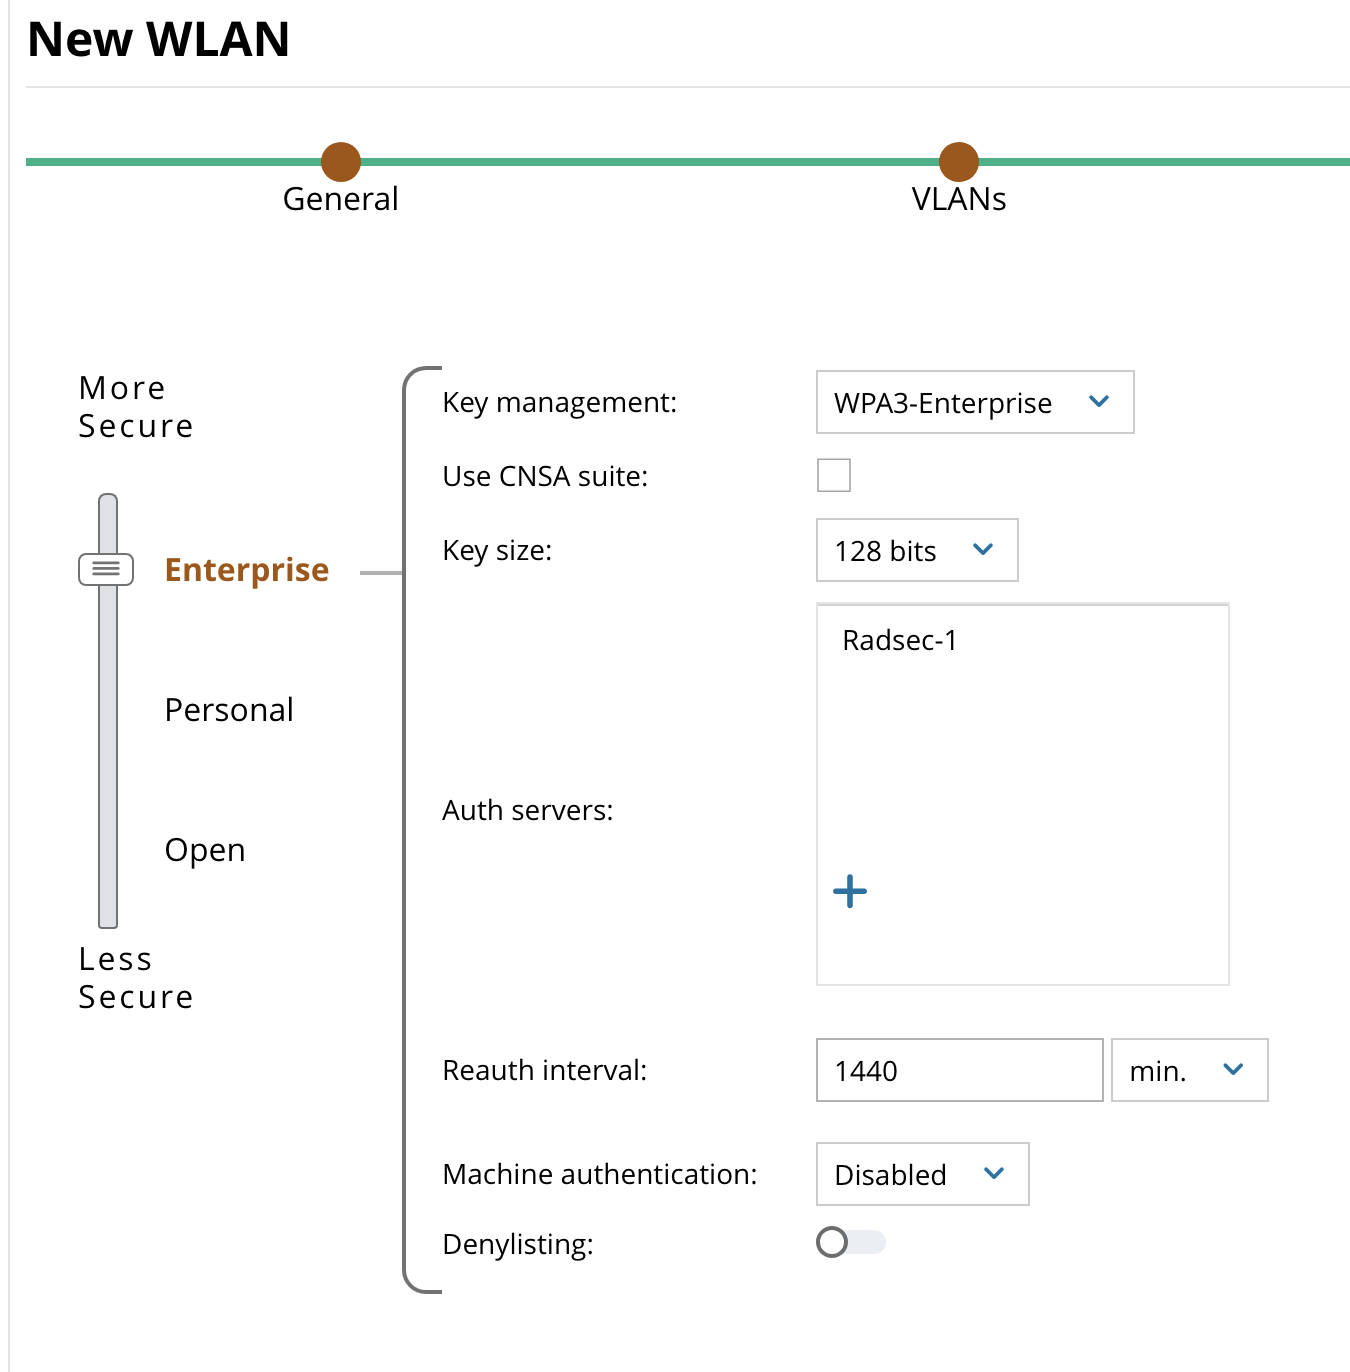
- Click Next
- Select the Default Role based on your network configuration. In this example we use an "allow-all" rule that is wide open and allows all user traffic.
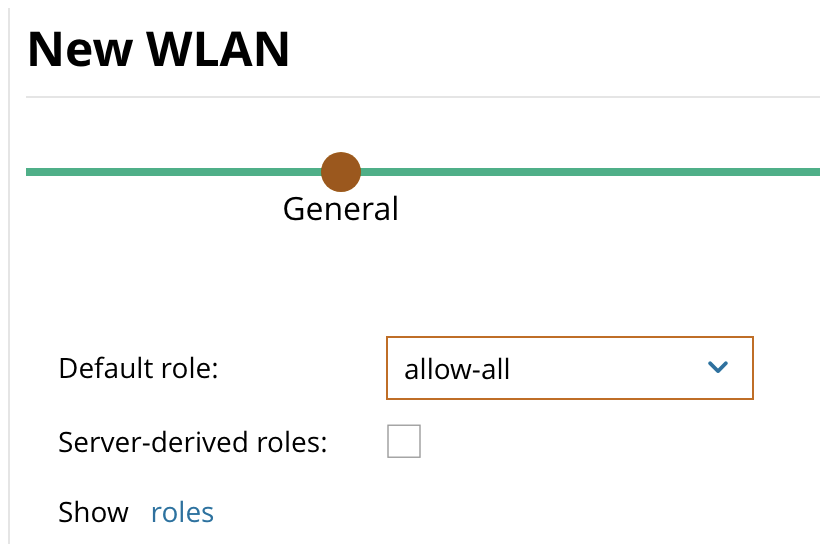
- Click Finish
Link AAA Profile for RADIUS Accounting Server Group
- Click on Configuration and then Authentication in the left menu column.
- Click on AAA Profiles in the top menu bar
- Click the + next to AAA and + next to Helium_aaa_prof
- Click on RADIUS Accounting Server Group
- Select Helium_dot1_svg from the drop-down menu next to Server Group
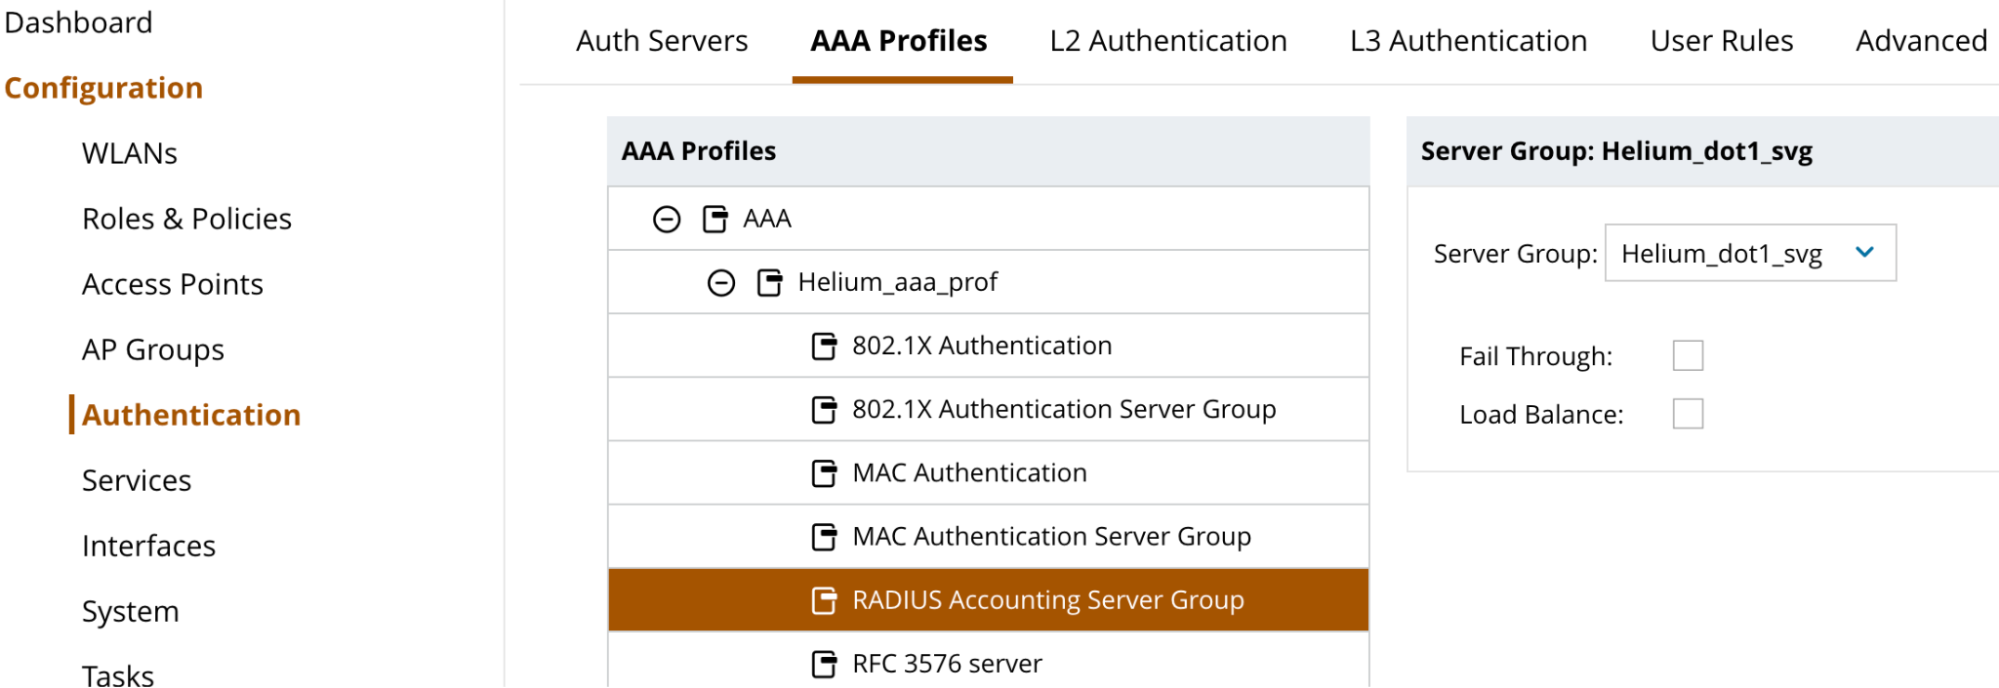
- Click Submit
- Click Pending Changes in the top right corner.
- Click Deploy Changes in the pop up.
Helium-RadSec must be the first server in the WLAN's server group. The WLAN wizard names the group
<ssid>_dot1_svg.
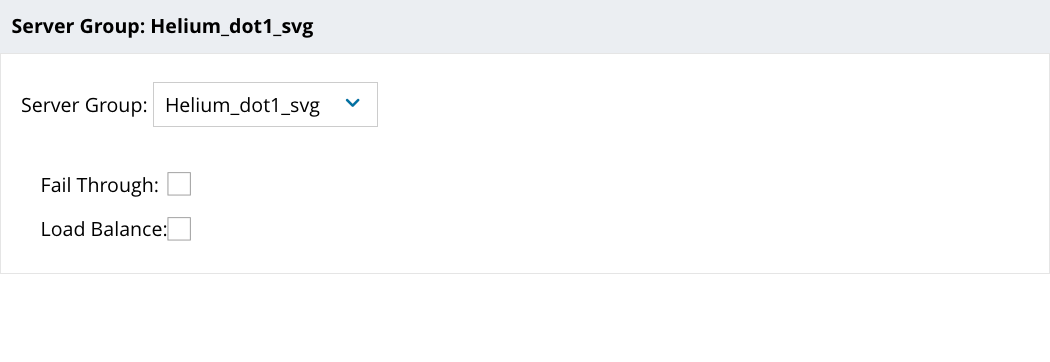
If Helium-RadSec is not listed first, set it from the CLI:
configure terminal
aaa server-group <ssid>_dot1_svg
  auth-server Helium-RadSec position 1
exit
write memory
Build ANQP Profile
Domain Name
- Click on Configuration and System in the left menu column.
- Click on Profiles in the menu bar across the top
- Click the + next to Wireless LAN and scroll down to find ANQP Domain Name
- Click the + in the area to the right to build a new ANQP Domain Name Profile
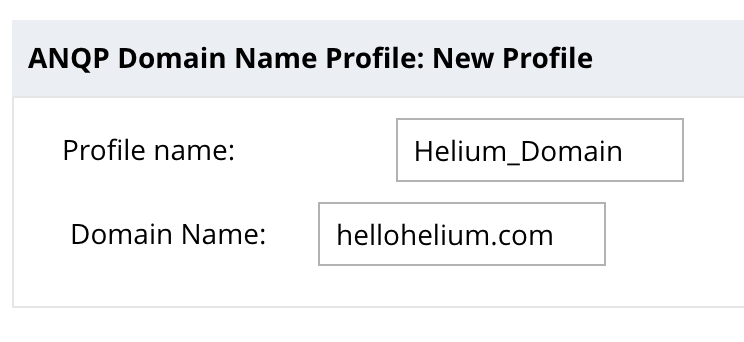
- Enter "Helium_Domain" for Profile Name and "Hellohelium.com" for Domain Name
- Click Submit
- Click Pending Changes in the top right corner.
- Click Deploy Changes in the pop up.
IP Address Availability
- Click on Configuration and System in the left menu column.
- Click on Profiles in the menu bar across the top
- Click the + next to Wireless LAN and scroll down to find ANQP IP Address Availability
- Click the + in the area to the right to build a new ANQP IP Address Availability Profile
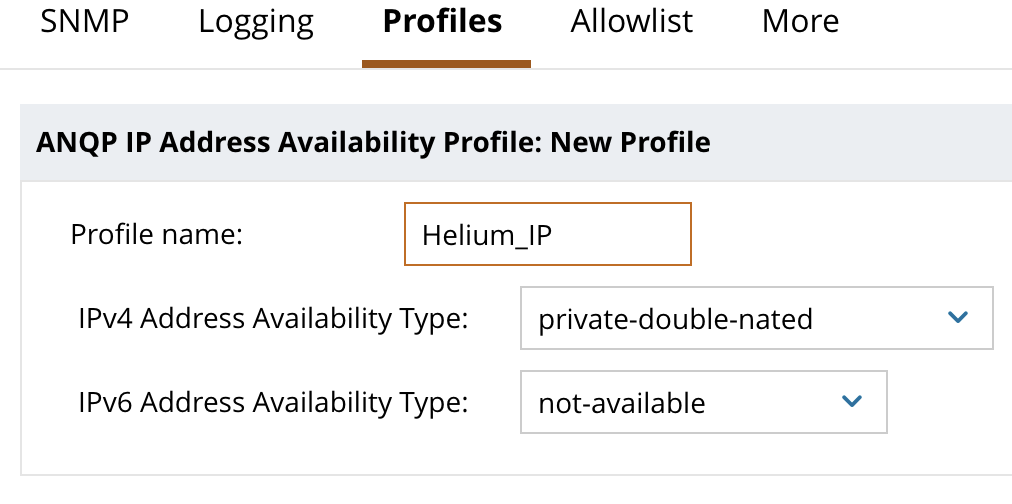
- Enter "Helium_IP" for profile name, then select appropriate values for IPv4 and IPv6 availability. If unsure, select "private-double-nated" and "not-available".
- Click Submit
- Click Pending Changes in the top right corner.
- Click Deploy Changes in the pop up.
NAI Realm
- Click on Configuration and System in the left menu column.
- Click on Profiles in the menu bar across the top
- Click the + next to Wireless LAN and scroll down to find ANQP NAI Realm
- Click the + in the area to the right to build a new ANQP NAI Realm Profile
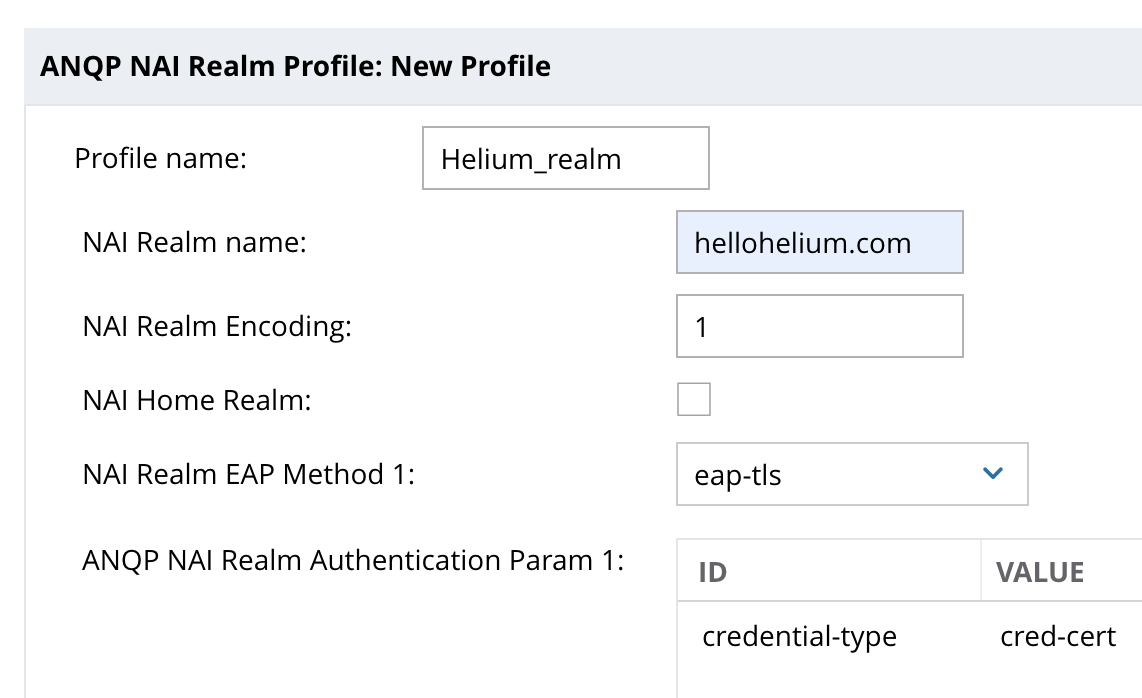
- Enter "Helium_realm" for Profile Name and "hellohelium.com" for NAI Realm Name.
- In the drop-down for NAI Realm EAP Method 1, choose "eap-tls" and below that click the + to set ID = Credential Type and Value = cred-cert
- Click OK
- Click Submit
- Click Pending Changes in the top right corner.
- Click Deploy Changes in the pop up.
Venue Name
- Click on Configuration and System in the left menu column.
- Click on Profiles in the menu bar across the top
- Click the + next to Wireless LAN and scroll down to find ANQP Venue Name
- Click the + in the area to the right to build a new ANQP Venue Name Profile
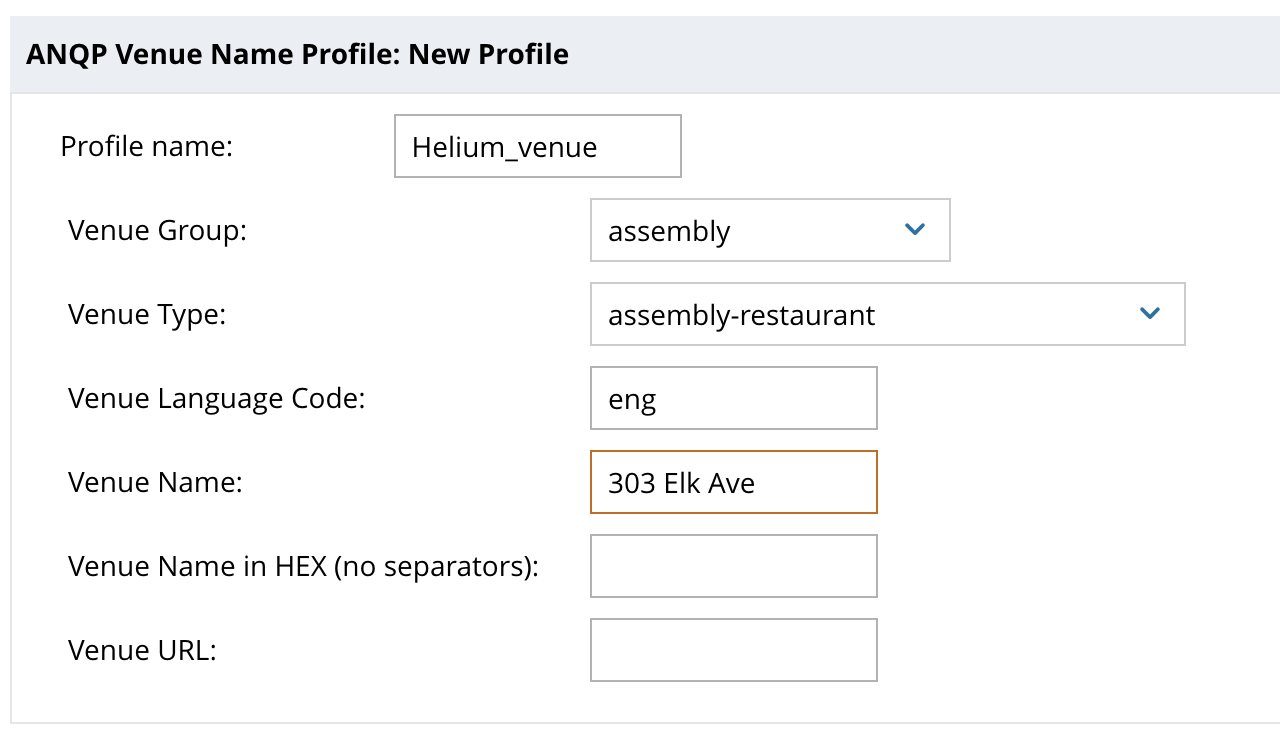
- Enter "Helium_venue" in Profile Name, select the best-fitting Venue Group, e.g. "business", and the best-fitting Venue Type, e.g. "assembly-restaurant", and supply a Venue Name, which can be the street address of your venue, e.g. "303 Elk Ave"
- Click Submit
- Click Pending Changes in the top right corner.
- Click Deploy Changes in the pop up.
Build Advertisement Profile
- Click on Configuration and System in the left menu column.
- Click on Profiles in the menu bar across the top
- Click the + next to Wireless LAN and scroll down to find Advertisement Profile
- Click the + in the area to the right to build a new Advertisement Profile
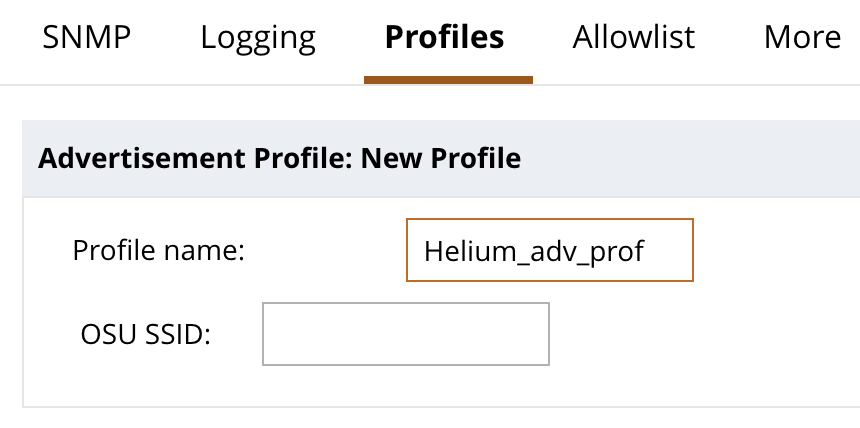
- Enter "Helium_adv_prof" as Profile name
- Click Submit
- Click Pending Changes in the top right corner.
- Click Deploy Changes in the pop up.
Link ANQP Profiles to the Advertisement Profile
- Click on Configuration and System in the left menu column.
- Click on Profiles in the menu bar across the top
- Click the + next to Wireless LAN and scroll down to find Advertisement
- Click the + next to Advertisement and click on the + next to Helium_adv_profile
- Select ANQP Domain Name from the list and click on the + in the box to the right and select "Helium_Domain" from the list.
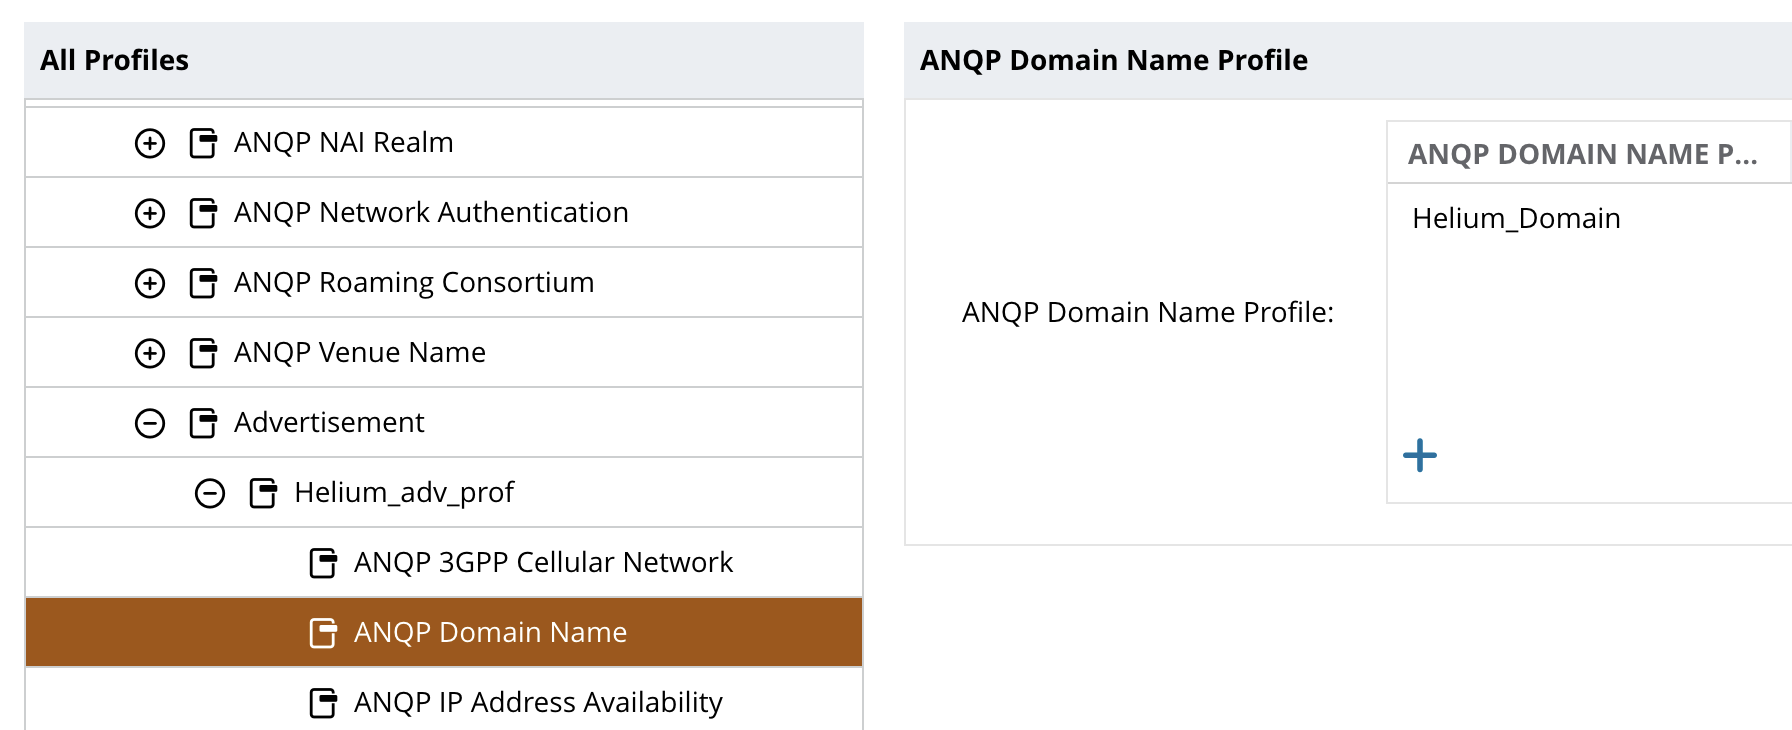
- Click OK
- Click Submit
- Click Pending Changes in the top right corner.
- Click Deploy Changes in the pop up.
- Repeat steps 1-9 to add:
- ANQP IP Address Availability
- ANQP NAI Realm
- ANQP Venue Name
You must do each parameter individually and deploy changes each time.
Build Hotspot 2.0 Profile
- Click on Configuration and System in the left menu column.
- Click on Profiles in the menu bar across the top
- Click the + next to Wireless LAN and scroll down to find Hotspot 2.0
- Click the + in the area to the right to build a new Hotspot 2.0 Profile
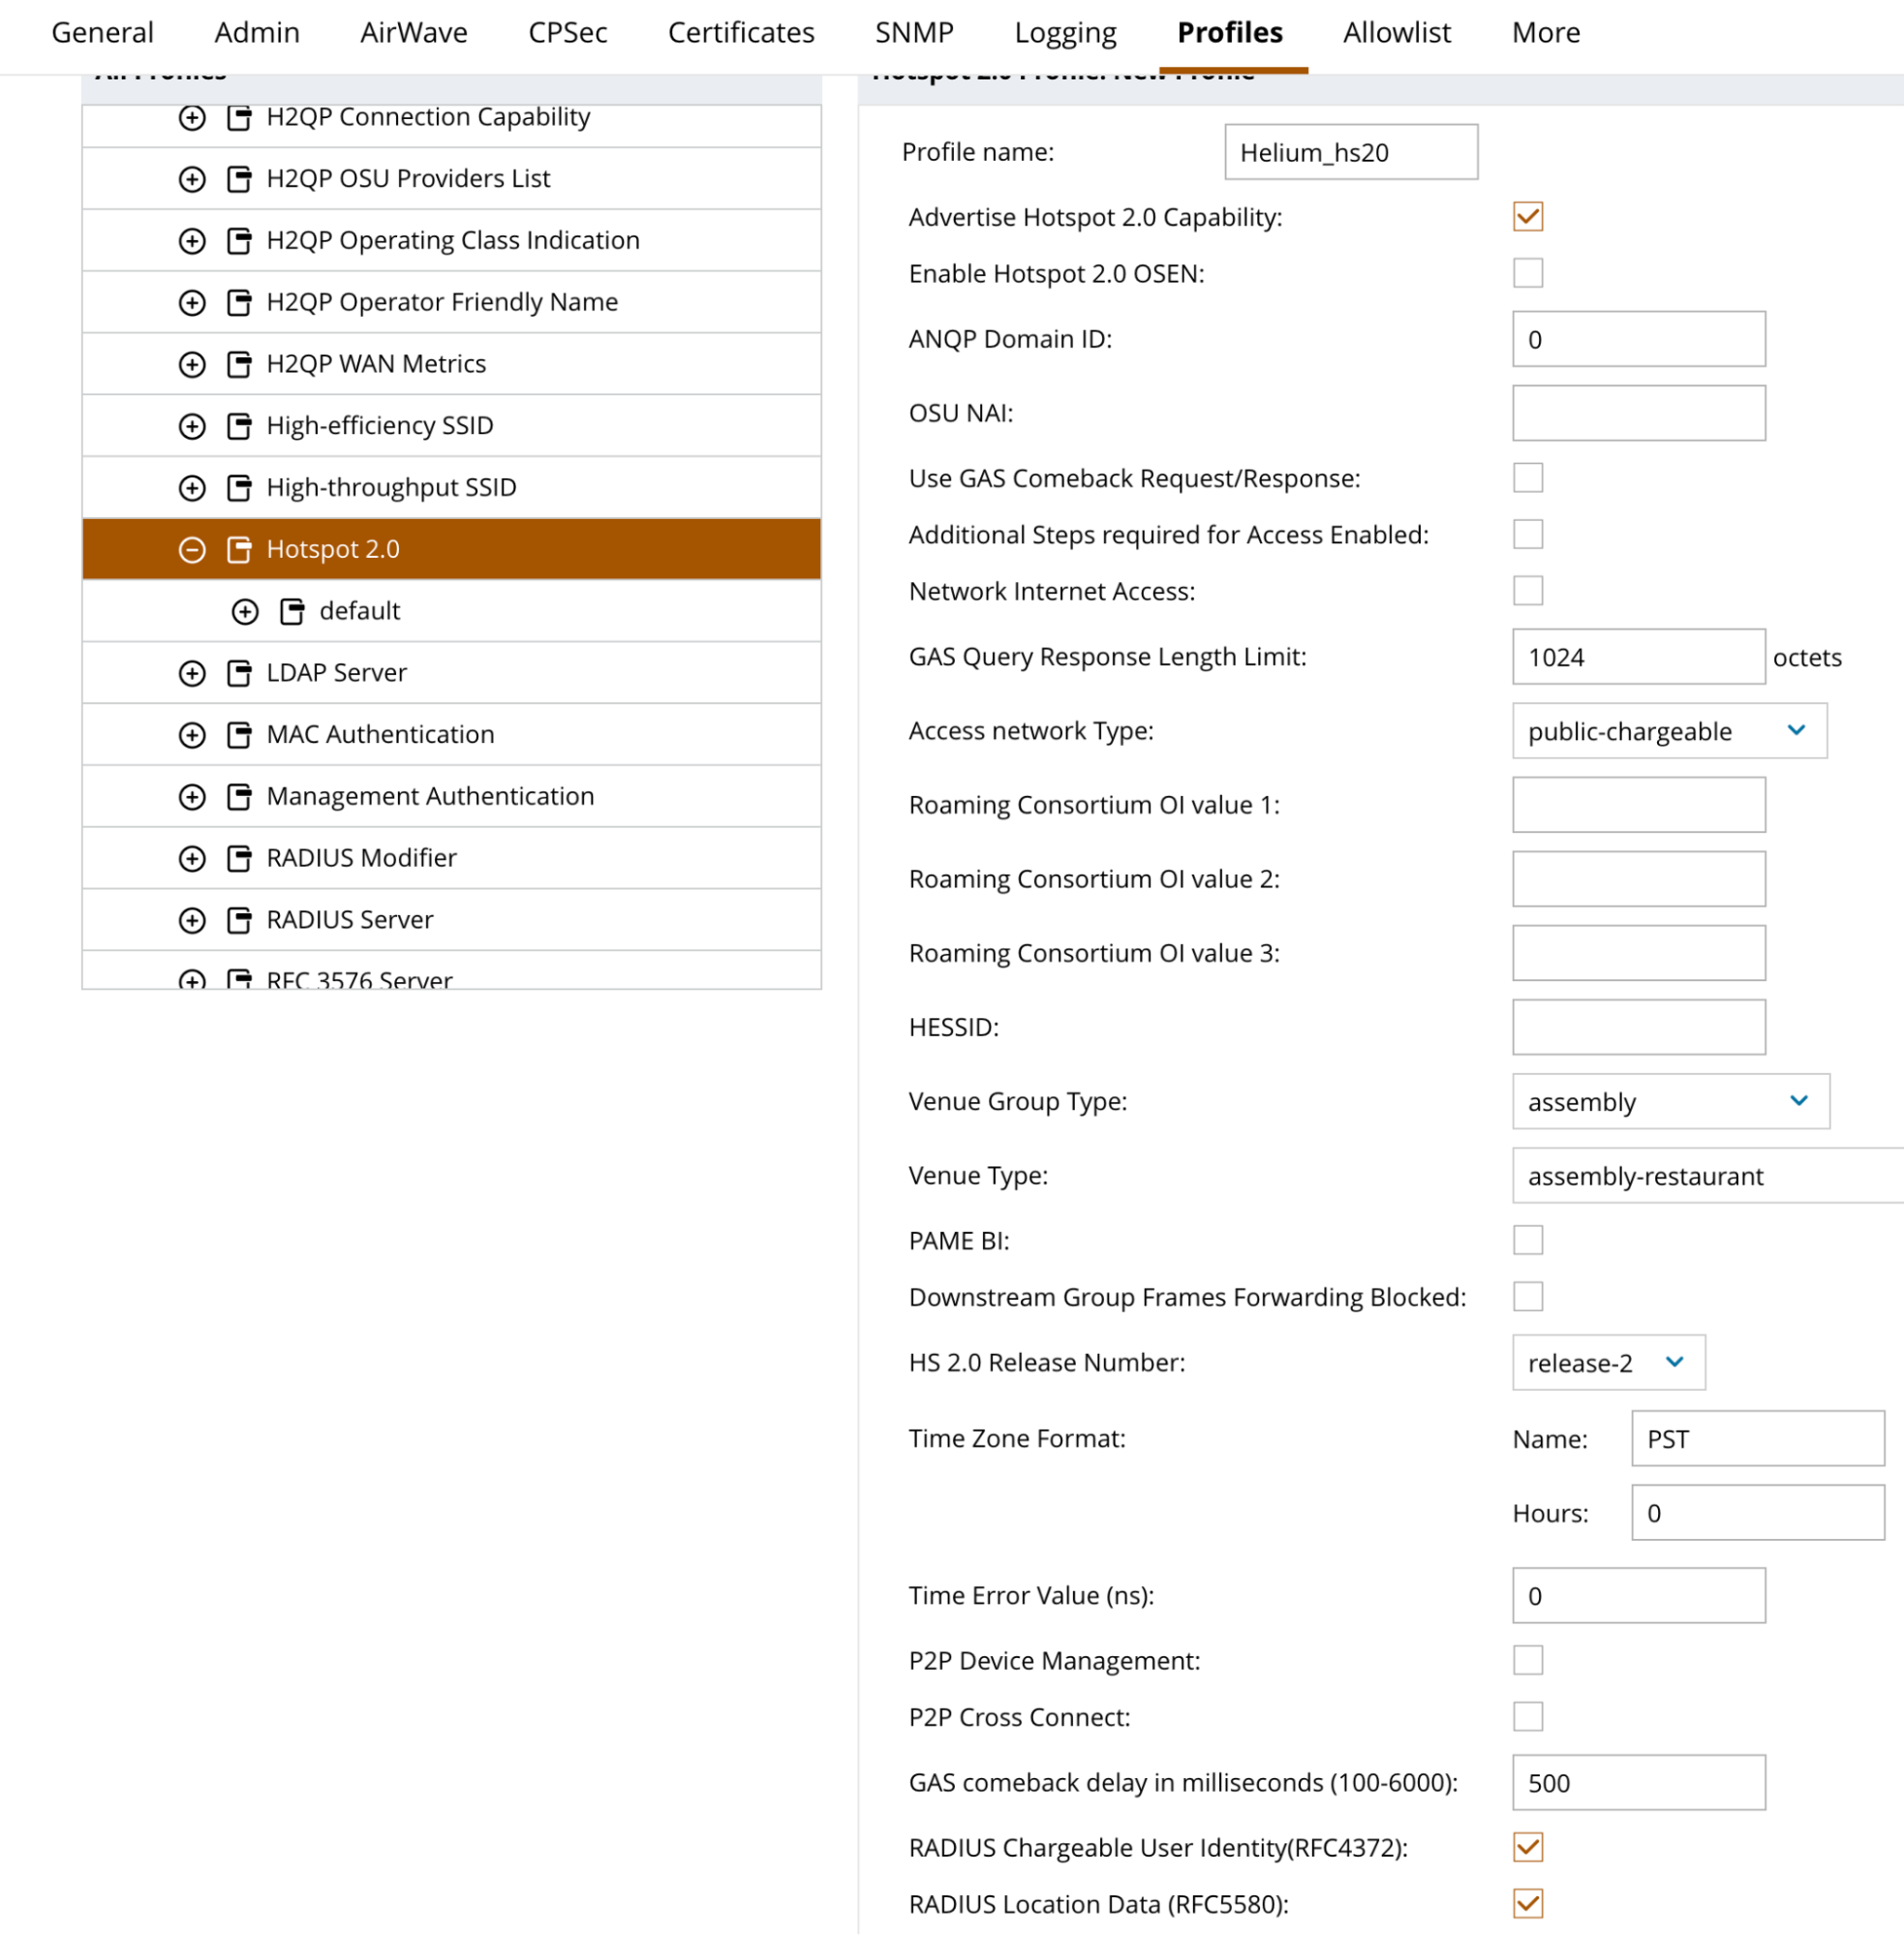
- Enter "Helium_hs20" for Profile name
- Check the box for Advertise Hotspot 2.0 Capability
- Select Access Network Type = Public chargeable
- Select the best-fitting Venue Group Type, e.g. assembly
- Select the best-fitting Venue Type, e.g. assembly-restaurant
- Check the box next to RADIUS Chargeable User Identity(RFC4372)
- Check the box next to RADIUS Location Data (RFC5580)
- When complete, the form should look like the screenshot above.
- Click Submit
- Click Pending Changes in the top right corner.
- Click Deploy Changes in the pop up.
Link Advertisement Profile to Hotspot 2.0 Profile
- Click on Configuration and System in the left menu column.
- Click on Profiles in the menu bar across the top
- Click the + next to Wireless LAN and scroll down to find Hotspot 2.0
- Click the + next to the Helium Hotspot 2.0 profile
- Click on Advertisement
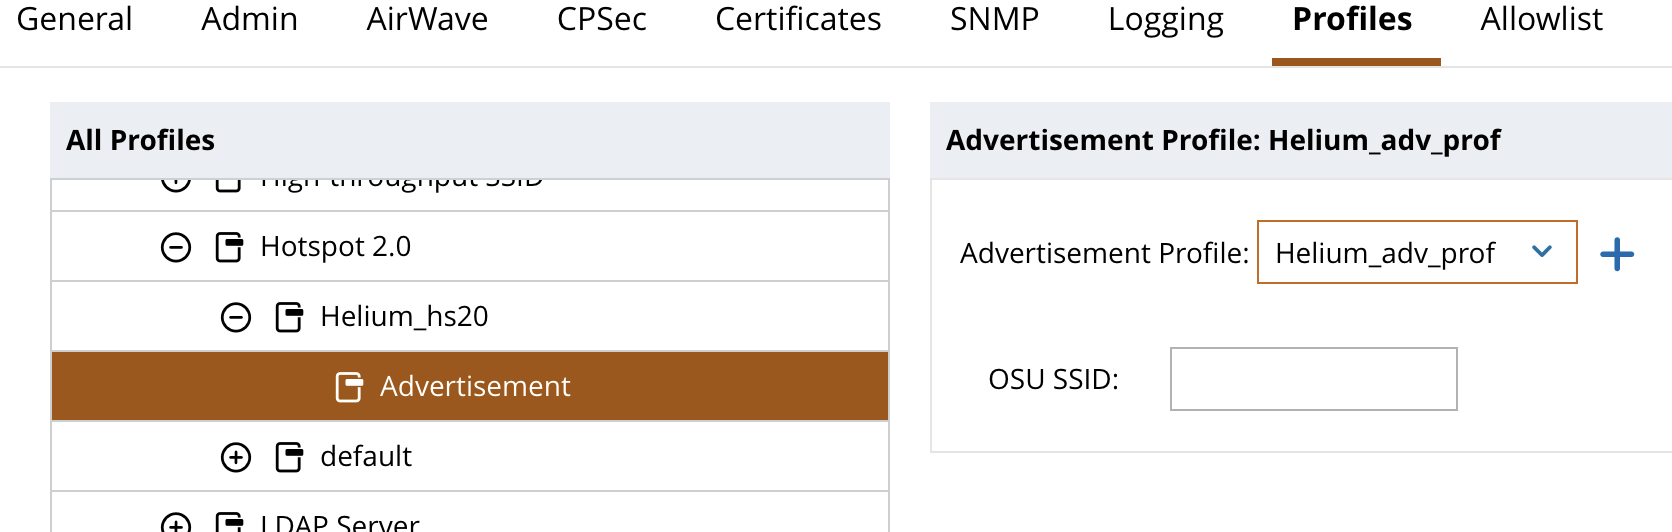
- Select Helium_adv_prof from the drop-down menu
- Click Submit
- Click Pending Changes in the top right corner.
- Click Deploy Changes in the pop up.
Link Hotspot 2.0 Profile to Virtual AP
- Click on Configuration and System in the left menu column.
- Click on Profiles in the menu bar across the top
- Click the + next to Wireless LAN and scroll down to find Virtual AP
- Click the + next to Virtual AP and click the + next to Helium
- Click on Hotspot 2.0
- Select Helium_hs20 from the drop-down menu next to Hotspot 2.0 Profile at the top
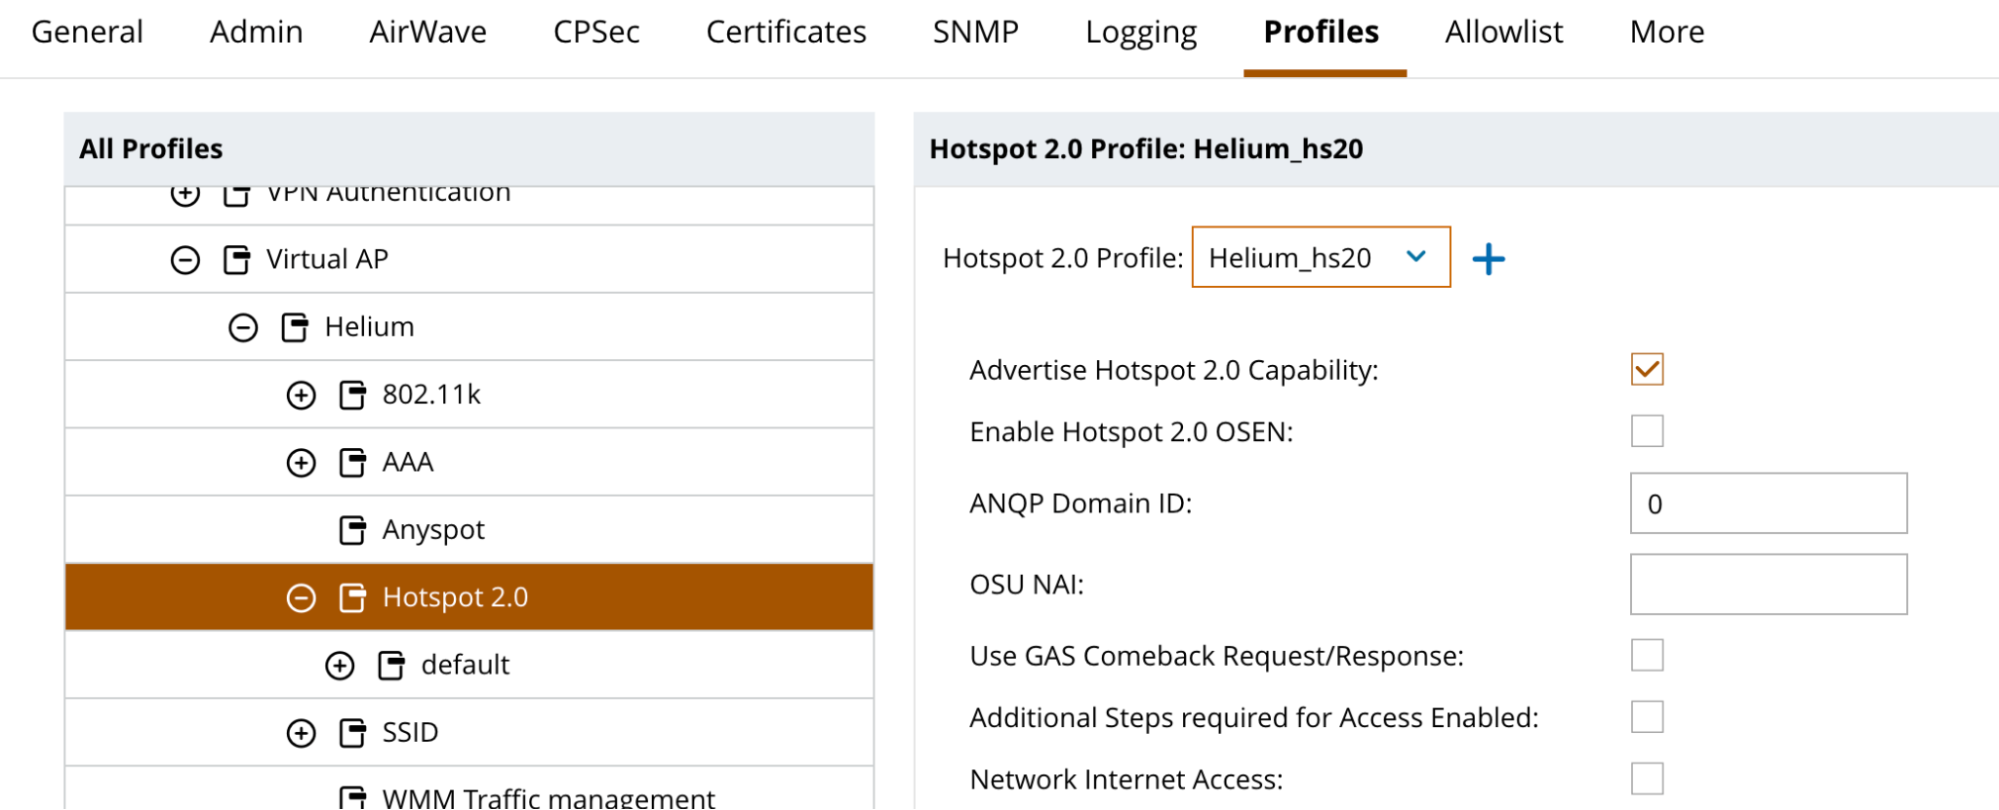
- Click Submit
- Click Pending Changes in the top right corner.
- Click Deploy Changes in the pop up.
Connect and Validate
Connect a client device to the newly created SSID.
Verify successful authentication: Diagnostics → Logs should no longer show
Failed to open TLS socket for server Helium-RadSec errors, and the device should get an IP address
and internet access.
Troubleshooting
- APs discover the controller but stay
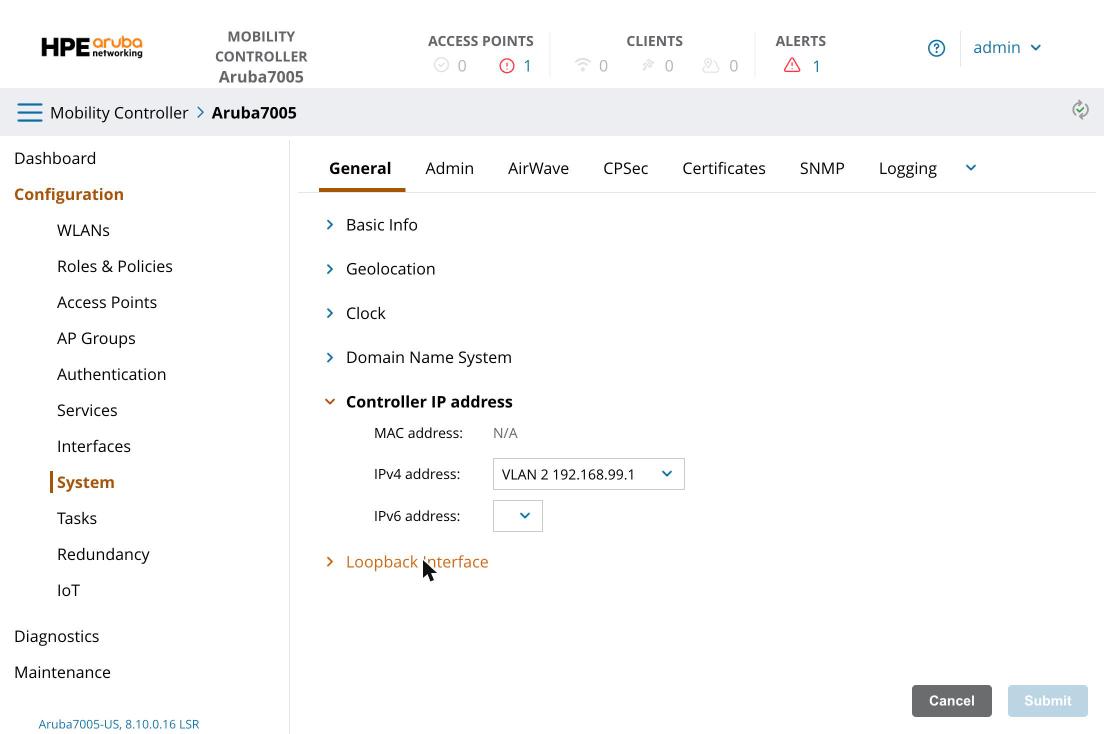
Down, or RadSec traffic cannot reach Helium: this often happens on a controller previously configured for another network. Confirm that Configuration → System → General → Controller IP address is on a VLAN that both your APs and the internet can reach. Changing the controller IP requires a reboot.
- Clients connect but have no internet access: confirm that the VLAN assigned to the Helium WLAN gives clients a routable address with internet access.
- RadSec connection: go to Diagnostics → Logs.
TCP connect to server Helium-RadSec failedmeans the controller cannot reach Helium on TCP 2083. If TCP connects but TLS still fails, recheck the CA and client certificate names on the server. - Certificate import fails with
Certificate is not yet valid: the controller clock is behind the certificate's start date. Check Configuration → System → General → Clock; if it uses NTP, make sure an NTP server is listed, then deploy and re-import. - RadSec connects but phones are rejected:
- Make sure the NAS-ID has been onboarded to the Helium Network
- Double-check ANQP profile creation steps